
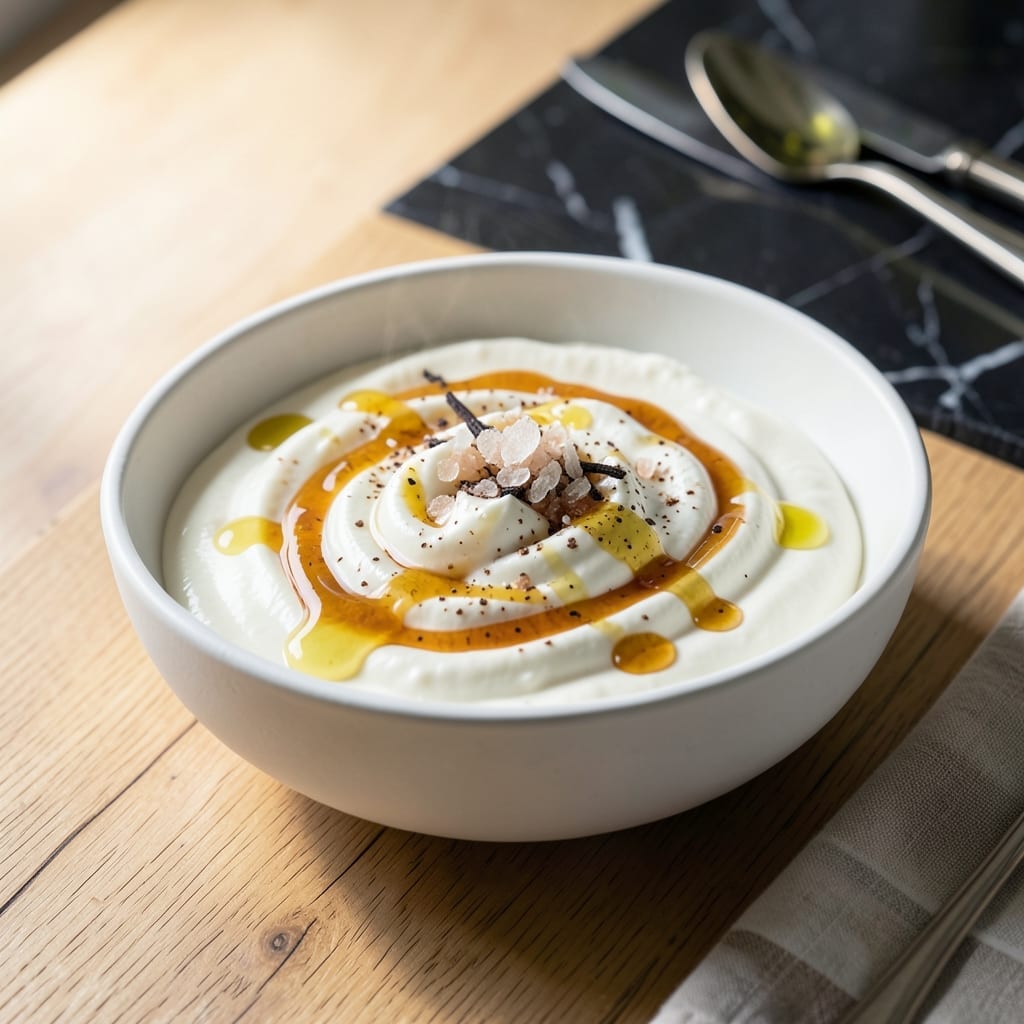
Making yogurt at home delivers probiotic-rich results that surpass store-bought versions. This method gives you complete control over ingredients and fermentation time.
The process requires just milk and a starter culture, with precise temperature control being the key to success. Maintaining 110°F–115°F ensures optimal bacterial growth for thick, tangy yogurt.
After 6–12 hours of fermentation, you’ll have creamy yogurt with live cultures that support gut health. The texture can be adjusted by straining for thicker consistency.
No special equipment is necessary—just a thermometer and warm environment. The results are consistently fresh and customized to your taste.
Ingredients for Fermented Yogurt
Just milk, culture, and patience. Simple ingredients for probiotic-rich results.
| Ingredient | Amount | Notes |
|---|---|---|
| Whole Milk 🥛 | 1 lb | Full-fat for creaminess |
| Plain Yogurt with Live Cultures 🥣 | 2 tbsp | Store-bought or previous batch |
| Honey 🍯 | 2 tbsp | Optional, for sweetening |
| Vanilla Extract 🌿 | 1 tsp | Pure, not imitation |
| Heavy Cream 🥛 | ½ cup | For richer texture |
| Gelatin 🍶 | 1 tsp | Unflavored, for thickening |
| Water 💧 | 2 tbsp | For dissolving gelatin |
| Salt 🧂 | ¼ tsp | Fine sea salt preferred |
| Fresh Berries 🍓 | 1 cup | For serving, optional |
| Granola 🥣 | 1 cup | For serving, optional |
The milk quality matters most here. Whole milk from a local dairy gives the creamiest texture, but any full-fat milk works. Store-bought plain yogurt with live cultures (check the label for ‘active cultures’ or ‘probiotics’) is your starter—Fage or Siggi’s are reliable. Avoid ultra-pasteurized milk; it won’t ferment properly (the good stuff, not the shelf-stable kind).
No yogurt starter? Use a yogurt making kit or ask a friend for a scoop of their homemade batch. Skipping the honey? Maple syrup or agave at the same amount works. For a dairy-free option, swap milk for coconut milk (full-fat, canned) and use a dairy-free starter. The vanilla can be omitted if you prefer plain yogurt.
Finished yogurt keeps 10–14 days in the fridge. Freeze extras in ice cube trays for smoothies (lasts 3 months). Always use a clean spoon to avoid contamination—this extends shelf life significantly.
Why You’ll Love This Recipe
- Set & Forget: It’s just heat, mix, and wait—no stirring, no fuss, and the live cultures do all the work overnight.
- Creamy Dream: The whole milk and heavy cream turn it luxuriously thick, while honey and vanilla add that subtle sweetness I crave.
- Breakfast to Dessert: I spoon it over granola at dawn and drizzle extra honey for an after-dinner treat.
- Pennywise Luxury: Honestly, a half-gallon of milk and a spoonful of starter yield quarts of yogurt for the price of one store-bought tub.
Step-by-Step Instructions for Fermented Yogurt
Here’s the method I use for consistently creamy, tangy homemade yogurt with live cultures.
Step 1: Heat and Cool the Milk Base
Pour the 1 lb Whole Milk into a heavy-bottomed saucepan. Heat it over medium heat until it reaches 180°F on an instant-read thermometer, stirring occasionally to prevent scorching. You’ll see tiny bubbles form around the edges and steam rising from the surface.
This step pasteurizes the milk, killing any unwanted bacteria that could compete with your yogurt cultures. Once it hits temperature, remove from heat and let it cool to 110°F. I speed this up by placing the pan in an ice bath, stirring gently until it reaches the target temperature.
Step 2: Bloom the Gelatin and Temper the Starter
While the milk cools, sprinkle the 1 tsp Gelatin evenly over the 2 tbsp Water in a small bowl. Let it sit undisturbed for 5 minutes to bloom—the gelatin will absorb the water and become translucent.
In a separate small bowl, whisk the 2 tbsp Plain Yogurt with Live Cultures with a few tablespoons of the cooled milk to temper it. This prevents shocking the live cultures with sudden temperature changes. Then whisk in the bloomed gelatin until fully dissolved.
Step 3: Combine and Incubate the Mixture
Add the tempered starter and gelatin mixture to the cooled milk, along with the 0.5 cup Heavy Cream. Whisk gently but thoroughly to combine. The mixture should look smooth and slightly thickened from the gelatin.
Pour this into clean glass jars or a bowl with a lid. Cover and place in a warm spot to incubate. I use my oven with the light on, which maintains a consistent 110°F. Let it sit undisturbed for 8-12 hours until set—it should have the consistency of store-bought yogurt when gently tilted.
Step 4: Chill and Flavor the Yogurt
Once set, refrigerate the yogurt for at least 4 hours to halt fermentation and develop its texture. The longer it chills, the thicker it becomes. I find 6 hours gives the perfect consistency for my taste.
Before serving, stir in the 2 tbsp Honey, 1 tsp Vanilla Extract, and 0.25 tsp Salt to taste. These additions balance the tang and enhance the natural creaminess. For a layered presentation, leave it plain and add toppings like 1 cup Fresh Berries and 1 cup Granola when serving.
Pro Tips For Making Fermented Yogurt
- Warm the Milk Slowly: Heat your whole milk to 180°F over medium-low heat—rushing it can scald the milk and ruin your yogurt’s texture. I learned this the hard way after burning two batches.
- Use Fresh Starter: Always check the expiration date on your plain yogurt with live cultures. Old starter weakens the fermentation, and your yogurt won’t set properly.
- Skip the Metal: Stir your yogurt with a wooden or plastic spoon, not metal. Metal can react with the acids and affect the fermentation process.
- Sweeten After Fermenting: Add honey and vanilla extract only after the yogurt has set. Adding them earlier can interfere with the bacterial cultures doing their job.
Pro Cooking Tips for This Recipe
Temperature Precision
Hitting 180°F during heating kills unwanted bacteria, but the real magic happens at 110°F–115°F for fermentation. I use a ThermoWorks Thermapen for instant, accurate reads. Even 2°F above or below can affect texture and tang. 🌡️
Starter Culture Care
Always use fresh, active starter—I prefer Fage or Siggi’s for consistent results. If reusing homemade yogurt, use it within 7 days for strongest cultures. Avoid metal utensils when handling starter to prevent contamination.
Incubation Setup
My oven with the light on maintains perfect warmth. For an even more consistent environment, try a yogurt maker or Instant Pot on yogurt mode. Keep the mixture undisturbed—any jostling can break the forming curds.
Gelatin Timing
Bloom the 1 tsp gelatin in 2 tbsp water for exactly 5 minutes. Dissolve it completely in warm (not hot) milk to avoid clumping. This step ensures a smooth, creamy texture without graininess.
Chilling Matters
Don’t rush the 4–6 hour chill—this is where the yogurt sets fully. I often make it before bed, then chill overnight. The longer it rests, the thicker and tangier it becomes. Patience really pays off here. 💪
Cleanliness Counts
Sterilize all equipment with boiling water before use. Even small amounts of soap residue can inhibit fermentation. I run my jars and utensils through the dishwasher’s sanitize cycle for extra assurance.
Nutrition Facts
Frequently Asked Questions
What happens if my milk gets too hot?
If heated above 185°F, the milk proteins can scorch, giving your yogurt a burnt taste. Always use a thermometer and remove from heat at 180°F.
Can I use a different type of milk?
Yes, but whole milk gives the creamiest results. Skim milk works but yields thinner yogurt. For dairy-free, use full-fat coconut milk with a compatible starter culture.
Why did my yogurt turn out runny?
This usually means the fermentation was too short or the temperature was too low. Ensure 110°F–115°F for 8–12 hours, and use fresh starter for best results.
How do I reuse my homemade yogurt as a starter?
Use 2 tablespoons from your latest batch within 7 days for the strongest cultures. Always check for active, bubbly texture before using.

- 6 Egg Cake Recipe with Oil: Light as Air With Buttery Moisture - October 4, 2026
- 4 Bean Casserole Recipe: One-Pan Heartiness With Smoky Paprika Depth - October 4, 2026
- 3-Ingredient Keto Mug Cake Recipe: Microwave Magic in 2 Minutes - October 4, 2026