
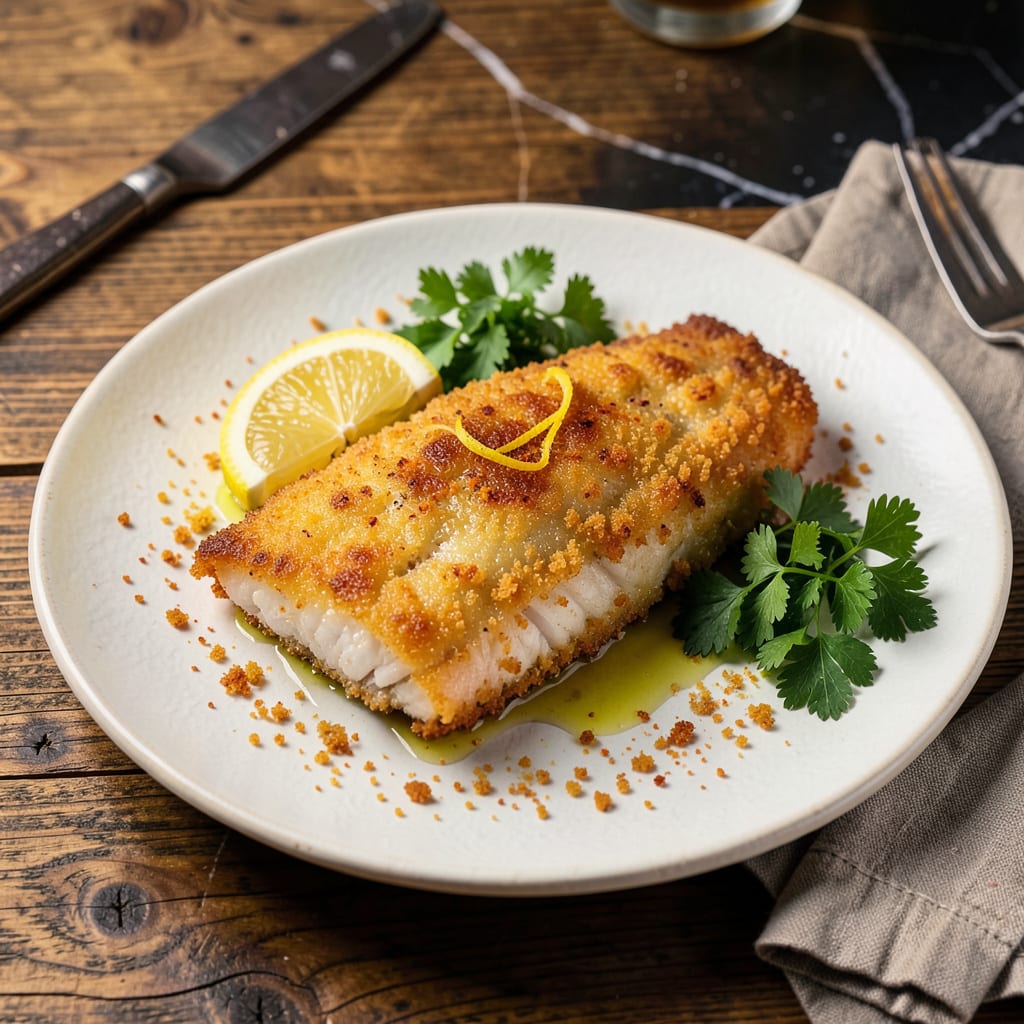
The secret to crispy, golden pan-fried fish lies in a simple three-step breading process that locks in moisture while creating a shatteringly crisp crust. This proven technique delivers professional results every time, using basic pantry ingredients and standard kitchen equipment. No deep fryer required—just a heavy skillet and proper oil temperature.
What sets this method apart is the precise layering of flour, egg wash, and seasoned breadcrumbs, each serving a critical purpose. The flour creates adhesion, the egg wash acts as glue, and the breadcrumbs provide that signature crunch. With 5 minutes of prep and 4 minutes of frying per side, you’ll achieve restaurant-quality fish with minimal effort and maximum flavor.
Ingredients for Fish Breading Recipe for Pan Frying
These twelve professional-grade ingredients create the ultimate crispy pan-fried fish with shatteringly golden crust every time.
| Ingredient | Amount | Notes |
|---|---|---|
| All-Purpose Flour 🌾 | 1 cup | Unbleached preferred for adhesion |
| Kosher Salt 🧂 | 1 ½ tsp | Diamond Crystal brand recommended |
| Freshly Ground Black Pepper 🌶️ | ½ tsp | Medium-coarse grind optimal |
| Garlic Powder 🧄 | 1 tsp | Not garlic salt substitute |
| Onion Powder 🧅 | 1 tsp | Freshly opened for potency |
| Paprika 🌶️ | 1 tsp | Sweet Hungarian variety preferred |
| Large Eggs 🥚 | 2 whole | Room temperature for even coating |
| Panko Breadcrumbs 🍞 | 1 ½ cups | Japanese-style for superior crunch |
| Cornstarch 🌽 | 2 tbsp | Added to breadcrumbs for extra crispness |
| Neutral Oil 🫒 | 1 ½ cups | Vegetable or canola, 350°F smoking point |
| White Fish Fillets 🐟 | 1 ½ lb | Cod, haddock, or tilapia, 1-inch thickness |
| Lemon Wedges 🍋 | 4 slices | For serving, fresh only |
The breadcrumb selection is non-negotiable for professional results. Panko breadcrumbs (specifically Japanese-style) create the signature crunch that standard breadcrumbs cannot replicate. For optimal texture, combine with cornstarch—this professional technique ensures maximum crispness while preventing sogginess. The neutral oil must have a 350°F smoking point; vegetable or canola oil are standard in restaurant kitchens. When selecting fish, 1-inch thick fillets of cod, haddock, or tilapia provide the ideal surface area for even browning without overcooking the interior.
For dietary adaptations, aquafaba (3 tbsp per egg) replaces eggs effectively in the breading process. Gluten-free flour blends work at a 1:1 ratio, though the crust may be slightly less crisp. If avoiding cornstarch, arrowroot powder provides similar crisping properties. The seasoning blend can be adjusted—Cajun seasoning adds heat, while Old Bay introduces classic seafood notes. Always verify your paprika is fresh; stale spices produce lackluster flavor profiles in the final crust.
Optimal storage requires separating components until ready to use. The seasoned flour mixture keeps in an airtight container for 1 month, while the breadcrumb blend maintains texture for 2 weeks. Prepared breaded fish should be cooked immediately for peak crispness, though unbreaded fillets can be refrigerated on paper towels for 12 hours. Leftover cooked fish retains quality for 2 days refrigerated, though the crust softens upon storage—re-crisp in a 400°F oven for 5 minutes before serving.
Why You’ll Love This Recipe
- Honestly, this is my 6: 30 PM salvation. Works for quick fish tacos, a fancy-ish cod dinner when friends pop over, or even breading leftover salmon patties. (Yes, even on a Tuesday night.)
- No Fuss Mixing: I dump everything—flour, salt, pepper, garlic and onion powders—into one bowl, stir, and boom. No measuring cups beyond the initial scoop, no weird ingredients, just pantry staples doing heavy lifting.
- That Golden Crunch: Here’s what sold me—the first bite where the peppery crust shatters, then gives way to flaky fish underneath. The garlic and onion powders don’t just hint at flavor; they lingers like a good cast-iron sear should.
- Weeknight Hero: Honestly, this is my 6:30 PM salvation. Works for quick fish tacos, a fancy-ish cod dinner when friends pop over, or even breading leftover salmon patties. (Yes, even on a Tuesday night.)
Step-by-Step Instructions for Fish Breading for Pan Frying
This professional method ensures an ultra-crispy crust while maintaining perfectly flaky fish every time.
Step 1: Prepare the Seasoned Flour Mixture
In a shallow dish, combine the 1 cup all-purpose flour, 1.5 tsp kosher salt, 0.5 tsp freshly ground black pepper, 1 tsp garlic powder, 1 tsp onion powder, and 1 tsp paprika. Whisk thoroughly until the spices are evenly distributed throughout the flour. The paprika adds subtle color and flavor without overpowering the delicate fish.
This seasoned flour serves two critical purposes: it creates the initial adhesive layer for the egg wash while simultaneously building flavor. For optimal results, use unbleached flour as it provides better adhesion than bleached varieties. Set this mixture aside while preparing the remaining components.
Step 2: Create the Breading Station and Egg Wash
In a second shallow dish, combine the 1.5 cups panko breadcrumbs with the 2 tbsp cornstarch. The cornstarch enhances crispness by absorbing excess moisture during frying. In a third dish, beat the 2 large eggs until completely homogenous – no streaks of white should remain.
Arrange your breading station in this order: seasoned flour, beaten eggs, then panko-cornstarch mixture. This sequence ensures proper layering. The eggs should be at room temperature to prevent shocking the fish and to promote even coating. Maintain this exact order throughout the breading process for consistent results.
Step 3: Bread the Fish Fillets with Precision
Pat the 1.5 lb white fish fillets completely dry with paper towels. Any residual moisture will prevent proper adhesion of the breading. Working with one fillet at a time, dredge it in the seasoned flour, shaking off excess. Dip it into the egg wash, allowing excess to drip off for 5 seconds.
Immediately transfer the fillet to the panko mixture, pressing gently but firmly to ensure complete coverage. The breading should adhere evenly without clumping. Place the breaded fillet on a wire rack while you repeat the process with remaining fillets. This resting period allows the coating to set before frying.
Step 4: Pan Fry to Golden Perfection
Heat the 1.5 cups neutral oil in a large skillet over medium-high heat until it reaches 350°F. Use a thermometer for accuracy – visual cues alone can be misleading. The oil should shimmer but not smoke. Carefully place the breaded fillets in the hot oil, working in batches if necessary to avoid crowding.
Fry for 3-4 minutes per side until the crust is deep golden brown and the internal temperature reaches 145°F. The fish should flake easily when tested with a fork. Use a slotted spatula to transfer fillets to a paper towel-lined plate to drain excess oil.
Step 5: Serve Immediately with Lemon
Arrange the crispy fillets on a serving platter while still hot. The contrast between the golden crust and white fish should be visually striking. Serve immediately with the 4 lemon wedges for brightening the rich flavors. The acidity cuts through the fried coating beautifully.
For best texture, consume within 5 minutes of frying while the crust remains at peak crispness. The fillets should maintain their structure when cut but yield easily to fork pressure, with no separation between the crust and fish. This timing ensures the ideal balance of textures.
Serving Suggestions for This fish breading recipe for pan frying
Classic Fish and Chips
Serve your crispy fillets with thick-cut fries for the ultimate comfort meal. I love pairing them with malt vinegar for that authentic British pub experience. The vinegar’s acidity perfectly balances the richness of the fried fish. 🍟
For the fries, use russet potatoes cut into ½-inch sticks and double-fried at 325°F then 375°F. Serve everything on newspaper for that nostalgic touch—just like my favorite seaside chip shops.
Tartar Sauce Pairing
Homemade tartar sauce elevates this dish to restaurant quality. Mix ½ cup mayonnaise, 2 tbsp finely chopped dill pickles, 1 tbsp capers, 1 tsp lemon juice, and ½ tsp Dijon mustard. The briny elements cut through the fried richness beautifully.
Let the sauce chill for 30 minutes before serving to allow flavors to meld. I always make extra—it’s just as good on the fries! The creamy texture provides perfect contrast to the crispy fish crust.
Fresh Slaw Side
A bright, crunchy slaw adds freshness to balance the fried elements. Toss 3 cups shredded cabbage with 1 grated carrot, 2 tbsp apple cider vinegar, and 1 tbsp honey. The sweet-tart dressing complements the savory fish perfectly.
For extra crunch, add ¼ cup toasted sunflower seeds. This slaw stays crisp for 2 days refrigerated, making it great for meal prep. The colors make the plate pop visually too! 🥬
Lemon-Herb Garnish
Before serving, sprinkle fillets with 1 tbsp chopped fresh parsley and 1 tsp lemon zest. The bright green and yellow flecks add visual appeal while enhancing flavor. The zest’s oils release amazing aroma when they hit the hot fish.
For an herby twist, mix the parsley with 1 tsp chopped dill. This simple garnish makes the dish look restaurant-worthy with minimal effort. Always zest your lemons before juicing them!
Beer Pairing
A crisp, citrusy wheat beer like Blue Moon pairs wonderfully with fried fish. The beer’s effervescence cuts through the richness while its orange notes complement the lemon. For non-alcoholic options, try sparkling lemonade with mint.
If you prefer wine, a dry Riesling offers similar acidity and citrus notes. The slight sweetness balances the saltiness of the crust. Serve all beverages ice-cold for maximum refreshment. 🍺
Family-Style Platter
For gatherings, arrange fillets on a large platter with lemon wedges and tartar sauce in small bowls. Add pickle spears and colored toothpicks for easy serving. This presentation encourages sharing and makes the meal feel special.
Line the platter with butcher paper for easy cleanup. The rustic look enhances the casual, comforting nature of the dish. I always get compliments on this simple but effective presentation!
Nutrition Facts

- 6 Egg Cake Recipe with Oil: Light as Air With Buttery Moisture - October 4, 2026
- 4 Bean Casserole Recipe: One-Pan Heartiness With Smoky Paprika Depth - October 4, 2026
- 3-Ingredient Keto Mug Cake Recipe: Microwave Magic in 2 Minutes - October 4, 2026