
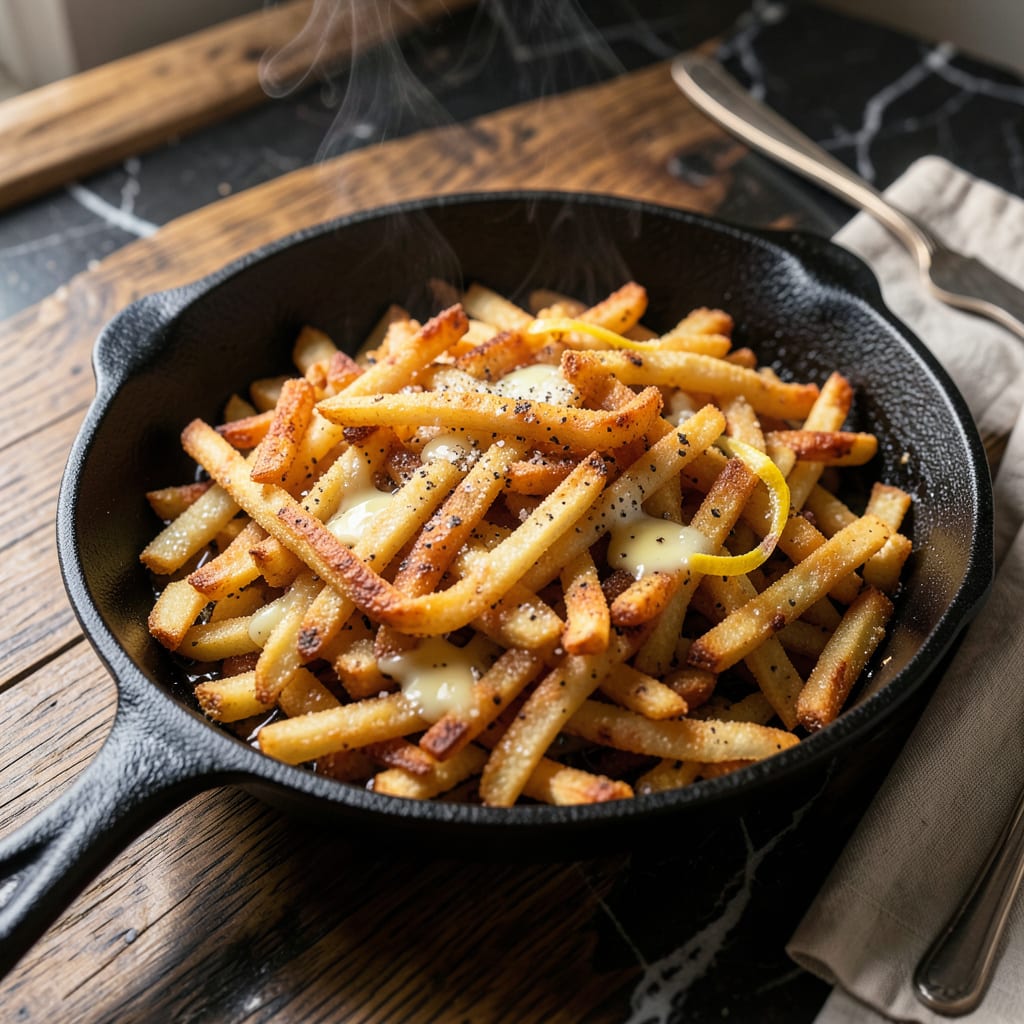
Perfectly crispy hash browns from frozen are easier to achieve than you might think—no thawing required. This method delivers golden, crunchy edges and tender centers every time, using just a bag of frozen hash browns and a few simple techniques. Whether you’re cooking for a crowd or just need a quick breakfast side, this approach guarantees restaurant-quality results at home.
The key lies in proper heat control and patience. By spreading the hash browns in a single layer and resisting the urge to stir too soon, you allow them to develop that coveted crispy crust. In 20 minutes, you’ll have a versatile breakfast staple that pairs perfectly with eggs, pairs perfectly with bacon, or stands alone as a satisfying snack. No soggy potatoes here—just consistent, delicious results.
Ingredients for Frozen Hashbrowns
One bag of frozen potatoes plus pantry staples—this is all you need for that diner-style crispy perfection.
| Ingredient | Amount | Notes |
|---|---|---|
| Frozen Shredded Hash Browns 🥔 | 32 oz | No need to thaw, straight from freezer |
| Vegetable Oil 🫒 | ¼ cup | High smoke point for crispiness |
| Unsalted Butter 🧈 | 2 tbsp | For rich golden color |
| Kosher Salt 🧂 | 1 tsp | Diamond Crystal preferred |
| Freshly Ground Black Pepper 🌶️ | ½ tsp | Coarse grind for texture |
| Garlic Powder 🧄 | ½ tsp | Not garlic salt |
| Onion Powder 🧅 | ½ tsp | Enhances savory depth |
| Smoked Paprika 🌶️ | ¼ tsp | Optional for subtle smokiness |
| Large Eggs 🥚 | 4 whole | Optional for serving |
| Sharp Cheddar Cheese 🧀 | 1 cup | Shredded, for topping |
| Fresh Chives 🌿 | 2 tbsp | Thinly sliced for garnish |
| Sour Cream 🥛 | ½ cup | Optional for serving |
The frozen hash browns are the star here—Ore-Ida is my go-to for consistent shred size and texture. Don’t bother thawing (that creates soggy spots). The vegetable oil needs a high smoke point—avocado oil works too if you’ve got it. I always use Diamond Crystal kosher salt because it’s easier to control the seasoning without overdoing it. The butter? That’s your secret weapon for golden-brown edges and rich flavor (trust me on the unsalted version).
No smoked paprika? Regular paprika or a pinch of cayenne can stand in. Fresh garlic instead of powder? Mince 1 clove and add it with the oil. The cheese is totally optional but sharp cheddar gives the best melt and flavor. For a dairy-free version, nutritional yeast adds that cheesy note. And if you’re skipping the eggs, these still make an amazing side for avocado toast or breakfast burritos.
Cooked hash browns keep 3-4 days in the fridge—reheat in a skillet to revive the crispiness. The uncooked frozen potatoes? They’ll last 6-12 months in the freezer. I make a double batch on weekends so weekday breakfasts are sorted. Just store leftovers in a single layer in the fridge to prevent sogginess (worth the extra container).
Why You’ll Love This Recipe
- No-Thaw Magic: Honestly, I’ve burned my fair share of hash browns trying to defrost them first. This recipe? Straight from freezer to skillet—no waiting, no soggy mess. Just crispy, golden perfection in the time it takes to brew coffee.
- Butter Meets Crisp: That combo of vegetable oil and butter is my secret weapon. The oil gets them extra crunchy while the butter adds this rich, toasty depth. Salt and fresh-cracked pepper finish it off—simple, but the flavor’s anything but basic.
- Breakfast or Midnight Snack: I’ve served these with eggs at 7 AM and straight from the pan at 11 PM. They’re my go-to for lazy Sundays, rushed school mornings, or when I need something solid to soak up last night’s wine. (Yes, even on a Tuesday night.)
- One Pan, Zero Regrets: Cleanup is one sheet pan and a spatula. No peeling, no chopping, no mystery leftovers that’ll haunt my fridge for days. And at under $5 total? It’s cheaper than takeout and twice as satisfying.
Step-by-Step Instructions for Crispy Frozen Hash Browns
Here’s how to transform frozen potatoes into perfectly crispy hash browns with golden edges every time.
Step 1: Preheat and Prepare the Skillet
Place a large cast iron or stainless steel skillet over medium-high heat. Add the 0.25 cup vegetable oil and the 2 tbsp unsalted butter, allowing them to heat together until the butter completely melts and begins to foam. This combination creates the ideal cooking medium for achieving both crispiness and rich flavor.
The oil should shimmer but not smoke—this indicates the perfect temperature for adding the potatoes. I prefer using a cast iron skillet for this recipe as it maintains consistent heat and develops an unmatched crust on the hash browns.
Step 2: Season and Spread the Hash Browns
Open the package of 32 oz frozen shredded hash browns directly into the hot skillet—no need to thaw. Immediately sprinkle the potatoes evenly with the 1 tsp kosher salt, 0.5 tsp freshly ground black pepper, 0.5 tsp garlic powder, 0.5 tsp onion powder, and 0.25 tsp smoked paprika.
Using a spatula, spread the potatoes into an even layer, pressing down firmly to create maximum surface contact with the pan. This initial press is crucial for developing that coveted crispy crust. Don’t stir after this point—letting the potatoes cook undisturbed is key to achieving perfect texture.
Step 3: Cook to Golden Perfection
Allow the hash browns to cook undisturbed for 10-12 minutes until the bottom develops a deep golden brown crust. You’ll know they’re ready to flip when the edges appear crispy and lift easily from the pan. Resist the temptation to peek or stir during this critical cooking period.
Once properly crisped, use your spatula to divide the hash browns into four equal sections. Flip each section carefully to expose the uncooked side to the hot pan. Cook for an additional 8-10 minutes until the second side achieves the same golden crispness and the potatoes are tender throughout.
Step 4: Add Cheese and Finish
When the hash browns are perfectly crisped on both sides, sprinkle the 1 cup sharp cheddar cheese evenly over the top. Reduce the heat to low, cover the skillet, and allow the cheese to melt for 1-2 minutes. The residual heat will be sufficient to create a beautiful melted cheese layer without burning the crispy crust you’ve worked so hard to develop.
Remove from heat when the cheese is fully melted and bubbly. The hash browns should have a crispy exterior, tender interior, and a delicious cheesy topping that ties everything together perfectly.
Step 5: Serve with Perfect Toppings
Transfer the crispy hash browns to a serving platter. For the complete experience, top with the 2 tbsp fresh chives and serve immediately with the 4 whole large eggs prepared to your liking and the 0.5 cup sour cream on the side. The contrast of the cool, creamy sour cream with the hot, crispy hash browns creates an irresistible combination.
Each serving should have a satisfying crunch with every bite, complemented by the savory seasoning blend and rich melted cheese. The optional eggs add protein to make this a complete breakfast, while the chives provide a fresh, oniony finish that brightens up the dish.
Pro Cooking Tips for Great frozen hashbrowns
Perfect Pan Selection
I always reach for my 12-inch cast iron skillet—it’s the gold standard for hash browns. The even heat distribution and retention create that restaurant-quality crust. If you don’t have cast iron, a heavy stainless steel skillet works too. Avoid nonstick pans here; they don’t get hot enough for proper browning. 🔥
Make sure your pan is fully preheated before adding oil. I test by sprinkling a few drops of water—they should dance and evaporate immediately. This ensures your potatoes hit the right temperature instantly for maximum crispiness.
Oil Temperature Control
The oil should shimmer but not smoke when you add the potatoes. I use a 50/50 mix of vegetable oil and butter—the oil for high heat tolerance and butter for flavor. If it starts smoking, remove the pan from heat for 30 seconds to cool slightly before proceeding.
Watch for the butter to turn from foamy to golden—this is your visual cue that the pan is at optimal temperature. The foam subsiding means the water has cooked out and you’re ready for the potatoes.
Seasoning Timing
Season the potatoes immediately after they hit the pan, while they’re still frozen. The salt draws out moisture that then steams and creates crispy pockets. I use Diamond Crystal kosher salt because its larger flakes distribute more evenly than table salt.
Sprinkle seasonings from about 12 inches above the pan for even coverage. The garlic and onion powders will toast slightly during cooking, deepening their flavor without burning.
Flipping Technique
When the edges turn golden brown (after about 10 minutes), divide the hash browns into quarters with your spatula. Flip each section like a pancake—this maintains the crispy structure better than stirring. Press down gently after flipping to ensure even browning on the second side.
If any pieces stick, don’t force them. Let them cook another 30 seconds—they’ll release naturally when properly crisped. This patience prevents the dreaded “hash brown scramble” look.
Cheese Melting Hack
For perfectly melted cheese without soggy bottoms, sprinkle it on during the last 2 minutes of cooking. Cover the pan to trap heat—this melts the cheese with residual warmth while keeping the crust crisp. I use sharp cheddar because it melts smoothly and adds tangy depth.
Remove from heat as soon as the cheese is fully melted. The carryover cooking will finish the melting process without risking burnt edges.
Serving Temperature
Hash browns are best served immediately while still sizzling. The contrast between the hot, crispy potatoes and cool toppings like sour cream creates the perfect bite. If you must hold them, keep in a 200°F oven for up to 15 minutes—any longer and they’ll lose their crunch. ✨
Nutrition Facts
Frequently Asked Questions
Do I need to thaw the potatoes first?
No, cooking from frozen is actually better! Thawing creates excess moisture that leads to soggy results. The frozen potatoes release steam as they cook, which helps create those crispy pockets we love. Just pour them straight from the bag into your hot skillet.
Why are my hash browns sticking to the pan?
This usually means the pan wasn’t hot enough or you disturbed them too soon. Let the potatoes cook undisturbed for 10-12 minutes before attempting to flip. A properly heated cast iron skillet with enough oil/butter should release them easily when ready.
Can I make these in the oven instead?
Yes! Toss frozen hash browns with 2 tbsp oil and seasonings, then spread on a baking sheet. Bake at 425°F for 20-25 minutes, flipping halfway. They won’t be quite as crispy as stovetop, but still delicious. For extra crunch, broil for 1-2 minutes at the end.
How do I keep them crispy for meal prep?
Cook as directed, then let cool completely on a wire rack. Store in a single layer in an airtight container with a paper towel to absorb moisture. Reheat in a dry skillet over medium heat for 2-3 minutes per side to restore crispiness.

- 6 Egg Cake Recipe with Oil: Light as Air With Buttery Moisture - October 4, 2026
- 4 Bean Casserole Recipe: One-Pan Heartiness With Smoky Paprika Depth - October 4, 2026
- 3-Ingredient Keto Mug Cake Recipe: Microwave Magic in 2 Minutes - October 4, 2026