
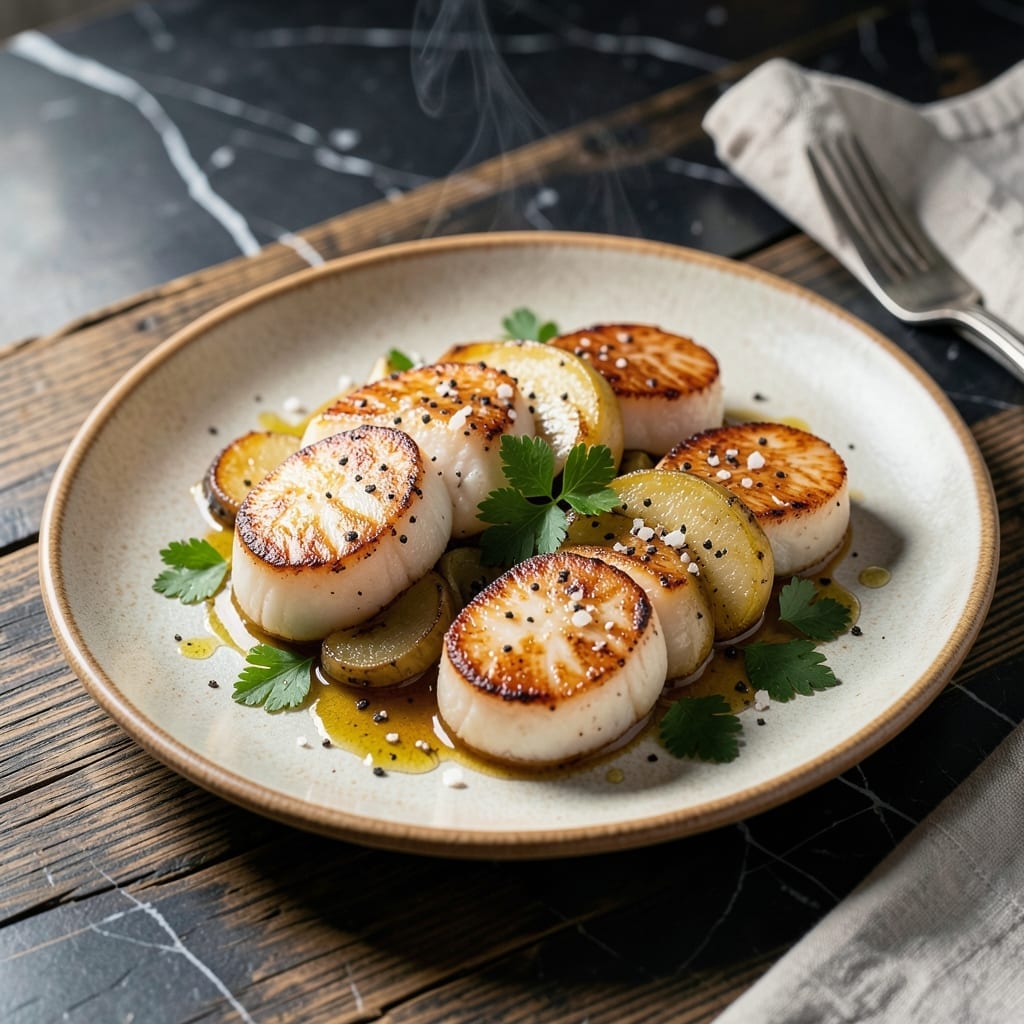
Achieving perfectly seared scallops from frozen is entirely possible with the right technique. This method transforms icy seafood into restaurant-quality results every time.
Proper thawing is crucial—never cook scallops straight from the freezer. A slow overnight thaw in the fridge preserves texture and prevents that rubbery consistency. Patience here pays off.
High heat and a hot pan create that coveted golden crust while keeping the centers tender. Just 2-3 minutes per side delivers the ideal sear without overcooking.
The result is scallops with a caramelized exterior and buttery interior. Serve immediately for the best texture and flavor.
Ingredients for Frozen Scallops
Transform frozen seafood into restaurant-worthy seared scallops with these essential ingredients.
| Ingredient | Amount | Notes |
|---|---|---|
| Frozen Scallops 🦪 | 1 ½ lb | Dry-packed, sea or bay variety |
| Unsalted Butter 🧈 | 3 tbsp | Divided for searing and finishing |
| Extra-Virgin Olive Oil 🫒 | 2 tbsp | High smoke point preferred |
| Kosher Salt 🧂 | 1 tsp | Diamond Crystal or Morton preferred |
| Freshly Ground Black Pepper 🌶️ | ½ tsp | Coarse grind for texture |
| Garlic Cloves 🧄 | 3 cloves | Minced for aromatic base |
| Fresh Lemon 🍋 | 1 whole | Zested and juiced for brightness |
| Fresh Parsley 🌿 | ¼ cup | Finely chopped for garnish |
| Dry White Wine 🍷 | ¼ cup | Optional for deglazing pan |
| Minced Shallot 🧅 | 2 tbsp | Substitute red onion if needed |
| Crushed Red Pepper Flakes 🌶️ | ¼ tsp | Adjust to heat preference |
The scallops must be dry-packed (not wet-packed) for proper searing—Trader Joe’s and Whole Foods carry excellent frozen options. Look for sea scallops rather than bay scallops for uniform size and better texture. Thaw overnight in the refrigerator on a paper towel-lined plate to absorb excess moisture. Pat them completely dry before cooking (this ensures a proper sear).
No dry-packed scallops available? Wet-packed will work in a pinch but require extra drying time. For the wine, any dry white like Sauvignon Blanc or Pinot Grigio works—skip the cooking wine (it’s salted). Shallots add subtle sweetness; red onion at half the amount is an acceptable substitute. The butter must be unsalted to control seasoning—European-style butter adds extra richness.
Store thawed scallops in the fridge for up to 2 days before cooking. Once seared, serve immediately for peak texture. Leftovers (rare with these!) keep 1-2 days refrigerated but are best enjoyed fresh. Freezing cooked scallops is not recommended as it compromises their delicate texture.
Why You’ll Love This Recipe
- No Thaw Needed: I can toss these frozen scallops straight into the pan with butter and oil—no waiting, no fuss.
- Buttery Perfection: The combo of butter, olive oil, and a pinch of salt makes every bite rich and satisfying.
- Weeknight Hero: Honestly, it’s my go-to for a quick dinner that still feels special.
- Budget Luxury: Frozen scallops give me that restaurant-quality taste without the seafood counter price tag.
Step-by-Step Instructions for Pan-Seared Scallops
Master these techniques and you’ll transform frozen scallops into a restaurant-quality dish with ease.
Step 1: Thaw and Pat the Scallops Dry
Begin by thawing the 1.5 lb frozen scallops in the refrigerator overnight, or submerge the sealed package in cold water for 30-45 minutes for a quick thaw. Once thawed, pat each scallop meticulously dry with paper towels—any residual moisture will prevent proper searing.
This step is non-negotiable for achieving that coveted golden crust. I always inspect the scallops and remove any remaining muscle tissue from the side if present, as this can toughen during cooking.
Step 2: Sear the Scallops in Hot Oil and Butter
Heat a large, heavy skillet (preferably stainless steel) over medium-high heat until very hot. Add the 2 tbsp extra-virgin olive oil and 1 tbsp unsalted butter, swirling to coat the pan. The oil should shimmer but not smoke.
Season the scallops with 1 tsp kosher salt and 0.5 tsp freshly ground black pepper, then carefully place them in the pan, leaving space between each. Sear undisturbed for 2-3 minutes per side until a deep golden crust forms and the scallops release easily from the pan. The edges should appear opaque and the centers slightly translucent.
Step 3: Build the Aromatic Pan Sauce
Transfer the scallops to a plate and reduce heat to medium. In the same skillet, add the 2 tbsp minced shallot and cook for 1 minute until softened. Add the 3 cloves garlic cloves (minced) and 0.25 tsp crushed red pepper flakes, stirring constantly for 30 seconds until fragrant.
Deglaze the pan with 0.25 cup dry white wine, scraping up any browned bits with a wooden spoon. Let the liquid reduce by half, then stir in the remaining 2 tbsp unsalted butter until melted and emulsified. This creates a rich, glossy sauce that complements the scallops beautifully.
Step 4: Finish and Garnish for Serving
Return the scallops to the pan, spooning the sauce over them to coat. Cook for an additional 30-60 seconds just to warm through. The scallops should be opaque throughout but still tender and slightly springy to the touch.
Finish with a squeeze of juice from the 1 whole fresh lemon and a sprinkle of 0.25 cup fresh parsley (finely chopped). The acidity from the lemon brightens the dish, while the parsley adds a fresh, herbal note. Serve immediately while hot, as scallops are best enjoyed fresh from the pan.
Pro Tips For Making Frozen Scallops
- Thaw Completely First: I learned this the hard way—partially frozen scallops release too much moisture and steam instead of searing, so let them sit in the fridge overnight or under cold water for 20 minutes, changing the water every 5.
- Pat Them Bone-Dry: After thawing, press the scallops between paper towels until they’re as dry as possible—any lingering moisture turns your hot pan into a sad, soggy mess.
- Sear in Batched Silence: Resist the urge to crowd the pan; cook in batches with 1 tablespoon each of butter and oil so each scallop gets a proper crust, not a pale, rubbery finish.
- Finish with Butter Baste: In the last minute, tilt the pan and spoon the foaming butter over the scallops—it adds a glossy sheen and rich flavor that plain oil can’t match.
Wine and Beer Pairings for This Dish
Crisp White Wines
A dry Sauvignon Blanc from New Zealand cuts through the richness with its bright acidity and citrus notes. I also love a Pinot Grigio from Italy—its mineral character complements the scallops’ sweetness beautifully. 🍷
Rich White Wines
For a fuller-bodied option, try an oaked Chardonnay from California. The butteriness mirrors the seared scallops’ texture. Just ensure it’s not too sweet—dry is the way to go.
Light Beers
A crisp pilsner or Belgian witbier works wonders here. The effervescence cleanses your palate between bites. I prefer a German pilsner for its clean, refreshing finish.
Rosé Options
Don’t overlook a dry Provence rosé—its subtle berry notes and crisp acidity pair surprisingly well. Serve it chilled for the best experience. This is my go-to for summer evenings.
Sparkling Wines
A brut Champagne or Prosecco adds a celebratory touch. The bubbles enhance the scallops’ delicate texture. I always keep a bottle of Veuve Clicquot on hand for special occasions. ✨
Avoid These
Steer clear of heavy reds or overly sweet wines—they’ll overpower the scallops. The same goes for dark beers like stouts or porters. Keep it light and crisp for the perfect match.
Nutrition Facts
Frequently Asked Questions
Do I need to thaw scallops before cooking?
Always thaw first for best texture. Cooking from frozen makes them release too much moisture, preventing a good sear. Use a fridge overnight or cold water bath for 30-45 minutes.
Why do my scallops stick to the pan?
Two common reasons: the pan isn’t hot enough or the scallops aren’t dry. Heat your pan to medium-high and pat scallops completely dry before adding them.
How can I tell when scallops are done?
Look for a golden crust and opaque color. They should feel slightly springy when pressed. Overcooking makes them rubbery, so aim for 2-3 minutes per side.
Can I use wet-packed scallops for this?
Yes, but they require extra drying time. Dry-packed are preferred for better searing. If using wet-packed, drain and pat extremely thoroughly before cooking.

- 6 Egg Cake Recipe with Oil: Light as Air With Buttery Moisture - October 4, 2026
- 4 Bean Casserole Recipe: One-Pan Heartiness With Smoky Paprika Depth - October 4, 2026
- 3-Ingredient Keto Mug Cake Recipe: Microwave Magic in 2 Minutes - October 4, 2026