
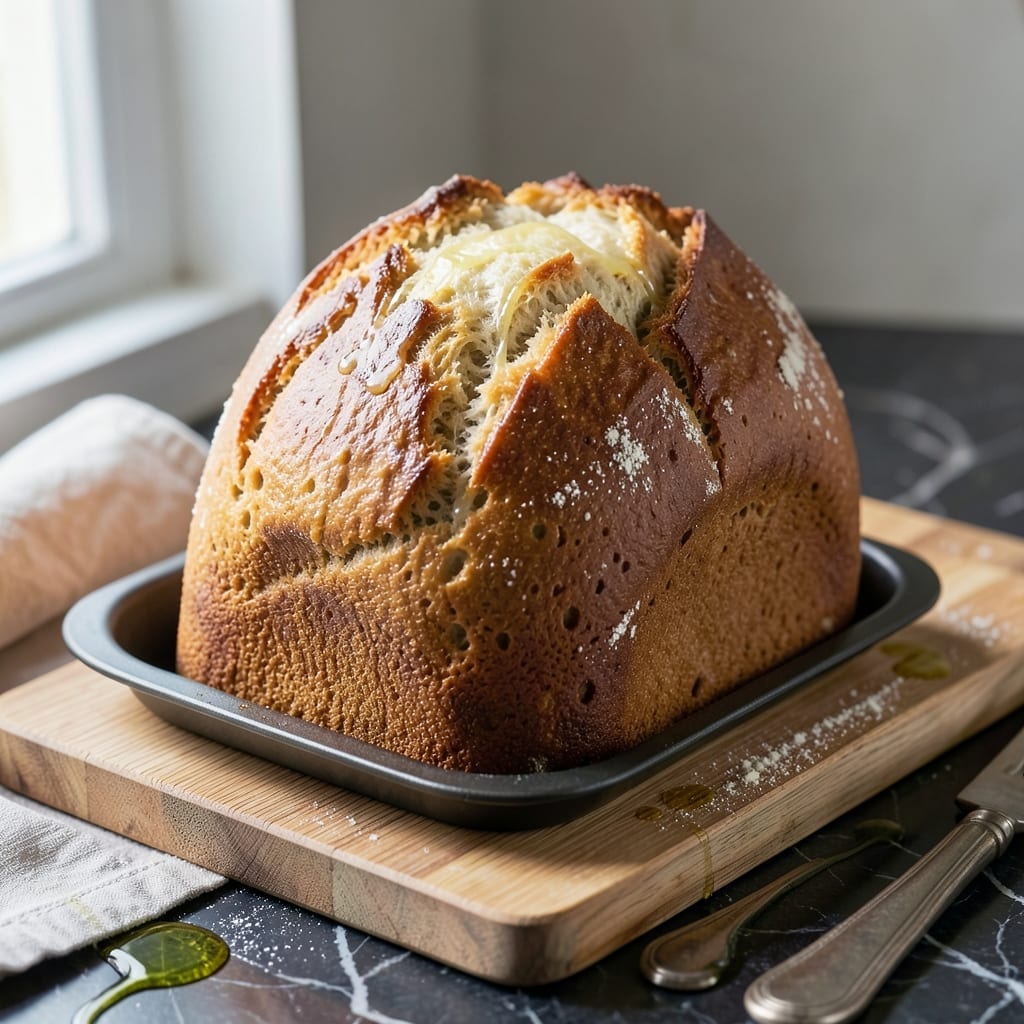
This bread machine recipe delivers a perfectly textured gluten-free loaf with minimal effort. The machine handles mixing, kneading, and baking while you focus on other tasks.
You’ll achieve a golden crust and soft, sliceable interior using simple ingredients. No special skills required—just add, select the cycle, and enjoy fresh bread.
Ingredients for Gluten Free Bread Recipe for Bread Machine
Simple pantry staples transform into a golden, sliceable loaf with minimal effort.
| Ingredient | Amount | Notes |
|---|---|---|
| Gluten-Free All-Purpose Flour Blend 🌾 | 3 cups | With xanthan gum included |
| Warm Water 💧 | 1 ¼ cups | 110°F, not hot |
| Large Eggs 🥚 | 3 whole | Room temperature preferred |
| Unsalted Butter 🧈 | 3 tbsp | Melted and cooled |
| Granulated Sugar 🍚 | 3 tbsp | Or honey for variation |
| Active Dry Yeast 🍃 | 2 ¼ tsp | One packet, proofed |
| Salt 🧂 | 1 ½ tsp | Fine sea salt preferred |
| Apple Cider Vinegar 🍏 | 1 tbsp | Balances acidity for rise |
| Psyllium Husk Powder 🌿 | 2 tsp | Essential for structure |
| Milk 🥛 | ¼ cup | Whole milk or dairy-free |
| Olive Oil 🫒 | 1 tbsp | For greasing pan |
The flour blend is everything here—King Arthur or Bob’s Red Mill 1-to-1 are my go-tos. Look for blends with xanthan gum already added (saves a step). Psyllium husk powder is non-negotiable for that perfect crumb. Whole Foods or Sprouts usually carry it in the bulk section. Yeast should be fresh—if it’s been in your pantry for over a year, grab a new packet.
No psyllium husk? Ground flaxseed at the same amount works in a pinch, but texture won’t be as good. Swap butter for coconut oil (melted) if you’re dairy-free. The eggs help with structure, but flax eggs (1 tbsp ground flax + 3 tbsp water per egg) can substitute if needed. Sugar can be replaced with maple syrup, but reduce liquids slightly.
Store flour blends in the freezer to keep them fresh for 6-12 months. Baked loaf stays good wrapped at room temp for 2 days, or slice and freeze for 3 months. Always let it cool completely before slicing—worth the wait.
Why You’ll Love This Recipe
- Hands-Off Baking: I just dump the ingredients in the machine and let it do the work—no kneading, no watching, just perfect bread.
- Buttery Richness: The unsalted butter gives it that warm, golden flavor that makes it taste like bakery bread.
- Sandwich Saver: I make a loaf on Sunday and it’s my lunchbox hero all week—holds up great for toast or PB&J.
- Pantry Friendly: Honestly, the flour blend and basics are already in my kitchen, so it’s cheap and last-minute doable.
Step-by-Step Instructions for Gluten Free Bread
Here’s how to let your bread machine do all the work for a perfect loaf.
Step 1: Proof the Yeast and Prepare Wet Ingredients
In your bread machine pan, add the 1.25 cups Warm Water first, followed by the 0.25 cup Milk. I always check that the water is exactly 110°F—too hot kills the yeast, too cold won’t activate it properly.
Sprinkle the 2.25 tsp Active Dry Yeast over the liquid and let it sit for 5 minutes until it becomes foamy. This proofing step ensures your bread will rise properly. Then add the 3 whole Large Eggs, 3 tbsp Unsalted Butter (melted and cooled), 3 tbsp Granulated Sugar, 1 tbsp Apple Cider Vinegar, and 1 tbsp Olive Oil.
Step 2: Add Dry Ingredients in the Correct Order
Now measure the 3 cups Gluten-Free All-Purpose Flour Blend and sprinkle it evenly over the wet ingredients. It’s crucial to use a blend that already includes xanthan gum for the right texture.
In a small bowl, whisk together the 2 tsp Psyllium Husk Powder and 1.5 tsp Salt to break up any clumps, then add this to the pan. The psyllium husk is non-negotiable here—it mimics gluten’s elasticity and gives the bread structure. Make sure all dry ingredients cover the wet completely.
Step 3: Select the Right Bread Machine Setting
Insert the pan into your bread machine and secure it properly. Select the gluten-free setting if your machine has one. If not, use the basic white bread setting with a 1.5-pound loaf size and medium crust.
I’ve found that most gluten-free breads do best with a slightly longer rise time, so if your machine allows programming, add an extra 10-15 minutes to the rise cycle. The total cycle should take about 3.5-4 hours from start to finish. Resist the urge to open the lid during the process—temperature and humidity stability are key.
Step 4: Cool Completely Before Slicing
When the cycle completes, immediately remove the pan from the machine and let it cool for 5 minutes. Then turn the bread out onto a wire rack. Here’s the thing—this bread needs to cool completely, which means waiting at least 1 hour before slicing.
If you cut into it while warm, it’ll be gummy and dense. As it cools, the structure sets properly, giving you that perfect sliceable texture. The crust should be golden brown with a slight crunch, and the interior should be soft but not crumbly. Store leftovers in an airtight container at room temperature for up to 3 days.
Pro Tips For Making Gluten Free Bread Recipe For Bread Machine
- Warm Your Eggs: Take the eggs out of the fridge 30 minutes before baking—cold eggs can cause your gluten-free loaf to rise unevenly, and I learned this the hard way with a lopsided first attempt.
- Measure Flour Right: Spoon the gluten-free flour blend into your measuring cup and level it off—scooping directly from the bag packs it down and can add 20% more flour, leading to a dense brick instead of bread.
- Skip the Overmix: After adding wet ingredients, let the bread machine do its thing for 30 seconds before checking—gluten-free batters look thicker than wheat-based ones, and overmixing can deflate the structure.
- Butter at Room Temp: Cube the unsalted butter and let it sit for 20 minutes before adding—it incorporates better into the batter, and I was skeptical until I tried it and got a noticeably softer crumb.
Common Mistakes When Making This Recipe
🔥 Overcrowding the Pan
Gluten-free dough is denser and often requires more space to rise properly. Overfilling the bread machine pan can lead to uneven baking or a collapsed loaf.
Fix: Never exceed 2/3 of the pan’s capacity. For a standard 1.5 lb loaf, stick to 1.25 cups of liquid and 3 cups of gluten-free flour blend.
🌡️ Using the Wrong Water Temperature
Water that’s too hot can kill yeast, while cold water may prevent activation. Gluten-free bread relies on yeast for structure, so temperature matters.
Fix: Use lukewarm water (around 110°F). Test it with your finger—it should feel warm but not scalding.
🎯 Skipping the Xanthan Gum
Gluten-free flours lack the elasticity of wheat, so xanthan gum is essential for binding and texture. Without it, your bread may crumble.
Fix: Add 1 tsp of xanthan gum per cup of gluten-free flour. If your blend already includes it, adjust accordingly.
⏰ Not Letting It Cool Completely
Slicing into gluten-free bread too soon can make it gummy. The structure sets as it cools, so patience is key.
Fix: Let the loaf cool on a wire rack for at least 1 hour before slicing.
Nutrition Facts

- 6 Egg Cake Recipe with Oil: Light as Air With Buttery Moisture - October 4, 2026
- 4 Bean Casserole Recipe: One-Pan Heartiness With Smoky Paprika Depth - October 4, 2026
- 3-Ingredient Keto Mug Cake Recipe: Microwave Magic in 2 Minutes - October 4, 2026