
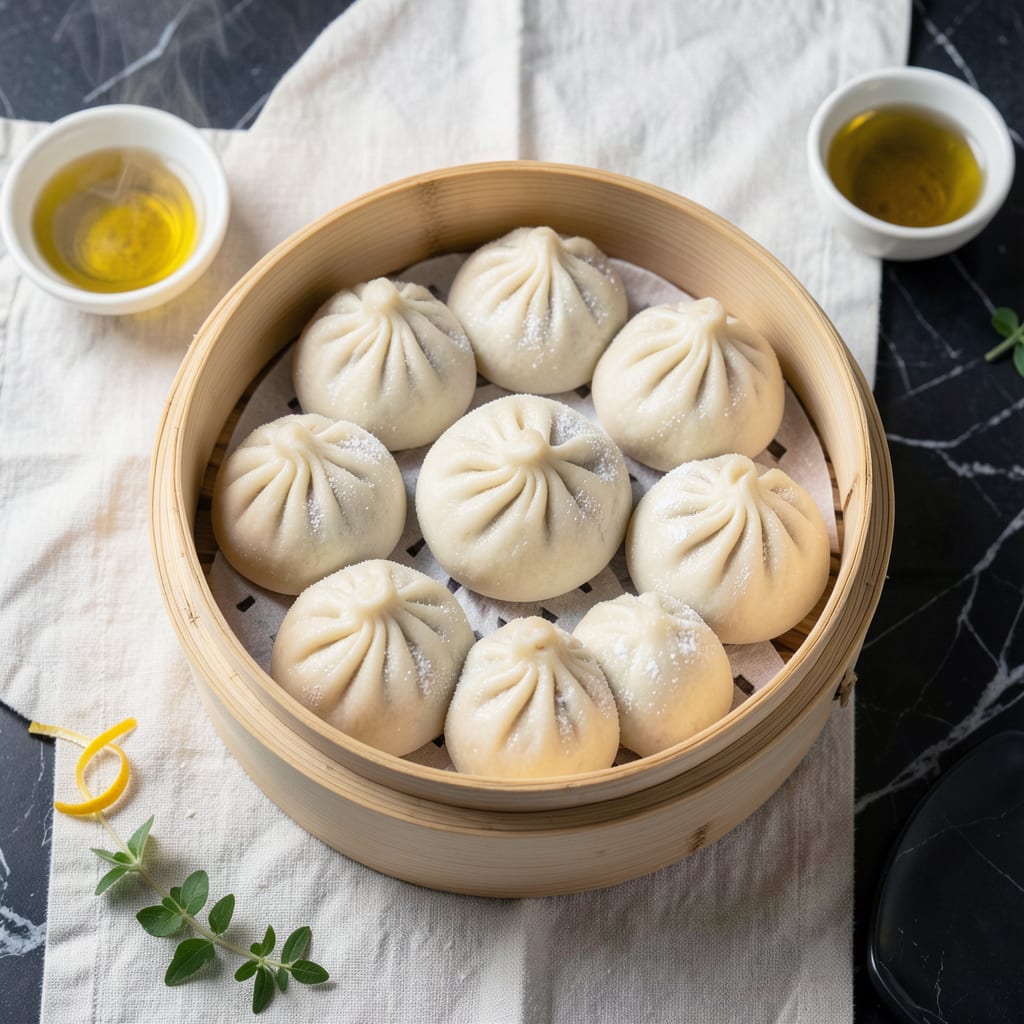
These steamed buns deliver the same pillowy soft texture you love, completely gluten free. I developed this recipe after years of testing blends to achieve the perfect chewy bite without traditional flour.
The dough comes together quickly with simple ingredients and steams in just 15 minutes. Each bun stays tender and light, holding savory fillings beautifully without falling apart.
Ingredients for Gluten Free Steamed Bun
Simple gluten-free staples create pillowy, chewy buns in minutes. No specialty store run needed.
| Ingredient | Amount | Notes |
|---|---|---|
| Gluten-Free All-Purpose Flour Blend 🌾 | 2 cups | With xanthan gum included |
| Tapioca Starch 🌾 | ½ cup | For elasticity and chew |
| Instant Yeast 🍞 | 2 ¼ tsp | Or one packet, activated |
| Granulated Sugar 🍚 | 2 tbsp | Feeds the yeast for rising |
| Rice Vinegar 🍶 | 1 tbsp | Or apple cider vinegar |
| Neutral Oil 🫒 | 2 tbsp | Avocado or vegetable oil |
| Warm Water 💧 | ¾ cup | 110°F for yeast activation |
| Psyllium Husk Powder 🌿 | 1 ½ tsp | Key for structure and softness |
| Baking Powder 🧂 | 1 tsp | Ensures light texture |
| Salt 🧂 | ½ tsp | Fine sea salt preferred |
| Parchment Paper Squares 📄 | 8 pieces | For steaming buns |
The flour blend is everything here. King Arthur’s Measure for Measure or Bob’s Red Mill 1-to-1 work best—they already include xanthan gum, which saves you a step. Psyllium husk powder is non-negotiable (find it at Whole Foods or Thrive Market), but if you’re in a pinch, ground flaxseed at a 1:1 ratio can sub in. Look for vibrant, finely ground powder; clumpy or old stuff won’t bind right.
No psyllium? Ground flaxseed works at equal amounts, but the texture won’t be as stretchy. Swap rice vinegar for apple cider or white vinegar—any acid helps activate the baking powder. The oil can be any neutral type (avocado, vegetable, canola), but avoid olive oil here—its flavor competes. For the yeast, instant is easiest (no proofing needed), but active dry works if that’s what you’ve got.
Dry ingredients keep at room temp for 6-12 months in airtight containers. Psyllium husk absorbs moisture fast, so store it in the fridge after opening. Mixed dough? Rest it covered for 30 minutes before shaping—don’t rush this step.
Why You’ll Love This Recipe
- No Fuss Dough: The gluten-free flour blend and tapioca starch mix together in one bowl—no kneading, no waiting hours for proofing.
- Pillowy Perfection: Instant yeast and a touch of sugar give these buns that light, fluffy texture I crave, with just the right chew.
- Freezer Friendly: I make a double batch, steam, then freeze—pop them in the steamer straight from frozen for a 5-minute snack.
- Budget Stretcher: A bag of gluten-free flour and a few pantry staples make a dozen buns for pennies compared to store-bought.
Step-by-Step Instructions for Gluten Free Steamed Buns
Here’s my tested method for achieving that signature pillowy texture without gluten.
Step 1: Activate the Yeast and Mix Dry Ingredients
In a small bowl, whisk together the 0.75 cup Warm Water, 2 tbsp Granulated Sugar, and 2.25 tsp Instant Yeast. Let it sit for 5-7 minutes until foamy and active. This confirms your yeast is alive and ready to work its magic.
Meanwhile, in a large mixing bowl, combine the 2 cups Gluten-Free All-Purpose Flour Blend, 0.5 cup Tapioca Starch, 1.5 tsp Psyllium Husk Powder, 1 tsp Baking Powder, and 0.5 tsp Salt. I always whisk these thoroughly to break up any lumps and ensure even distribution of leavening agents.
Step 2: Combine Wet and Dry Ingredients
Once the yeast mixture is foamy, add the 1 tbsp Rice Vinegar and 2 tbsp Neutral Oil. The vinegar reacts with the baking powder for extra lift, while the oil keeps the buns tender. Pour this liquid mixture into the dry ingredients all at once.
Using a sturdy spatula or wooden spoon, mix until a shaggy dough forms. It will be stickier than traditional dough—don’t be tempted to add more flour. The Psyllium Husk Powder needs a few minutes to gel and create structure, so let the dough rest for 5 minutes before handling.
Step 3: Shape and Prepare for Proofing
After resting, the dough should be more manageable. Lightly oil your hands (this prevents sticking) and divide the dough into 8 equal portions. Roll each portion into a smooth ball, then flatten slightly into a 3-inch disc.
Here’s the thing—gluten-free dough doesn’t stretch like traditional dough. If adding fillings, place them in the center of each disc and pleat the edges to seal. I use the 8 pieces Parchment Paper Squares both as a work surface and to line the steamer basket, preventing sticking.
Step 4: Proof Until Doubled in Size
Place each formed bun on its own parchment square in your steamer basket. Cover with a clean kitchen towel and let proof in a warm, draft-free spot for 45-60 minutes. You’ll know they’re ready when they’ve visibly puffed up and feel light and spongy to the touch.
I’ve found that gluten-free dough benefits from a slightly longer proof time. Don’t rush this step—the yeast needs time to work, and the psyllium needs time to fully gel for that perfect texture.
Step 5: Steam to Pillowy Perfection
Bring 2 inches of water to a boil in your steamer pot. Once boiling, reduce heat to maintain a steady, rolling simmer. Place the steamer basket over the water, cover tightly with a lid, and steam for 15-18 minutes.
Resist the urge to peek during steaming—opening the lid releases valuable steam and can cause the buns to deflate. They’re done when the dough looks set and slightly translucent, and a toothpick inserted comes out clean. Remove from heat and let cool for 2 minutes before serving—this prevents them from collapsing when handled.
Pro Tips For Making Gluten Free Steamed Bun
- Proof in Warmth: Let the dough rise in a turned-off oven with a bowl of boiling water—gluten-free dough needs that extra humidity to double properly. I learned this the hard way after my first few batches stayed flat and dense. —
- Chill the Dough: After shaping, pop the buns in the fridge for 15 minutes before steaming. This prevents them from collapsing during cooking, which happens more often with gluten-free flour blends. —
- Skip Cold Ingredients: Make sure your flour blend and liquids are room temperature—cold ingredients can shock the yeast and stall the rise. After burning three batches, I finally figured out this was the culprit. —
- Line with Parchment: Cut parchment squares to place under each bun in the steamer. Sounds weird, but it works: it keeps the sticky gluten-free dough from tearing when you try to remove them.
Pro Cooking Tips for gluten free steamed bun
Dough Hydration Control
Gluten-free dough requires precise moisture balance. I measure my 0.75 cup Warm Water with a kitchen scale for accuracy—6 oz by weight. If your flour blend absorbs liquid differently, adjust in 1 tbsp increments. The dough should feel tacky but not sticky. 💧
Proofing Environment
Create a warm proofing spot by turning your oven light on for 2 minutes, then turning it off. Place your covered buns inside with the door closed. This maintains 80-85°F—ideal for gluten-free dough which needs consistent warmth to rise properly.
Steamer Setup
Use a bamboo steamer with a tight-fitting lid to trap maximum steam. I line mine with cabbage leaves or parchment to prevent sticking. Ensure your pot is wide enough so the steamer basket doesn’t touch the water. Bring to a rolling boil before adding buns.
Sealing Technique
When making filled buns, pleat the edges by pinching and twisting the dough between your thumb and forefinger. This creates a strong seal that holds during steaming. I find 1 tbsp filling per bun prevents bursting while ensuring good flavor in each bite. 💡
Steam Timing
Start checking at 15 minutes—oversteaming makes gluten-free buns dense. The buns are done when they’ve puffed significantly and the dough looks set. Remove from steamer immediately to prevent condensation from making them soggy.
Cooling Method
Let buns cool on a wire rack for 5 minutes before serving. This prevents the bottoms from getting damp. If storing, cool completely first to avoid condensation inside containers, which ruins the texture.
Nutrition Facts
Frequently Asked Questions
Can I make these without a steamer?
Use a colander or sieve placed over a pot of boiling water with a tight lid. Line it with parchment, ensuring it doesn’t touch the water.
Why did my buns collapse after steaming?
Likely underproofed or opened too soon. Let them proof until visibly puffy and rest 2 minutes after steaming before handling.
Can I use a different flour blend?
Stick to a 1:1 blend with xanthan gum already added. Avoid almond or coconut flour as they lack the needed elasticity.
How long can I store leftovers?
Keep in an airtight container for up to 3 days. Reheat by steaming for 5 minutes to restore softness.

- 6 Egg Cake Recipe with Oil: Light as Air With Buttery Moisture - October 4, 2026
- 4 Bean Casserole Recipe: One-Pan Heartiness With Smoky Paprika Depth - October 4, 2026
- 3-Ingredient Keto Mug Cake Recipe: Microwave Magic in 2 Minutes - October 4, 2026