
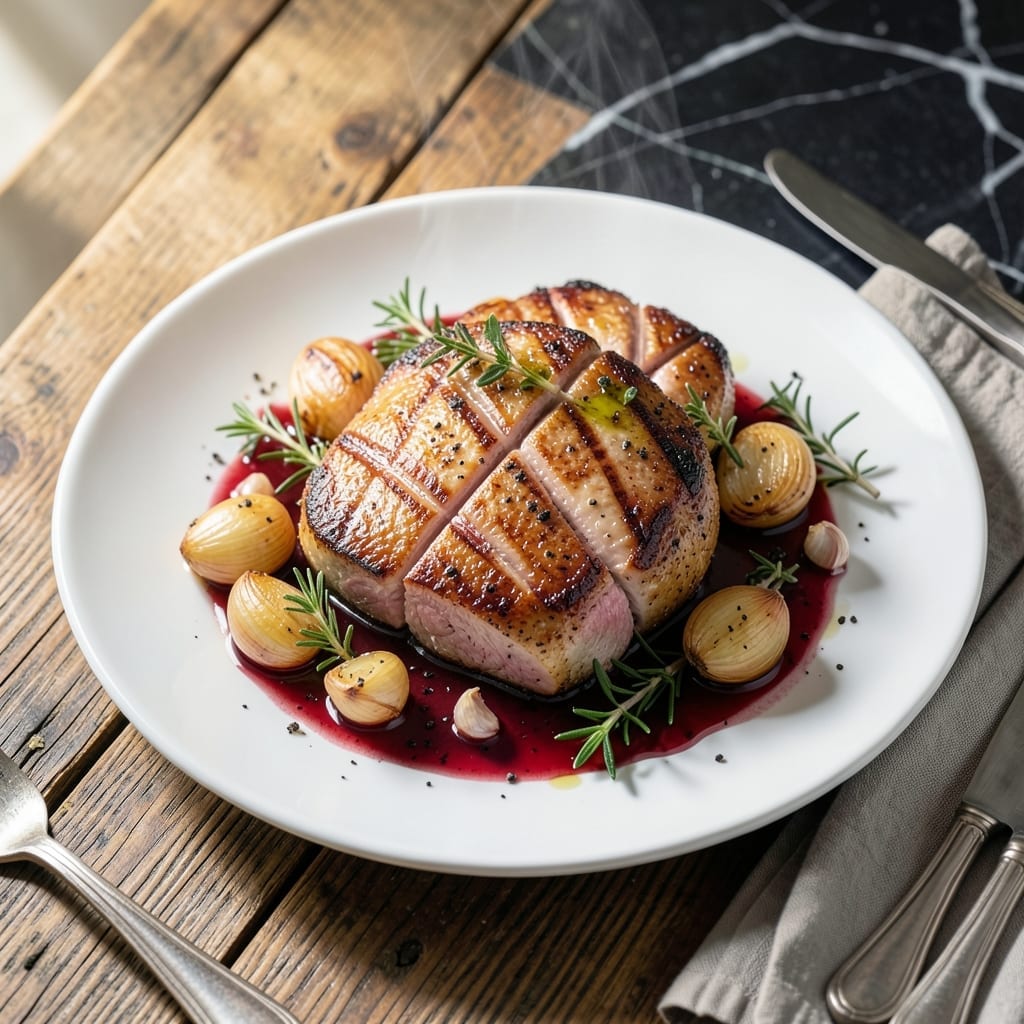
This method delivers crispy skin and perfectly rosy centers every time, using a professional technique honed in restaurant kitchens. The key lies in proper scoring, seasoning, and temperature control throughout the cooking process.
Starting with cold duck breast ensures even rendering of fat and development of that coveted golden crust. A simple rest period between cooking stages allows the meat to relax and reabsorb its juices, preventing dryness.
You’ll achieve a contrast of textures that defines great duck—shatteringly crispy skin giving way to tender, moist meat with a subtle pink center. The process requires attention to detail but rewards with restaurant-quality results.
Serve sliced on a slight angle to showcase the gradient from skin to center, with a light sauce that complements rather than overpowers the natural flavor.
Ingredients for Gordon Ramsay Duck Breast
Restaurant-quality duck requires just a handful of premium ingredients. Precision matters here.
| Ingredient | Amount | Notes |
|---|---|---|
| Duck Breast 🦆 | 4 whole | Skin-on, about 6-8 oz each |
| Kosher Salt 🧂 | 2 tsp | Diamond Crystal preferred |
| Black Pepper 🌶️ | 1 tsp | Freshly cracked preferred |
| Fresh Thyme Sprigs 🌿 | 4 whole | Optional for aromatics |
| Garlic Cloves 🧄 | 2 cloves | Smashed, peeled |
| Shallot 🧅 | 1 whole | Finely minced for sauce |
| Red Wine 🍷 | ½ cup | Dry variety like Pinot Noir |
| Chicken Stock 🥘 | ½ cup | Low-sodium preferred |
| Unsalted Butter 🧈 | 2 tbsp | Cold, cubed for finishing |
| Honey 🍯 | 1 tbsp | For glaze (optional) |
| Dijon Mustard 🟡 | 1 tsp | For sauce depth |
| Extra-Virgin Olive Oil 🫒 | 1 tbsp | For initial searing |
The duck breast is non-negotiable—sourced from a reputable butcher or Whole Foods for consistent quality. Look for Magret duck breast (the breast of a Moulard duck), which offers the ideal fat-to-meat ratio. Skin should be intact and unblemished, with a thick, even layer of fat. D’Artagnan is a trusted brand if ordering online. Proper scoring of the skin (in a crosshatch pattern) is essential for rendering fat and achieving that signature crispiness.
No red wine? Substitute with beef stock plus a splash of balsamic vinegar. Fresh thyme can be replaced with rosemary—both hold up well to duck’s richness. Shallots and garlic are flexible: yellow onion works in a pinch, and garlic powder (at one-third the amount) can replace fresh. For a non-alcoholic version, use apple cider with a teaspoon of apple cider vinegar for acidity.
Duck breast keeps in the fridge for 2-3 days before cooking. Once cooked, it’s best served immediately, but leftovers can be refrigerated for up to 3 days. Reheat gently in a skillet to preserve the crispy skin. Freezing raw duck breast is possible for up to 3 months, though texture may suffer slightly.
Why You’ll Love This Recipe
- One Pan Wonder: I love how this comes together with just a skillet and those five ingredients—minimal mess, maximum flavor.
- Crispy and Juicy: That skin gets so perfectly crisp while the inside stays tender, thanks to the simple salt and pepper rub.
- Date Night Ready: Honestly, it feels fancy but takes less time than ordering takeout. Between us, my partner thinks I’m a pro.
- Leftovers Luxury: The slices reheat beautifully for salads or sandwiches the next day—if there are any left, that is.
Step-by-Step Instructions for Gordon Ramsay Duck Breast
Master the technique for achieving perfectly crispy skin and rosy centers with this method.
Step 1: Score and Season the Duck Breast
Using a sharp knife, score the skin of each duck breast in a crosshatch pattern, cutting through the skin and fat but not into the meat. This allows the fat to render out evenly while cooking. Pat the skin dry with paper towels—this is crucial for achieving maximum crispiness.
Season both sides generously with the 2 tsp Kosher Salt and 1 tsp Black Pepper. I always use freshly cracked black pepper for the best aroma. Place the duck breasts skin-side up on a plate and let them sit at room temperature for 20-30 minutes to take the chill off before cooking.
Step 2: Sear the Duck Breast Skin-Side Down
Heat a cold, dry skillet (cast iron works best) over medium-low heat. Place the duck breasts skin-side down in the pan. The fat will begin to render immediately. Cook undisturbed for 8-10 minutes until the skin is deep golden brown and crispy.
Drain off excess fat occasionally during cooking, but leave about 1 tbsp in the pan for flavor. The skin should look like a perfect, even crust when it’s ready to flip. Don’t rush this step—low and slow renders the fat properly while crisping the skin.
Step 3: Finish Cooking and Rest the Duck
Flip the duck breasts and cook for 3-4 minutes on the flesh side for medium-rare. For perfect doneness, use an instant-read thermometer: 130-135°F for medium-rare with rosy centers. Transfer the duck to a cutting board, skin-side up, and tent loosely with foil.
Let the duck rest for 10 minutes before slicing. This allows the juices to redistribute throughout the meat, ensuring each slice remains moist and flavorful. The internal temperature will rise a few degrees during resting.
Step 4: Create the Red Wine Pan Sauce
After removing the duck, reduce heat to medium. Add the 1 whole Shallot (finely minced), 2 cloves Garlic Cloves (smashed), and 4 whole Fresh Thyme Sprigs to the pan. Sauté for 1-2 minutes until fragrant, being careful not to burn the garlic.
Pour in the 0.5 cup Red Wine and 0.5 cup Chicken Stock, scraping up all the browned bits from the bottom of the pan. Simmer for 4-5 minutes until the liquid reduces by half. Whisk in the 1 tbsp Honey, 1 tsp Dijon Mustard, and 2 tbsp Unsalted Butter until the sauce is glossy and slightly thickened.
Step 5: Slice and Serve with Sauce
Slice the duck breasts diagonally into ½-inch thick pieces. Arrange the slices on serving plates, skin-side up to showcase the crispy texture. Spoon the warm red wine sauce over the duck or serve it on the side for dipping.
The skin should maintain its crispness while the interior remains tender and rosy. Serve immediately while the duck is still warm. The combination of crispy skin, perfectly cooked meat, and rich pan sauce delivers a restaurant-quality experience.
Pro Tips For Making Gordon Ramsay Duck Breast
- Score the Fat: Cut a crosshatch pattern into the duck skin—about 1/4 inch apart—so the fat renders out evenly. I learned this the hard way after my first duck breast came out greasy instead of crispy.
- Start Cold, Finish Hot: Place the duck breast skin-side down in a cold pan, then turn the heat to medium. This renders the fat slowly without burning the skin.
- Don’t Overcrowd: Cook one duck breast at a time if your pan isn’t huge—too much in the pan lowers the heat and steams instead of sears.
- Rest Under Foil: Let the duck rest for 5-10 minutes under loose foil after cooking. It keeps the meat juicy and the skin crisp, and yes, it actually changes the outcome.
Storing and Reheating This gordon ramsay duck breast
Refrigerator Storage
Let cooked duck cool for 30 minutes before transferring to an airtight container. Store with sauce separately to maintain that crispy skin we worked so hard to achieve. It keeps beautifully for 3 days at 40°F or below. 💡
Freezer Storage
For longer storage, wrap cooled duck tightly in plastic wrap then heavy-duty foil. Freeze for up to 2 months. I recommend slicing before freezing for easier portion control. The texture will soften slightly upon thawing.
Skillet Reheating
This is my preferred method. Heat a dry skillet over medium-low heat and add duck slices skin-side down. Cover for 2-3 minutes to warm through while reviving some crispness. Add a splash of water and cover to steam the meat gently.
Oven Reheating
Preheat oven to 300°F. Place duck on a wire rack over a baking sheet and warm for 8-10 minutes. This method works best for whole breasts. Brush with a little duck fat from cooking for extra richness.
Sauce Reheating
Gently warm sauce in a small pot over low heat, stirring occasionally. If it’s thickened too much, whisk in 1-2 tbsp of water or stock. Never boil the sauce—it can cause separation.
Serving Leftovers
Reheated duck makes an amazing salad topping. Slice and arrange over mixed greens with cherry tomatoes and a light vinaigrette. The contrast of warm duck and cool greens is divine. ❄️
Nutrition Facts
Frequently Asked Questions
Why score the skin before cooking?
Scoring helps render fat evenly and creates more surface area for crispiness. Without it, the skin may puff or cook unevenly. Always cut in a crosshatch pattern.
What temperature should the duck reach?
Use a thermometer for accuracy: pull at 130-135°F for perfect medium-rare. The temperature will rise 5°F while resting. Overcooking dries the meat.
Can I use a nonstick pan instead of cast iron?
Yes, but cast iron is ideal for even heat and crisping. If using nonstick, avoid dragging the duck to prevent damaging the coating. Drain fat frequently.
How do I prevent the sauce from breaking?
Keep heat low and avoid boiling. Whisk constantly when adding butter off-heat. If it separates, blend with an immersion blender to re-emulsify.

- 6 Egg Cake Recipe with Oil: Light as Air With Buttery Moisture - October 4, 2026
- 4 Bean Casserole Recipe: One-Pan Heartiness With Smoky Paprika Depth - October 4, 2026
- 3-Ingredient Keto Mug Cake Recipe: Microwave Magic in 2 Minutes - October 4, 2026