
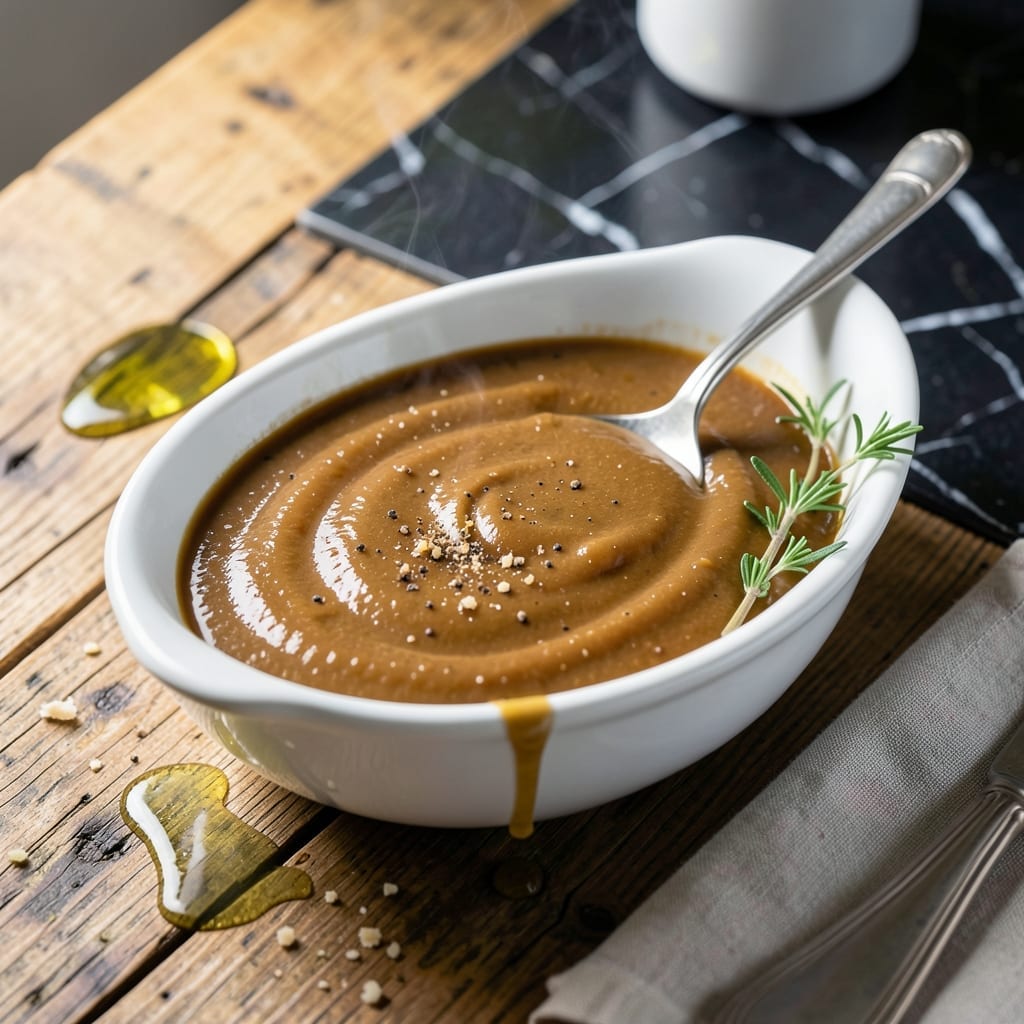
This chicken broth-based gravy transforms any meal with its rich, velvety texture and deep, savory flavor. I’ve refined this recipe over years of holiday cooking, ensuring it delivers consistent, lump-free results every time.
The foundation is a simple roux—just butter and flour—cooked to a golden hue before slowly whisking in warm chicken broth. This method guarantees a smooth, thickened sauce that clings perfectly to mashed potatoes, roasted meats, or biscuits.
What sets this gravy apart is its balanced seasoning. A touch of garlic powder and black pepper enhances the broth’s natural depth without overpowering it. The result is a restaurant-quality sauce that’s both comforting and versatile.
Ready in under 15 minutes, it’s the ideal finishing touch for weeknight dinners or special occasions. Here’s how to make it.
Ingredients for Gravy Recipe with Chicken Broth
Eight ingredients transform into this restaurant-quality sauce with velvety texture and deep savor.
| Ingredient | Amount | Notes |
|---|---|---|
| Unsalted Butter 🧈 | 4 tbsp | For golden roux base |
| All-Purpose Flour 🌾 | 4 tbsp | Creates smooth thickening |
| Chicken Broth 🍲 | 2 cups | Warm, low-sodium preferred |
| Garlic Powder 🧄 | ½ tsp | Enhances savory depth |
| Onion Powder 🧅 | ½ tsp | Balances flavor profile |
| Black Pepper 🌶️ | ½ tsp | Freshly ground for intensity |
| Kosher Salt 🧂 | ½ tsp | Adjust to taste preference |
| Worcestershire Sauce 🍶 | 1 tsp | Adds umami complexity |
The chicken broth is the backbone here. Low-sodium versions let you control the salt content—Swanson or Pacific Foods are reliable brands. For the butter, unsalted is essential (salted can make the gravy too salty). A good roux requires equal parts fat and flour by weight, so the 4 tablespoons each creates the perfect base. Always use fresh broth if possible—homemade stock elevates the flavor significantly.
No Worcestershire? Soy sauce at half the amount works in a pinch, though it’ll darken the color. Out of garlic powder? Fresh minced garlic at one-third the quantity, sautéed in the butter before adding flour. For gluten-free, swap the all-purpose flour for rice flour or cornstarch (use 2 tablespoons instead of 4). The onion powder can be omitted, but it adds subtle sweetness that complements the savory notes beautifully.
Gravy thickens as it cools—store in an airtight container in the fridge for up to 5 days. Reheat gently on the stove, adding a splash of broth to thin if needed. Freezes beautifully for 3 months (portion into ice cube trays for easy single servings).
Why You’ll Love This Recipe
- One Pot Wonder: I melt butter, whisk in flour, then pour in the chicken broth—no fancy steps, just smooth, creamy gravy every time.
- Rich & Savory: The garlic and onion powders bloom in the butter, turning plain broth into something deeply flavorful.
- Pairs With Everything: I drizzle it over mashed potatoes, roasted chicken, even biscuits—honestly, it’s my secret weapon for leftovers.
- Pantry Staples: Between us, I always have butter, flour, and broth on hand, so this gravy happens whenever I need it.
Step-by-Step Instructions for Gravy With Chicken Broth
Master the technique for a perfect, lump-free sauce with this proven method.
Step 1: Create the Roux Base
Melt the 4 tbsp unsalted butter in a medium saucepan over medium heat. As it melts, it should foam slightly but not brown. This is your foundation for the roux.
Add the 4 tbsp all-purpose flour all at once and whisk vigorously for 1-2 minutes until the mixture forms a smooth paste. You’re aiming for a golden color—this indicates the flour is cooked but not burned. The roux should bubble gently but not darken.
This step is crucial: undercooked flour tastes raw, while overcooked flour creates a bitter taste. Keep the heat moderate and stir constantly to prevent hot spots from forming.
Step 2: Gradually Incorporate the Broth
Slowly pour in the 2 cups chicken broth, about ¼ cup at a time, whisking continuously after each addition. The mixture will thicken immediately upon contact with the hot roux, so steady whisking prevents lumps.
After adding all the broth, continue whisking until the mixture becomes smooth and begins to simmer. You should see the first gentle bubbles breaking the surface after about 2-3 minutes of constant stirring.
This gradual incorporation ensures a silky texture. If lumps do form, don’t panic—just keep whisking. They’ll dissolve as the gravy heats through.
Step 3: Season and Develop the Flavors
Add the 0.5 tsp garlic powder, 0.5 tsp onion powder, 0.5 tsp black pepper, 0.5 tsp kosher salt, and 1 tsp Worcestershire sauce. Whisk to distribute the seasonings evenly throughout the gravy.
Reduce the heat to low and let the gravy simmer for 5-7 minutes. This allows the flavors to meld and the gravy to reach its final consistency. You’re looking for a sauce that coats the back of a spoon but still drizzles easily.
Taste and adjust the seasoning if needed. Remember that the gravy will intensify slightly as it thickens, so err on the side of caution with additional salt.
Step 4: Finish and Serve
Remove the saucepan from heat. The gravy should have a glossy appearance and a velvety texture. If it’s too thick, whisk in a splash of warm water or additional broth. If too thin, return it to the heat for another minute or two.
Let it sit for 1-2 minutes before serving. This brief rest allows the gravy to reach its optimal consistency. The surface should be smooth with no visible separation of ingredients.
Serve immediately while hot. The gravy will continue to thicken slightly as it cools, so transfer it to a warmed gravy boat or serve directly over your main dish for the best results.
Pro Tips For Making Gravy Recipe With Chicken Broth
- Whisk Constantly: I learned this the hard way—once you add the chicken broth to your butter-flour roux, keep whisking nonstop until it thickens, or you’ll end up with lumpy gravy that no amount of stirring will fix.
- Use Warm Broth: Cold chicken broth seizes up the roux and makes clumps. Heat your broth first—about 160°F is perfect—so it blends smoothly into the fat and flour.
- Skip Cold Butter: Pull your unsalted butter out 10 minutes before starting. Soft butter melts evenly into the flour, while cold butter leaves greasy streaks that never fully incorporate.
- Bloom the Powders: Toast the garlic and onion powder in the melted butter for 30 seconds before adding flour—sounds small, but it wakes up their flavor so the gravy tastes rich, not flat.
Troubleshooting Great gravy recipe with chicken broth
Lumpy Gravy
If lumps appear, don’t panic. Whisk vigorously—they’ll dissolve as the gravy heats. For stubborn lumps, use an immersion blender for 10-15 seconds. Prevention is key: ensure broth is warm and added slowly. 💡
Too Thin
Simmer uncovered for 2-3 minutes to evaporate excess liquid. If still thin, mix 1 tbsp cornstarch with 1 tbsp cold water, then whisk into the gravy. Cook for 1 minute until thickened.
Too Thick
Whisk in warm broth or water, 1 tbsp at a time, until reaching desired consistency. Return to low heat if needed. Remember, gravy thickens as it cools, so slightly thin gravy now may be perfect later.
Bland Flavor
Boost with ½ tsp more kosher salt or an extra splash of Worcestershire. For depth, add ¼ tsp onion powder or a pinch of garlic powder. Taste as you go—seasoning builds gradually. ✨
Greasy Surface
This happens if butter separates. Remove from heat and whisk vigorously to reincorporate. To prevent, avoid boiling the gravy. Keep it at a gentle simmer. If stubborn, skim with a spoon.
Burnt Roux
Discard and start over—burnt flour imparts bitterness. Use medium-low heat and stir constantly. A golden roux is your goal, not brown. Patience ensures a smooth, flavorful base.
Nutrition Facts
Frequently Asked Questions
Can I use a different broth?
Yes! Beef or turkey broth work well for a richer flavor. Vegetable broth is a great lighter alternative. Just ensure it’s warm before adding to the roux.
Why is my gravy too thin or thick?
For thin gravy, simmer longer or mix 1 tbsp cornstarch with 1 tbsp cold water and whisk in. For thick gravy, add warm broth 1 tbsp at a time.
How do I make it gluten-free?
Swap all-purpose flour for rice flour or cornstarch. Use 2 tbsp instead of 4 tbsp and follow the same steps. Texture stays smooth and velvety.
Can I make it ahead?
Store in an airtight container in the fridge for up to 5 days. Reheat gently, adding a splash of broth if needed.

- 6 Egg Cake Recipe with Oil: Light as Air With Buttery Moisture - October 4, 2026
- 4 Bean Casserole Recipe: One-Pan Heartiness With Smoky Paprika Depth - October 4, 2026
- 3-Ingredient Keto Mug Cake Recipe: Microwave Magic in 2 Minutes - October 4, 2026