
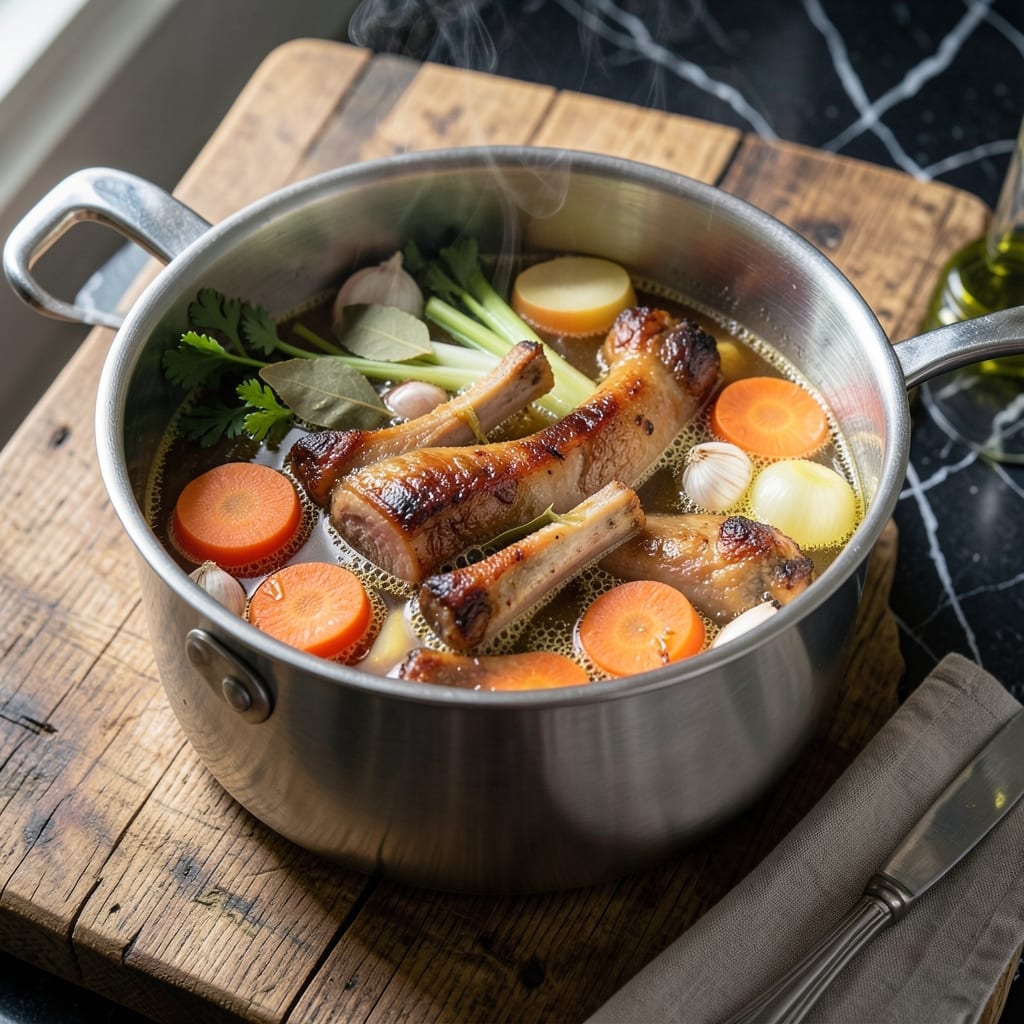
Transform leftover ham bones into a rich, flavorful stock that elevates any soup or stew. This method extracts maximum depth from ingredients you might otherwise discard, creating a foundation that tastes like it simmered all day.
The process is simple yet precise: simmer ham bones with aromatic vegetables and herbs for 2-3 hours to build layers of savory complexity. Skimming the surface occasionally ensures a clean, clear broth.
What emerges is a versatile liquid gold that enhances everything from split pea soup to risotto. The stock develops a balanced richness that store-bought versions can’t match, with subtle smoky notes from the ham.
Strain and store in airtight containers for up to a week in the fridge or freeze for 6 months. This is the kind of kitchen staple that makes home cooking taste like a professional kitchen.
Ingredients for Ham Stock
A handful of humble ingredients transforms leftover ham bones into liquid gold for soups.
| Ingredient | Amount | Notes |
|---|---|---|
| Ham Bones 🍖 | 2 lb | Meaty, with some cartilage |
| Yellow Onions 🧅 | 2 whole | Quartered, skins on |
| Carrots 🥕 | 3 whole | Roughly chopped, unpeeled |
| Celery Stalks 🌿 | 3 whole | Cut into large pieces |
| Garlic Cloves 🧄 | 6 cloves | Smashed, unpeeled |
| Bay Leaves 🍃 | 2 whole | Dried, whole leaves |
| Black Peppercorns 🌶️ | 1 tbsp | Whole, lightly crushed |
| Fresh Thyme Sprigs 🌿 | 4 whole | Or 1 tsp dried thyme |
| Fresh Parsley Stems 🌿 | 1 cup | With leaves, roughly chopped |
| Cold Water 💧 | 12 cups | Enough to cover bones |
| Apple Cider Vinegar 🍏 | 2 tbsp | Helps extract minerals |
The ham bones are paramount—opt for meaty, gelatinous ones from a smoked ham rather than deli scraps. Most butcher shops or Whole Foods will save them if you ask ahead. The vegetables needn’t be pretty; onion skins and carrot tops add depth and color. For the herbs, fresh thyme and parsley stems (often discarded) contribute complexity without waste.
No ham bones? Pork neck bones or a ham hock work nearly as well. Short on time? Pressure cooker cuts simmering to 45 minutes. The vinegar isn’t just for flavor—it helps draw calcium and collagen from the bones. If you lack fresh herbs, dried at one-third the volume is acceptable, though less vibrant.
Strain immediately once done to avoid bitterness. Cool uncovered, then refrigerate for up to 1 week or freeze in portions for 6 months. Ice cube trays make single-serving portions effortless. Always label with the date.
Why You’ll Love This Recipe
- Set It and Forget: I toss the ham bone, onions, carrots, celery, and garlic in a pot, cover with water, and let it simmer—no babysitting required.
- Rich, Meaty Depth: The ham bone infuses the stock with a smoky, savory richness that store-bought just can’t match.
- Soup Base Superstar: I use this for beans, soups, or risotto—it’s my secret to making weeknight meals taste like they cooked all day.
- Pennywise Perfection: Honestly, it turns a leftover ham bone into liquid gold and saves me a trip to the grocery store.
Step-by-Step Instructions for Ham Stock
Master this technique and you’ll produce a deeply flavorful stock that elevates every dish it touches.
Step 1: Prepare and Roast the Bones
Place the 2 lb Ham Bones on a rimmed baking sheet. Roasting intensifies their flavor, so don’t skip this. Position them in a single layer to ensure even browning. Roast at 400°F for 20-25 minutes, turning once halfway through, until the bones are deep golden brown and any exposed meat is lightly caramelized.
This step extracts maximum gelatin and richness from the bones. Watch for dark spots forming on the meat—this is the Maillard reaction, which builds complex, savory depth in your stock. Remove the pan from the oven and transfer the bones directly to your stockpot.
Step 2: Add Vegetables and Aromatics
To the stockpot with the roasted bones, add the 2 whole Yellow Onions, 3 whole Carrots, 3 whole Celery Stalks, 6 cloves Garlic Cloves, 2 whole Bay Leaves, 1 tbsp Black Peppercorns, 4 whole Fresh Thyme Sprigs, and 1 cup Fresh Parsley Stems.
There’s no need to peel the vegetables—just give them a good rinse. The skins and peels contribute color and earthy notes. The garlic should be smashed but left unpeeled to infuse its flavor without bitterness. This combination creates a balanced, aromatic base for your stock.
Step 3: Deglaze and Add Liquid
Return the baking sheet to the stovetop over medium heat. Pour in 2 tbsp Apple Cider Vinegar and scrape up all the browned bits with a wooden spoon. These fond (the caramelized residues) are packed with flavor and will dissolve into your stock.
Transfer this liquid to your stockpot along with the 12 cups Cold Water. The cold water ensures a clear stock by slowly drawing out impurities as it heats. The vinegar also helps extract minerals and collagen from the bones, resulting in a more nutrient-rich final product.
Step 4: Simmer and Skim
Bring the mixture to a boil over high heat, then immediately reduce to a gentle simmer. A rolling boil can make your stock cloudy and break up the bones, releasing impurities. Skim off any foam or fat that rises to the surface during the first 30 minutes of simmering.
Partially cover the pot and maintain a low simmer for 4-6 hours. The longer it cooks, the more gelatin you’ll extract, giving the stock a rich, velvety mouthfeel. Occasional stirring prevents the vegetables from sticking to the bottom. You’ll know it’s ready when the liquid is deep amber and aromatic.
Step 5: Strain and Store
Carefully strain the stock through a fine-mesh sieve into a large bowl or clean pot. Discard all the solids—they’ve given up all their flavor. Let the stock cool slightly, then skim off any remaining fat from the surface if desired.
Once cooled to room temperature, transfer the stock to airtight containers. It will keep in the refrigerator for up to 5 days or in the freezer for 3 months. The stock should be rich, aromatic, and slightly gelatinous when chilled, a sign of its high collagen content and excellent quality.
Pro Tips For Making Ham Stock
- Simmer Low and Slow: Keep the heat at a gentle simmer—never a rolling boil—or your stock will turn cloudy. I learned this the hard way after rushing a batch and ending up with murky broth.
- Roast the Bones: Toss the ham bones in a 400°F oven for 20 minutes first to deepen the flavor. Sounds like extra work, but it actually changes the outcome.
- Skip the Salt: Resist the urge to season early; the ham bones are already salty. Wait until the end to adjust, or you might overdo it.
- Use Cold Water: Start with cold water and the bones—this helps extract the gelatin and collagen for a richer, more velvety stock. My grandmother swore by this, and she was right.
Make-Ahead Tips for Leftovers
Batch Prep Strategy
I always make a double batch when I roast ham bones. Just double the vegetables and use the same 12 cups water per 2 lb of bones. My stockpot fits 4 lb of bones comfortably. This way, I have enough for multiple recipes without extra effort. 💡
Freezer Organization
I freeze stock in 1-cup portions using silicone muffin molds. Once solid, pop them out and transfer to a freezer bag. This lets me grab exactly what I need for sauces or soups. Label with the date—it keeps for 6 months at peak quality.
Quick Cooling Method
To cool stock rapidly, divide it into smaller containers and place them in an ice bath. Stir occasionally to speed up the process. I aim to get it below 70°F within 2 hours to prevent bacterial growth. Never leave stock at room temperature overnight.
Convenience Containers
For refrigerator storage, I use glass mason jars—they’re airtight and let me see the stock’s rich color. Fill only to the shoulder to allow for expansion. In the fridge, properly stored stock stays fresh for up to 5 days.
Reheating Properly
Gently reheat stock in a saucepan over medium-low heat until it reaches a simmer. If it’s gelatinous when cold, that’s a sign of high collagen content. Avoid boiling vigorously to maintain its silky texture and prevent cloudiness.
Flavor Boost Tip
When reheating for immediate use, I often add a bay leaf or thyme sprig to refresh the aromatics. This is especially helpful if the stock has been stored for a while. The additional herbs brighten up the flavors beautifully. ✨
Nutrition Facts
Frequently Asked Questions
Can I use a ham hock instead of bones?
A meaty ham hock works beautifully and adds extra richness. Just follow the same method, adjusting liquid to cover it. The gelatin content will be even higher.
Why roast the bones first?
Roasting at 400°F for 20-25 minutes develops deep, caramelized flavors through the Maillard reaction. Skipping this step results in a bland, one-dimensional stock.
How can I make it less salty?
Use bones from a low-sodium ham and avoid adding extra salt. If needed, dilute with water or reduce the simmering time to 2-3 hours.
Can I skip the vinegar?
Yes, but 2 tablespoons of vinegar helps extract minerals and collagen. Without it, your stock may lack depth and gelatinous texture.

- 6 Egg Cake Recipe with Oil: Light as Air With Buttery Moisture - October 4, 2026
- 4 Bean Casserole Recipe: One-Pan Heartiness With Smoky Paprika Depth - October 4, 2026
- 3-Ingredient Keto Mug Cake Recipe: Microwave Magic in 2 Minutes - October 4, 2026