
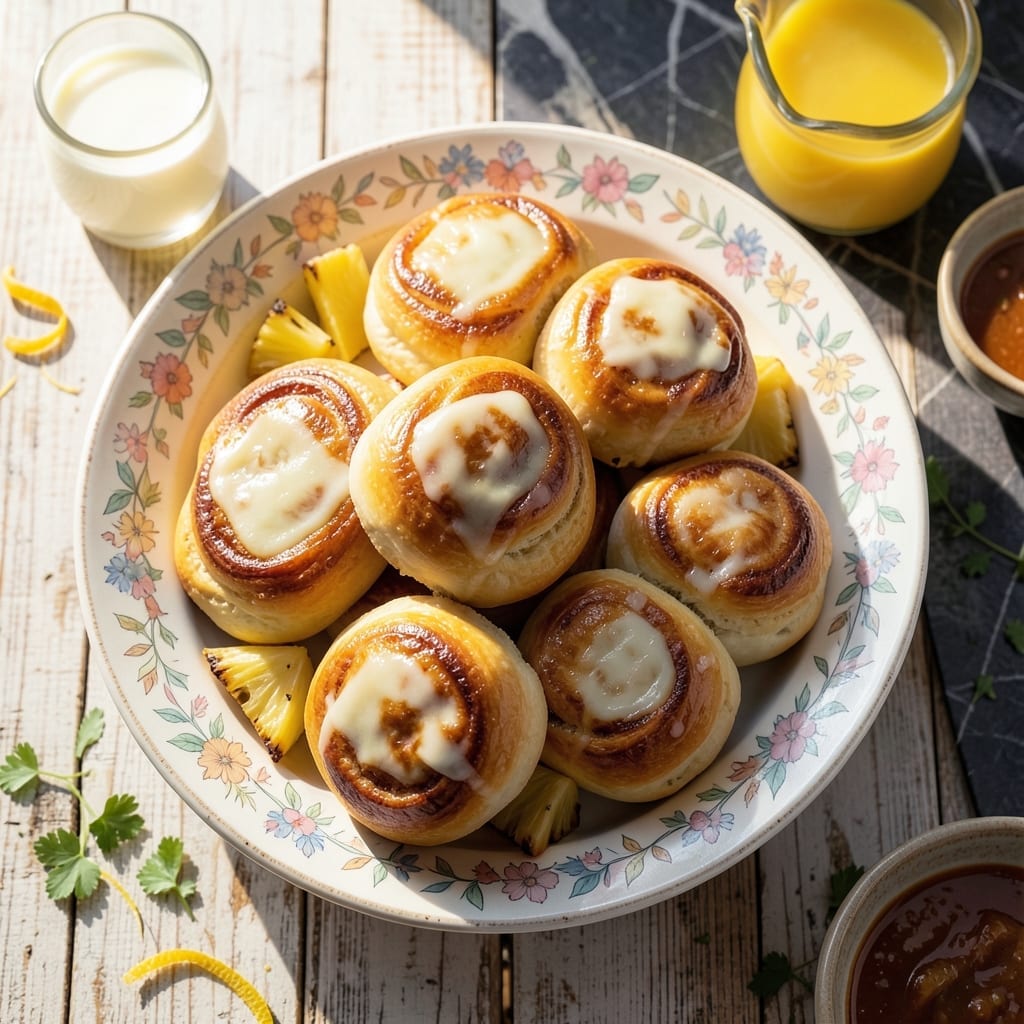
There’s nothing like the smell of warm Hawaiian rolls fresh from the oven, their golden tops glistening with a hint of sweetness. This recipe delivers pillowy soft texture with a subtle pineapple flavor that sets them apart from ordinary dinner rolls.
The secret lies in the dough, enriched with pineapple juice and a touch of sugar for that signature sweetness. The rolls rise beautifully, creating a light and fluffy interior with a tender crust that’s hard to resist.
Baking them close together ensures they pull apart into those coveted soft, buttery layers. Each bite is a perfect balance of sweet and savory, making them ideal for any meal or as a standalone treat.
Whether for holidays or everyday dinners, these rolls are a guaranteed crowd-pleaser.
Ingredients for Hawaiian Rolls
Pantry staples and pineapple juice create these light, fluffy, golden dinner rolls with a sweet touch.
| Ingredient | Amount | Notes |
|---|---|---|
| All-Purpose Flour 🌾 | 4 cups | Plus extra for dusting |
| Granulated Sugar 🍚 | ⅓ cup | Divided for dough and glaze |
| Active Dry Yeast 🍞 | 2 ¼ tsp | One packet, proofed in warm water |
| Unsalted Butter 🧈 | ½ cup | Melted and cooled |
| Large Egg 🥚 | 1 whole | Room temperature |
| Pineapple Juice 🍍 | ¾ cup | Warm, about 110°F |
| Whole Milk 🥛 | ¼ cup | Warm, about 110°F |
| Salt 🧂 | 1 tsp | Fine table salt |
| Vanilla Extract 🌿 | 1 tsp | Pure extract preferred |
| Crushed Pineapple 🍍 | ¼ cup | Drained, reserved juice used |
The pineapple juice is non-negotiable here—Dole or Del Monte work perfectly for both juice and crushed pineapple. King Arthur Flour gives the most consistent rise, but any all-purpose will do. Yeast freshness is key; if it doesn’t bubble in warm water within 5 minutes, start over with a fresh packet. The butter should be unsalted so you control the salt content precisely.
No pineapple juice? Orange juice with 1 tsp extra sugar gets close but lacks that signature flavor. Milk can be swapped for warm water plus 1 tbsp powdered milk. For a richer dough, replace 2 tbsp milk with heavy cream. The egg adds structure—skip it and your rolls may spread. Crushed pineapple can be omitted, but the glaze won’t have that authentic Hawaiian touch.
Dough can rest in the fridge overnight for a slow rise. Baked rolls keep 3-4 days in an airtight container at room temp. Freeze for up to 3 months—reheat wrapped in foil at 350°F for 10-15 minutes. Always warm before serving.
Why You’ll Love This Recipe
- No-Fuss Dough: I throw everything in one bowl—flour, sugar, yeast, butter, egg—and let the mixer do the work.
- Sweet & Buttery: That hint of sugar and melted butter gives them a melt-in-your-mouth richness I can’t resist.
- Holiday Hero: They disappear faster than the turkey at Thanksgiving. Honestly, I make them for potlucks now too.
- Budget Stretch: A batch costs pennies compared to store-bought, and leftovers? Perfect for next-day sliders.
Step-by-Step Instructions for Hawaiian Rolls
Follow this proven method for consistently soft, sweet rolls with perfect texture every time.
Step 1: Proof the Yeast and Activate the Base
In a stand mixer bowl, combine the 0.75 cup Pineapple Juice and 0.25 cup Whole Milk warmed to 110°F. Sprinkle the 2.25 tsp Active Dry Yeast over the surface and let sit for 5 minutes until foamy. This confirms the yeast is active and ready to work.
Stir in 0.33 cup Granulated Sugar, 1 whole Large Egg, 0.5 cup Unsalted Butter (melted and cooled), 1 tsp Salt, and 1 tsp Vanilla Extract. The sugar feeds the yeast while the fat and egg enrich the dough for that signature Hawaiian roll tenderness.
Step 2: Develop the Dough to Ideal Consistency
Add 4 cups All-Purpose Flour and the 0.25 cup Crushed Pineapple (drained) to the wet mixture. Using the dough hook attachment, mix on low speed until combined, then increase to medium for 6-8 minutes until the dough is smooth and elastic.
The dough should pull away from the bowl sides but remain slightly tacky. If it sticks excessively, add flour 1 tablespoon at a time, but resist over-flouring—this affects the rolls’ softness. The crushed pineapple adds subtle texture and natural sweetness.
Step 3: First Rise Until Doubled in Volume
Transfer the dough to a lightly greased bowl, turning to coat all sides. Cover with a damp towel and let rise in a warm, draft-free place for 1 to 1.5 hours or until doubled in size. Proper proofing is visible when the dough springs back slowly when poked.
This first rise develops flavor and structure. I place my bowl near (not on) a preheating oven set to 200°F turned off—just enough warmth to accelerate the process without killing the yeast.
Step 4: Shape and Second Rise
Punch down the risen dough to release air. Turn onto a lightly floured surface and divide into 12 equal portions (about 3 ounces each). Roll each into a smooth ball and arrange in a greased 9×13-inch baking pan.
Cover and let rise again for 45-60 minutes until puffy. The rolls should nearly touch each other. This second rise ensures light, airy texture. Preheat your oven to 350°F during the last 15 minutes of rising.
Step 5: Bake to Golden Perfection
Bake the rolls for 20-25 minutes until golden brown on top and an internal temperature reaches 190°F. Rotate the pan halfway through for even browning if your oven has hot spots.
Remove from the oven and immediately brush the tops with 2 tablespoons of the melted butter (reserved from the 0.5 cup Unsalted Butter). This creates a glossy finish and adds richness. Let cool in the pan for 10 minutes before serving warm.
Pro Tips For Making Hawaiian Rolls
- Proof the Yeast: Always dissolve the active dry yeast in warm water (110°F) with a pinch of sugar first—I learned this the hard way after wasting flour on rolls that never rose.
- Soften the Butter: Take the unsalted butter out 30 minutes before mixing; cold butter won’t blend properly into the dough, and microwaving it just makes a mess.
- Avoid Overflouring: Resist the urge to add extra all-purpose flour while kneading; the dough should be slightly sticky, not dry, or your rolls will turn out dense.
- Brush with Butter: Right after baking, brush the rolls with melted unsalted butter—sounds simple, but it actually changes the outcome, giving them that glossy, rich finish.
Perfect Pairings for These Flavors
Holiday Meal Pairings
These rolls shine alongside roast turkey or glazed ham during holiday feasts. I love serving them warm with cranberry sauce for a sweet-savory combination that always disappears first. The pineapple notes complement rich, savory meats beautifully. 💛
Casual Dinner Sides
For weeknight meals, pair with honey butter and rotisserie chicken. The rolls soak up juices perfectly. I also serve them with sweet potato casserole or green bean almondine for a complete comfort meal.
Breakfast Delights
Use leftover rolls for French toast—dip in egg mixture with 1 tsp cinnamon and cook until golden. Or split and toast for breakfast sandwiches with scrambled eggs and Canadian bacon. The sweetness pairs wonderfully with morning flavors.
Beverage Pairings
Serve with cold milk or hot cocoa for a cozy treat. For adults, Moscato wine or Kona coffee enhances the pineapple notes. I always keep extra butter on hand for re-warming rolls throughout the meal. 🍷
Nutrition Facts
Frequently Asked Questions
Can I use fresh pineapple instead of juice?
Yes, blend fresh pineapple and strain to get 0.75 cup of juice. Use the leftover pulp in place of crushed pineapple for extra flavor.
Why did my rolls turn out dense?
Over-flouring or not letting the dough rise long enough are common culprits. Ensure your yeast is fresh and give it the full 1-1.5 hours for the first rise.
How do I make them ahead of time?
Shape the rolls and refrigerate overnight for a slow rise. Bake in the morning as directed, adding 5-10 minutes to the baking time.
Can I freeze the dough before baking?
Yes! After the first rise, punch down the dough, shape into rolls, and freeze in the pan. Thaw overnight in the fridge, then bake as usual.

- 6 Egg Cake Recipe with Oil: Light as Air With Buttery Moisture - October 4, 2026
- 4 Bean Casserole Recipe: One-Pan Heartiness With Smoky Paprika Depth - October 4, 2026
- 3-Ingredient Keto Mug Cake Recipe: Microwave Magic in 2 Minutes - October 4, 2026