
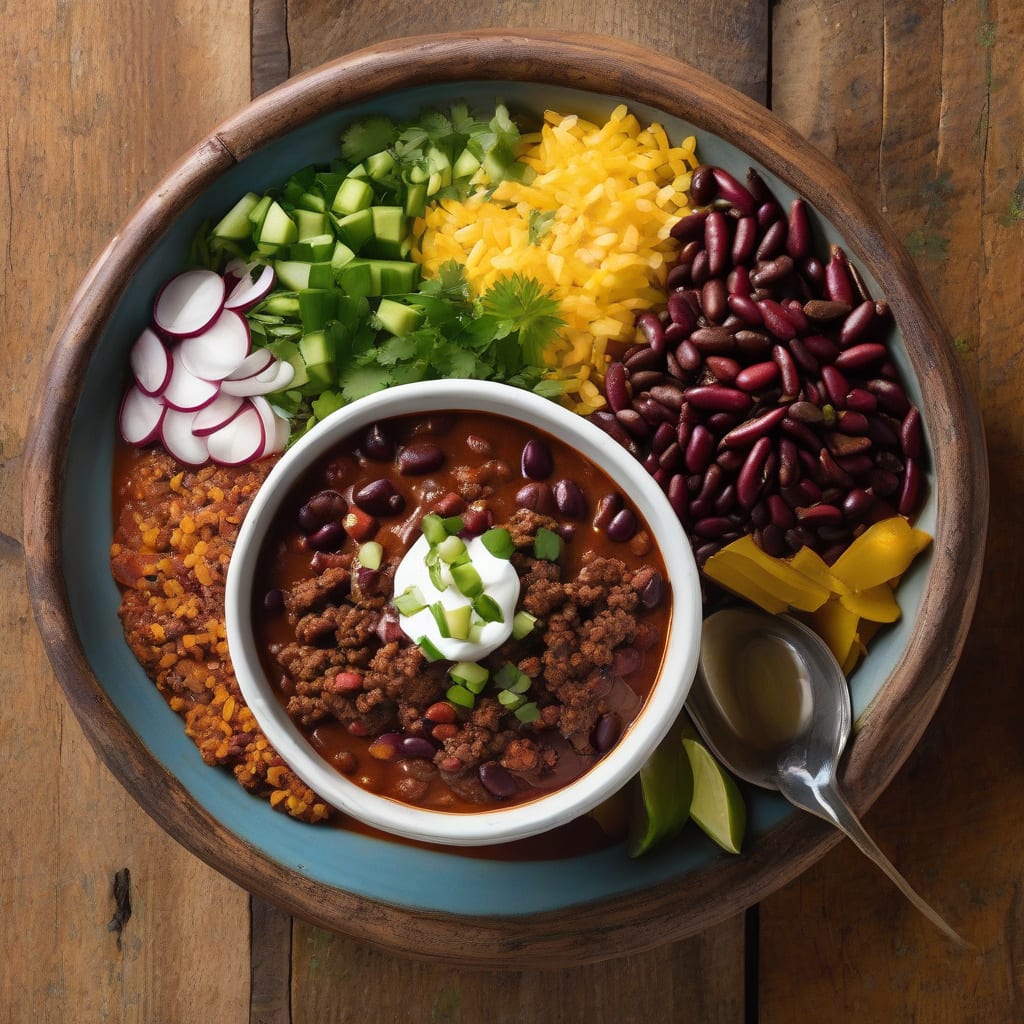
There’s nothing like a warm bowl of chili to bring comfort on a chilly day. 🔥 This Heartland Chili recipe delivers a hearty blend of ground beef, beans, and spices that simmer together to create a rich, satisfying meal.
Ready in under an hour, this chili is perfect for weeknight dinners or meal prep. The combination of tender beef and perfectly cooked beans in a thick, flavorful broth is sure to become a family favorite.
Ingredients for Heartland Chili
Hearty ingredients come together in this comforting chili recipe, perfect for any meal.
| Ingredient | Amount | Notes |
|---|---|---|
| Ground Beef 🥩 | 1 ½ lb | 80/20 lean to fat ratio |
| Onion 🧅 | 1 whole | Yellow or white, diced |
| Garlic Cloves 🧄 | 3 cloves | Minced, not pressed |
| Red Bell Pepper 🌶️ | 1 whole | Diced, any color works |
| Canned Kidney Beans 🌽 | 1 can | Drained and rinsed |
| Canned Black Beans 🌽 | 1 can | Drained and rinsed |
| Canned Diced Tomatoes 🍅 | 1 can | With juice, not drained |
| Chili Powder 🌿 | 2 tbsp | High-quality, not pre-mixed |
| Ground Cumin 🌿 | 1 tsp | Freshly ground preferred |
| Paprika 🌶️ | 1 tsp | Smoked or sweet |
| Cayenne Pepper 🔥 | ¼ tsp | Adjust to heat preference |
| Salt 🧂 | 1 tsp | Kosher or sea salt |
| Black Pepper 🌶️ | ½ tsp | Freshly ground preferred |
| Beef Broth 🍜 | 2 cups | Low-sodium, or homemade |
| Tomato Paste 🍅 | 2 tbsp | Concentrated, not sauce |
The ground beef matters here. 80/20 lean to fat ratio gives the best flavor and texture. Most grocery stores carry it, but if you’re at Whole Foods, look for their grass-fed option. The chili powder is another key player—Penzeys has excellent quality, but any good chili powder works.
No red bell pepper? Green or yellow works just as well. Want more heat? Add more cayenne or throw in some diced jalapeños. The beans can be swapped—pinto or navy are great alternatives. If you’re using canned beans, make sure to drain and rinse them well.
This chili reheats beautifully and gets better with time. Store it in the fridge for up to 5 days or freeze for 3 months. When reheating, add a splash of broth if it’s too thick. I like to portion it into containers for easy lunches throughout the week.
❤️
Why You’ll Love This Recipe
- I’ll be real: I love that this recipe makes a big batch, so I can enjoy leftovers for days – and it’s just as good reheated.
- Quick Prep: I can throw this heartland chili recipe together in under 30 minutes, and it’s a total lifesaver on busy weeknights.
- Flavor Bomb: The combination of ground beef, garlic cloves, and red bell pepper creates a rich, depth of flavor that’s ridiculously good.
- Crowd Pleaser: This chili is perfect for game day gatherings or family potlucks – it’s easy to scale up and feeds a crowd without breaking the bank.
Step-by-Step Instructions for Heartland Chili
Follow these straightforward steps to create a rich, satisfying chili that serves 4 people.
🍳 Step 1: Brown the Ground Beef
Heat a large Dutch oven or heavy pot over medium-high heat. Add the 1.5 lb Ground Beef and cook, breaking it up with a spoon, until it’s browned and fully cooked, about 8-10 minutes. I like to use a mix of breaking up the meat and letting it sear for a minute or two to get that perfect texture.
Once the beef is browned, drain off any excess fat, leaving about 2 tablespoons in the pot. This helps maintain the rich flavor without making the chili greasy. If you’re concerned about the fat content, you can drain it all and add a bit of oil back in.
👨🍳 Step 2: Soften the Vegetables
Add the 1 whole Onion and 1 whole Red Bell Pepper to the pot. Cook over medium heat, stirring occasionally, until they’re tender and lightly browned, about 8 minutes. You’ll notice the onions becoming translucent and the peppers softening—that’s when you know they’re ready.
Stir in the 3 cloves Garlic Cloves and cook for another 1 minute until fragrant. Be careful not to burn the garlic, as it can quickly become bitter. If you notice it browning too quickly, reduce the heat slightly.
🍳 Step 3: Add Spices and Simmer
Stir in the 2 tbsp Chili Powder, 1 tsp Ground Cumin, 1 tsp Paprika, and 0.25 tsp Cayenne Pepper. Cook for 1-2 minutes until the spices are fragrant. This step is crucial for developing the depth of flavor in your chili.
Add the 1 can Canned Diced Tomatoes, 2 cups Beef Broth, 2 tbsp Tomato Paste, 1 tsp Salt, and 0.5 tsp Black Pepper. Stir well to combine, then bring the mixture to a simmer.
⏰ Step 4: Add Beans and Finish
Reduce the heat to low and let the chili simmer, covered, for 30 minutes, stirring occasionally. This allows the flavors to meld together beautifully.
Add the 1 can Canned Kidney Beans and 1 can Canned Black Beans, both drained and rinsed. Continue to simmer for another 15-20 minutes until the flavors have fully integrated and the chili has thickened slightly. Taste and adjust the seasoning as needed.
🍽️ Step 5: Serve and Enjoy
Ladle the chili into bowls and serve hot. You can garnish it with your favorite toppings, such as shredded cheese, sour cream, or diced onions. This hearty chili is perfect for a comforting meal on a chilly day.
For the best results, let the chili rest for 10-15 minutes before serving. This allows the flavors to settle and the chili to thicken further, making it even more enjoyable.
👨🍳
Pro Tips For Making Heartland Chili
- Brown the Beef: Don’t rush browning the ground beef – take your time to get a good crust on it, breaking it up into small pieces as it cooks. This step actually changes the outcome by adding depth to your heartland chili.
- Soften the Onions: Cook the onions until they’re translucent and starting to caramelize before adding the garlic – this prevents the garlic from burning and gives your chili a richer flavor. I learned this the hard way—after burning three batches, I finally figured out that patience is crucial.
- Don’t Overcook: Resist the urge to simmer your chili for hours – after about an hour, the flavors meld together and the beef is tender. Letting it go longer can make the beef dry and the flavors muddy.
- Prep Your Beans: Rinse those canned kidney beans thoroughly to get rid of excess sodium and the liquid that can give your chili an off-flavor. It makes a real difference in the overall taste, and your future self will thank you.
Pro Cooking Tips for This Recipe
Browning Techniques Matter
Getting a good sear on your ground beef is crucial for developing deep flavor in your chili. I use medium-high heat and let the meat cook undisturbed for about 1-2 minutes between stirs. This creates those perfect browned bits that add complexity. 🔥
Layering Flavors
Don’t just dump all the ingredients in at once. Start with aromatics like onion and garlic, then add spices, followed by liquids. Each layer builds on the last, creating a rich, complex flavor profile that makes your chili stand out.
Spice Blend Secrets
Using high-quality chili powder makes a huge difference. I prefer brands like Penzeys for their depth and complexity. Don’t be afraid to adjust the heat level with cayenne pepper to suit your taste. Start with ¼ tsp and add more if needed.
Simmering Techniques
A slow, gentle simmer is key to letting all the flavors meld together. Keep your chili at a low simmer for at least 30 minutes, stirring occasionally. This patience pays off in a thicker, more flavorful chili.
Bean Timing
Add your canned beans toward the end of cooking so they don’t get mushy. I add them after 30 minutes of simmering and let them cook for another 15-20 minutes. This keeps them tender but intact.
Resting for Better Flavor
Letting your chili rest for 10-15 minutes before serving allows the flavors to settle and the chili to thicken further. This simple step makes a noticeable difference in the final dish, making it even more enjoyable.
Nutrition Facts
320kcal
Frequently Asked Questions
Can I make this chili recipe in a slow cooker?
Yes, you can easily adapt this recipe for a slow cooker. Brown the ground beef and soften the vegetables in a pan, then transfer everything to the slow cooker and cook on low for 6-8 hours or high for 3-4 hours.
How can I thicken my chili if it’s too thin?
If your chili is too thin, you can simmer it uncovered for 10-15 minutes to reduce the liquid. Alternatively, mix 1 tablespoon of cornstarch with a little water and stir it in. Let it simmer for a few more minutes until it thickens.
Can I freeze leftover chili?
Absolutely! This chili freezes beautifully. Let it cool completely, then transfer it to airtight containers or freezer bags. It will keep in the freezer for up to 3 months. When you’re ready to eat it, thaw it overnight in the refrigerator and reheat it on the stovetop or in the microwave.
What can I serve with this chili?
This hearty chili is great on its own or paired with simple sides like cornbread, rice, or a fresh green salad. You can also top it with your favorite garnishes, such as shredded cheese, sour cream, or diced onions.

- 6 Egg Cake Recipe with Oil: Light as Air With Buttery Moisture - October 4, 2026
- 4 Bean Casserole Recipe: One-Pan Heartiness With Smoky Paprika Depth - October 4, 2026
- 3-Ingredient Keto Mug Cake Recipe: Microwave Magic in 2 Minutes - October 4, 2026