
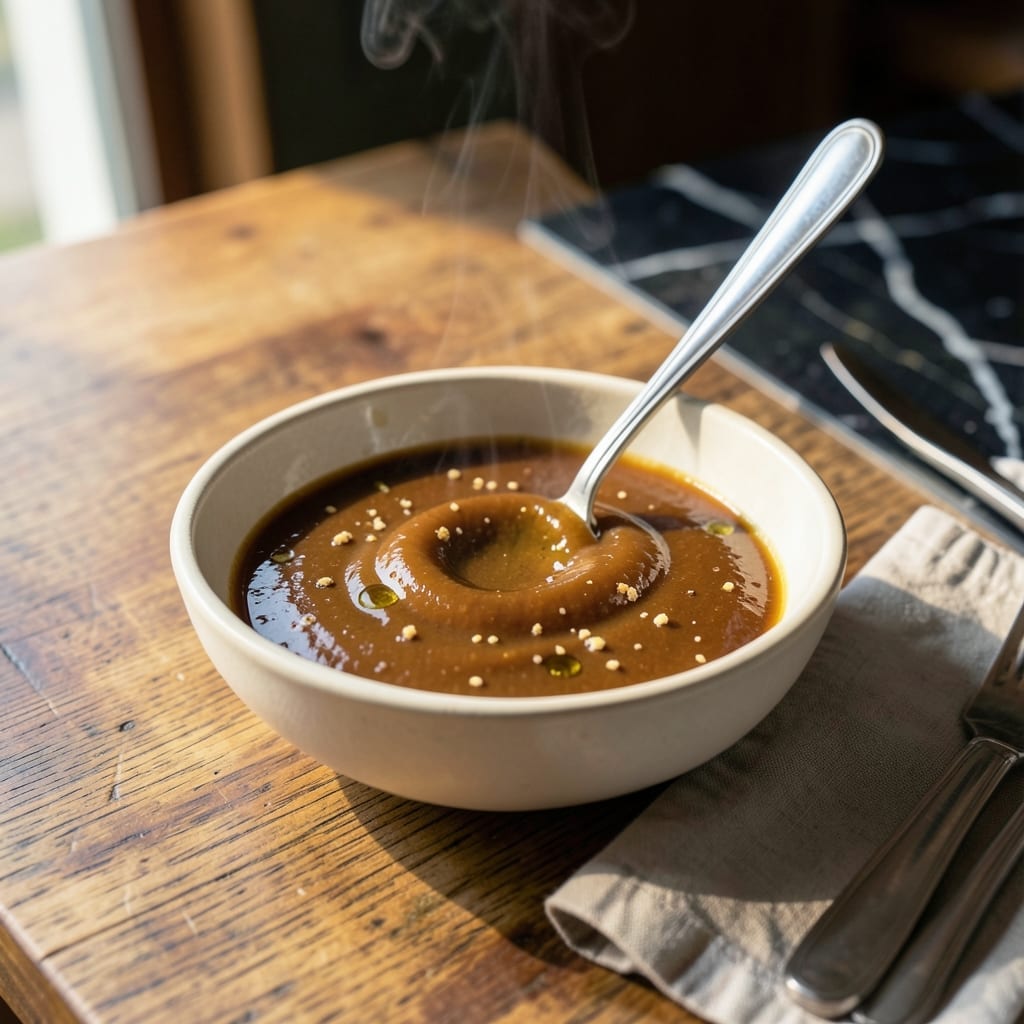
This professional-grade sauce brings authentic hibachi flavor to your home kitchen without the complexity.
The simple blend of soy sauce, butter, and a touch of sweetness creates that signature sweet umami glaze found in Japanese steakhouses. I’ve streamlined the process to use just 5 ingredients you likely already have.
What results is a versatile sauce that works beautifully on grilled meats, vegetables, or rice. The balance of salty, sweet, and savory makes it addictive on everything it touches.
Make a batch and keep it on hand for quick weeknight meals. This recipe delivers on its promise of being both easy and professional-quality.
Ingredients for Hibachi Sauce Recipe Easy
Five ingredients. One sauce. That hibachi magic you crave.
| Ingredient | Amount | Notes |
|---|---|---|
| Soy Sauce 🥢 | ½ cup | Low-sodium preferred for balance |
| Unsalted Butter 🧈 | ½ cup | Melted for smooth emulsion |
| Granulated Sugar 🍚 | 2 tbsp | White sugar for neutral sweetness |
| Garlic Powder 🧄 | 1 tsp | Fine powder for even distribution |
| Onion Powder 🧅 | 1 tsp | Complements the garlic depth |
| Rice Vinegar 🍶 | 1 tbsp | Adds subtle tang to balance |
| Sesame Oil 🫒 | 1 tsp | Toasted for authentic nutty aroma |
The soy sauce is the backbone here—Kikkoman or San-J are my go-tos. Unsalted butter lets you control the salt level (trust me on this). I grab mine from Trader Joe’s or whatever’s on sale. The garlic and onion powders might seem small, but they’re doing heavy lifting for that restaurant-quality depth. Don’t skip the rice vinegar; it’s the secret to balancing all that richness.
No rice vinegar? Apple cider vinegar works in a pinch. Want it sweeter? Swap sugar for honey or maple syrup (same amount). If you’re avoiding dairy, vegan butter like Earth Balance melts the same. The sesame oil is optional but adds that signature nutty finish—toasted sesame oil only for the best flavor.
Keeps in the fridge for 1 week in an airtight container. The butter will solidify, so warm it gently before using. Freeze in ice cube trays for 3 months if you want to make ahead.
Why You’ll Love This Recipe
- 5-Minute Magic: I dump everything in one bowl—soy sauce, butter, sugar, and those powders—and it’s ready before the rice finishes cooking.
- Umami Bomb: The butter mellows the soy while the garlic and onion powders pack that savory punch I crave every single time.
- Weeknight MVP: We drizzle it on steak, shrimp, even veggies—honestly, it turns whatever’s in the fridge into takeout-night vibes.
- Pantry Stretch: Five ingredients I always have on hand, and it costs pennies compared to ordering in.
Step-by-Step Instructions for Hibachi Sauce
Simple, foolproof method that delivers restaurant-quality sauce in minutes.
Step 1: Melt and Combine the Base
In a small saucepan over low heat, melt the 0.5 cup Unsalted Butter completely. I use low heat to prevent the butter from separating or browning—you want it just melted and smooth.
Once melted, immediately add the 0.5 cup Soy Sauce and 2 tbsp Granulated Sugar. Stir continuously with a whisk or wooden spoon until the sugar fully dissolves. This usually takes 1-2 minutes. You’ll see the mixture transform from grainy to glossy as the sugar incorporates.
Watch for tiny sugar crystals at the bottom of the pan—if you spot them, keep stirring until they’re completely gone. The mixture should look slightly darker as the soy sauce and butter begin to emulsify.
Step 2: Incorporate the Aromatics
Add the 1 tsp Garlic Powder and 1 tsp Onion Powder to the saucepan. These fine powders will dissolve almost immediately, but stir for another 30 seconds to ensure even distribution throughout the liquid.
Real talk: fresh garlic or onion would burn at this low temperature and create bitter notes, but the powdered versions integrate seamlessly. The powder’s fine texture is crucial here—coarser spices won’t blend as smoothly into the finished sauce.
At this point, the sauce should have a rich, caramel-like color from the soy and sugar combination. The aroma will be deeply savory with just a hint of sweetness.
Step 3: Balance with Acid and Finish
Remove the saucepan from heat and stir in the 1 tbsp Rice Vinegar and 1 tsp Sesame Oil. The vinegar will cut through the richness of the butter and soy, adding that signature hibachi tang.
The sesame oil brings the authentic nutty aroma that makes this sauce instantly recognizable. I always use toasted sesame oil here—it has a much more pronounced flavor than the untoasted variety. Stir for 15-20 seconds until everything is fully incorporated.
Let the sauce cool for 2-3 minutes before using. It will thicken slightly as it cools, coating the back of a spoon with a glossy sheen. The finished sauce should be smooth, with no visible separation between the butter and other ingredients.
Step 4: Test and Adjust Consistency
Dip a spoon into the sauce and let it drip off—it should coat the spoon evenly but still flow freely. If it’s too thick, return it to low heat and whisk in 1-2 teaspoons of warm water until it reaches your desired consistency.
Taste and adjust if needed. The balance should be sweet, salty, and slightly tangy with that unmistakable sesame finish. If it needs more sweetness, a pinch of extra granulated sugar can be whisked in while warm.
This sauce keeps beautifully in the fridge for up to 1 week, though I doubt it’ll last that long. The flavors actually deepen after a day in the refrigerator, making it even more delicious for your next hibachi night.
Pro Tips For Making Hibachi Sauce Recipe Easy
- Melt Butter Slowly: Use low heat to melt the butter first—cranking it too high can cause the sugar to separate or burn. I learned this the hard way after scrapping a batch that turned grainy.
- Dissolve Sugar Completely: Stir the sugar into the warm butter until fully dissolved before adding soy sauce. Sounds tedious, but it prevents that weird gritty texture in the finished sauce.
- Skip the Salt: Soy sauce is already salty, so resist the urge to add extra salt. After ruining a batch by oversalting, I now taste before adjusting.
- Use Fresh Powders: Garlic and onion powders lose potency over time. If yours have been in the cupboard for a year, replace them—it actually changes the outcome.
Wine and Beer Pairings for This Dish
Crisp Beer Pairings
Light lagers like Sapporo or Asahi are my top picks. Their clean, crisp profiles cut through the sauce’s richness without overpowering the umami. Serve ice-cold in frosted mugs for the full experience.
Bold Beer Options
For craft beer lovers, try a Japanese rice lager or a German pilsner. The subtle sweetness of a Kölsch complements the sauce beautifully. These beers have enough body to stand up to the bold flavors.
White Wine Choices
An off-dry Riesling works wonders with this sauce. The slight sweetness mirrors the sauce while the acidity cleanses your palate. Dr. Loosen Blue Slate is a fantastic choice. 🍷
Sparkling Wine Surprise
Prosecco or other dry sparkling wines add a refreshing contrast. The bubbles lift the sauce’s richness off your tongue. I love La Marca Prosecco for its consistent quality and affordable price point.
Non-Alcoholic Pairings
For non-drinkers, try ginger beer or Sparkling Yuzu from San Pellegrino. Their effervescence and citrus notes pair surprisingly well with the sauce’s sweet-savory profile.
Temperature Matters
Always serve your pairings well-chilled. The contrast between cold drinks and warm hibachi dishes enhances both. I keep my beer at 38-40°F and white wine at 45-50°F for optimal enjoyment. 💫
Nutrition Facts
Frequently Asked Questions
Can I use salted butter instead?
I’d recommend sticking with unsalted to control the salt level. If using salted, reduce the soy sauce by 1-2 tablespoons to compensate. Taste as you go to avoid over-salting.
What can I substitute for rice vinegar?
Apple cider vinegar or white vinegar work in a pinch. Use the same amount, but add a pinch of sugar to mimic rice vinegar’s mild sweetness.
How long does this sauce last in the fridge?
It stays fresh for 1 week in an airtight container. The butter will solidify, so warm gently before using. For longer storage, freeze in ice cube trays for up to 3 months.
Why does my sauce look separated?
This happens if the butter cools too quickly. Reheat gently while whisking to re-emulsify. To prevent it, keep the heat low and stir constantly during prep.

- 6 Egg Cake Recipe with Oil: Light as Air With Buttery Moisture - October 4, 2026
- 4 Bean Casserole Recipe: One-Pan Heartiness With Smoky Paprika Depth - October 4, 2026
- 3-Ingredient Keto Mug Cake Recipe: Microwave Magic in 2 Minutes - October 4, 2026