
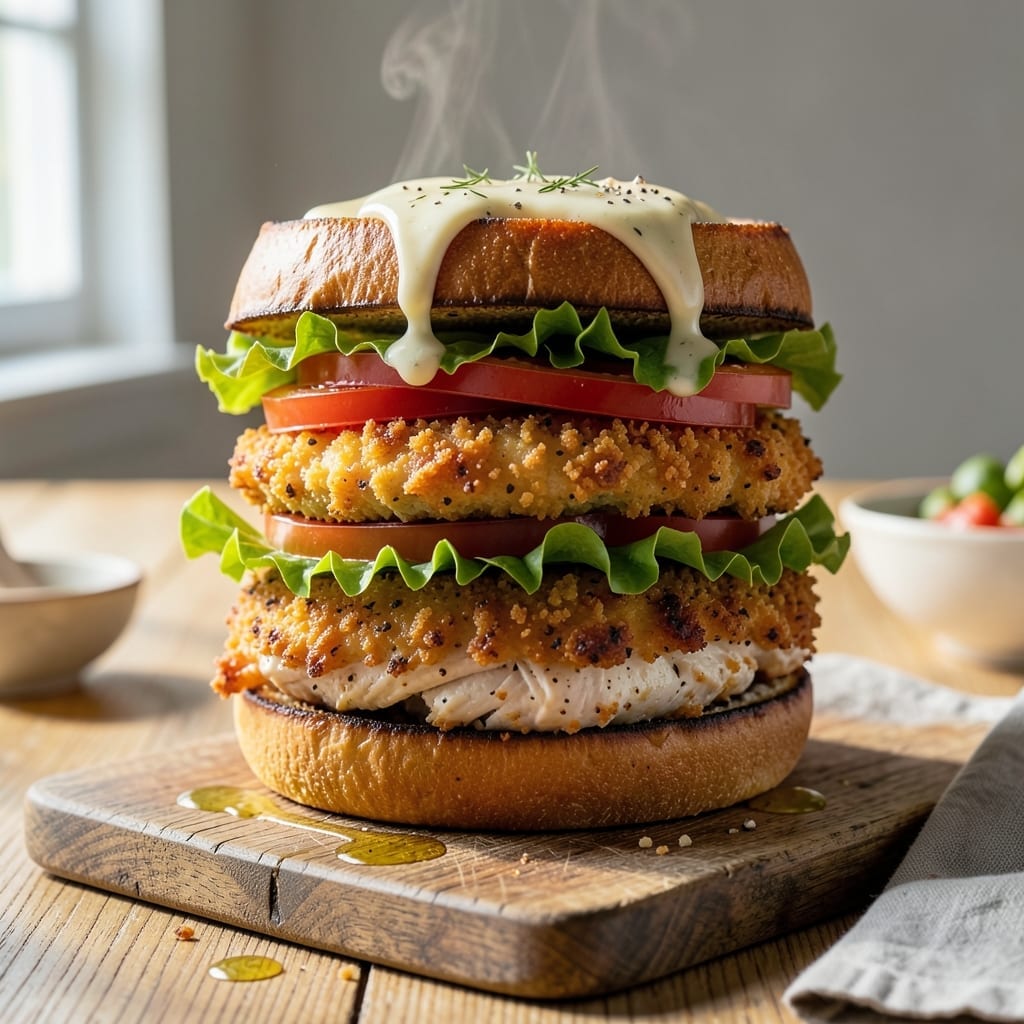
This homemade sandwich starts with a simple but powerful technique: brining the chicken in pickle juice for maximum flavor and moisture. The acid in the brine tenderizes the meat while adding that signature tang.
After brining, the chicken is coated and fried to a golden crisp, then layered with pickles and sauce on a soft bun. The result is a sandwich with juicy, flavorful chicken and a satisfying crunch in every bite.
Ingredients for Homemade Chicken Sandwich Recipe Pickle Juice
A handful of pantry staples plus brining magic create this crispy, tangy sandwich masterpiece.
| Ingredient | Amount | Notes |
|---|---|---|
| Boneless Skinless Chicken Breasts 🍗 | 1 ½ lb | Pounded to even thickness |
| Dill Pickle Juice 🥒 | 2 cups | For brining chicken |
| All-Purpose Flour 🌾 | 1 ½ cups | For dredging chicken |
| Large Eggs 🥚 | 2 whole | Beaten for breading |
| Buttermilk 🥛 | ½ cup | For crispy coating |
| Breadcrumbs 🍞 | 1 cup | Panko for extra crunch |
| Vegetable Oil 🫒 | 2 cups | For frying chicken |
| Dill Pickle Chips 🥒 | 1 cup | For sandwich assembly |
| Mayonnaise 🥄 | ½ cup | For sandwich sauce |
| Yellow Mustard 🟡 | 2 tbsp | For tangy flavor |
| Potato Buns 🍔 | 4 whole | Soft for sandwiches |
| Salt 🧂 | 1 tsp | Kosher or sea salt |
| Black Pepper 🌶️ | ½ tsp | Freshly ground preferred |
| Paprika 🌶️ | 1 tsp | For seasoning breading |
| Garlic Powder 🧄 | 1 tsp | For enhanced flavor |
The pickle juice brine is non-negotiable here. Use a high-quality dill pickle juice—Vlasic or Claussen work well—with visible spices floating in it, which means it’s packed with flavor. For the chicken, air-chilled breasts from Whole Foods or Trader Joe’s yield the juiciest results. Pound them to an even ½-inch thickness so they cook uniformly and stay moist. The breadcrumbs should be fresh (check the date) for maximum crunch.
No buttermilk on hand? Whole milk with a splash of vinegar or lemon juice works in a pinch. For a gluten-free version, swap the flour and breadcrumbs for cornstarch and crushed cornflakes. If you dislike mayonnaise, Greek yogurt adds tang without the richness. The pickles can be bread-and-butter if you prefer a sweeter crunch, but dill is traditional.
The brined chicken can sit in the fridge for up to 24 hours before cooking. Fry in batches and keep warm in a 200°F oven while assembling. Leftovers (if any) keep 3-4 days in the fridge—reheat in the oven to revive crispiness.
Why You’ll Love This Recipe
- Under 30 Minutes: I can have crispy, golden chicken sandwiches ready before the oven even finishes preheating my old casserole.
- Tangy Crunch: The dill pickle juice soaks into the chicken, giving every bite that briny kick I crave.
- Meal Prep Hero: I make a double batch on Sunday and stack the cooked cutlets—perfect for sandwiches all week.
- Pantry Friendly: Between the flour, eggs, and pickle juice I always have, this costs me almost nothing to throw together.
Step-by-Step Instructions for Pickle Juice Brined Chicken Sandwich
This method ensures maximum crispiness and tangy flavor in every bite of your sandwich.
Step 1: Brine the Chicken in Pickle Juice
Begin by pounding the boneless skinless chicken breasts to an even ½-inch thickness using a meat mallet. This ensures uniform cooking and optimal tenderness. Place the pounded chicken in a bowl or resealable bag.
Pour the 2 cups dill pickle juice over the chicken, making sure it is fully submerged. Refrigerate and let it brine for at least 4 hours, or preferably overnight. The acidity in the pickle juice tenderizes the meat while infusing it with a tangy flavor that pairs perfectly with the crispy coating.
Step 2: Prepare the Breading Station
Set up a breading station with three shallow dishes. In the first dish, combine the 1.5 cups all-purpose flour, 1 tsp salt, ½ tsp black pepper, 1 tsp paprika, and 1 tsp garlic powder. Mix well to distribute the seasonings evenly.
In the second dish, whisk together the 2 whole large eggs and ½ cup buttermilk until fully combined. In the third dish, place the 1 cup breadcrumbs. This three-step process ensures a crispy, well-seasoned coating that adheres perfectly to the chicken.
Step 3: Bread and Fry the Chicken
Remove the chicken from the brine and pat it dry with paper towels. This step is crucial—excess moisture will prevent the breading from sticking. Dredge each piece in the seasoned flour, shaking off any excess, then dip it into the egg and buttermilk mixture, allowing any excess to drip off.
Finally, press the chicken into the breadcrumbs, ensuring it is fully coated on all sides. Heat the 2 cups vegetable oil in a large, heavy-bottomed skillet over medium-high heat to 350°F. Fry the breaded chicken for 4-5 minutes per side or until golden brown and the internal temperature reaches 165°F. Transfer to a wire rack to drain excess oil.
Step 4: Assemble the Sandwiches
In a small bowl, mix the ½ cup mayonnaise and 2 tbsp yellow mustard to create a tangy sauce. Spread a generous amount of this mixture on both halves of the 4 whole potato buns.
Place a fried chicken breast on the bottom half of each bun. Top with dill pickle chips, then add the top bun. Press gently to compress the sandwich slightly, ensuring all the flavors meld together. Serve immediately while the chicken is still crispy and hot.
Pro Tips For Making Homemade Chicken Sandwich Recipe Pickle Juice
- Brine Overnight: Soak the chicken breasts in dill pickle juice for at least 4 hours—I learned this the hard way when my first batch was bland, but now it’s juicy and packed with that tangy flavor every time.
- Double-Dredge for Crunch: Dip the chicken in flour, then buttermilk-egg wash, then back in flour. Sounds like a hassle, but it creates that extra-crispy crust that holds up to the sandwich.
- Skip Cold Chicken: Let the brined chicken sit at room temperature for 15 minutes before frying—cold chicken lowers the oil temp and gives you a greasy, uneven cook.
- Use the Leftover Juice: Mix a splash of the leftover pickle juice into your buttermilk-egg wash. It adds a little zing that ties the whole sandwich together.
Pro Cooking Tips for This Dish
💡 Brine Like a Pro
Soak your chicken in pickle juice for at least 4 hours—overnight for maximum flavor. The acidity tenderizes the meat while adding that tangy zing. For extra crispiness, pat the chicken thoroughly dry before breading to ensure a perfect sear. 🌡️
🔥 Perfect the Crisp
Use a double-dredge method: dip in flour, then egg wash, then back in flour for a thicker, crunchier crust. Fry in 350°F oil until golden (about 4-5 minutes per side). For an air fryer, spritz with oil and bake at 400°F for 12-15 minutes, flipping halfway. ✨
🎯 Rest for Juiciness
Let the fried chicken rest on a wire rack for 5-10 minutes after cooking. This keeps it crispy while allowing the juices to redistribute. Skip the paper towels—they trap steam and make the coating soggy. 🌟
⏰ Time Your Assembly
Toast your buns lightly and assemble the sandwich right before serving to prevent sogginess. Layer pickles, sauce, and lettuce under the chicken to act as a barrier against moisture. This keeps every bite as fresh as the first! 💡
Nutrition Facts

- 6 Egg Cake Recipe with Oil: Light as Air With Buttery Moisture - October 4, 2026
- 4 Bean Casserole Recipe: One-Pan Heartiness With Smoky Paprika Depth - October 4, 2026
- 3-Ingredient Keto Mug Cake Recipe: Microwave Magic in 2 Minutes - October 4, 2026