
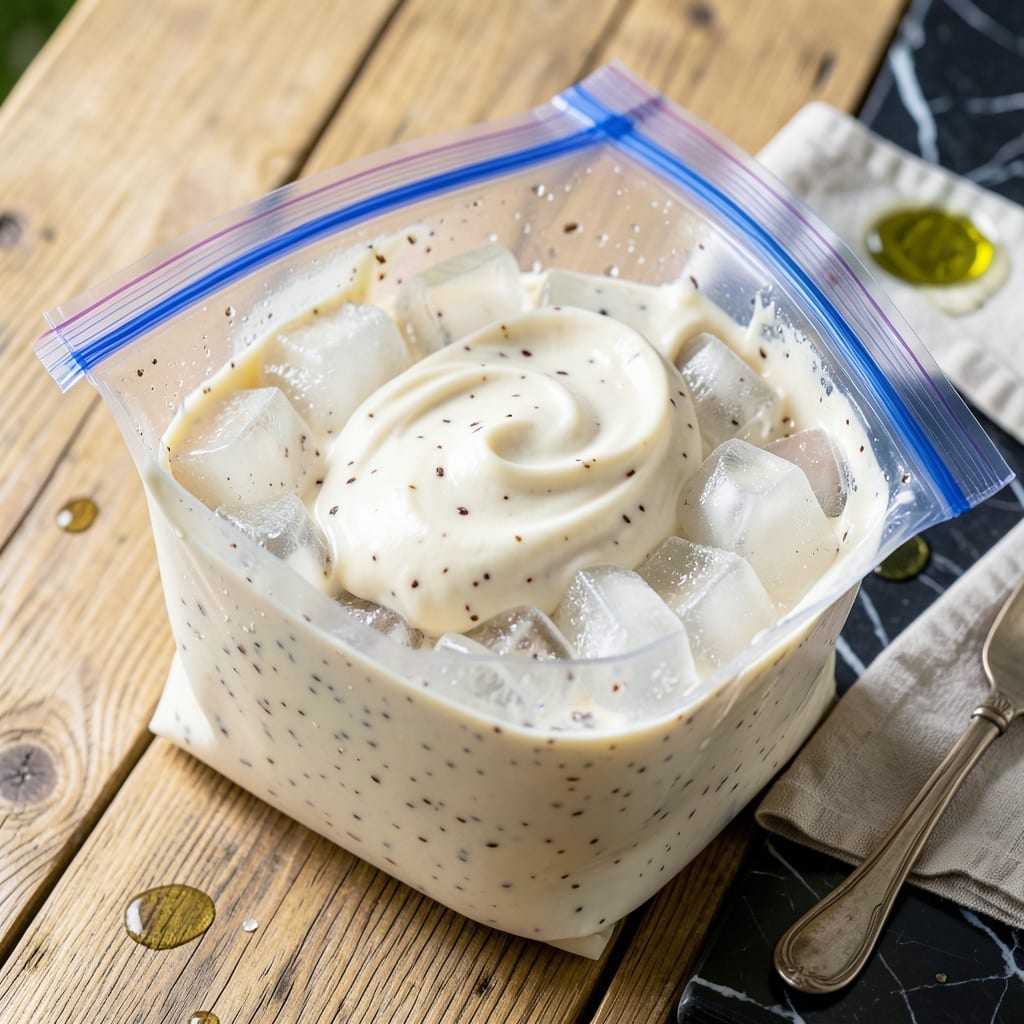
This hands-on method proves you don’t need a machine to make creamy ice cream at home. A simple zip-top bag, some ice, and a little elbow grease create a smooth frozen treat in minutes.
Perfect for science experiments or summer fun, this technique lets you customize flavors while learning the basics of ice cream making. The result is homemade goodness without the fuss.
Ingredients for Homemade Ice Cream Recipe in a Bag
Basic pantry staples plus a little ice create this smooth frozen treat in minutes.
| Ingredient | Amount | Notes |
|---|---|---|
| Heavy Cream 🥛 | 1 cup | Full-fat for creaminess |
| Whole Milk 🥛 | 1 cup | Cold for best texture |
| Granulated Sugar 🍚 | ¼ cup | Adjust to taste preference |
| Vanilla Extract 🌿 | 1 tsp | Pure for best flavor |
| Table Salt 🧂 | ¼ tsp | Enhances all flavors |
| Ice Cubes ❄️ | 4 cups | Crushed works best |
| Rock Salt 🧂 | ½ cup | Lowers freezing point |
| Zip-Top Freezer Bag 🛍️ | 1 piece | Gallon size for mixing |
| Zip-Top Sandwich Bag 🛍️ | 1 piece | For holding ice |
| Optional Mix-Ins 🍫 | ½ cup | Chocolate chips, sprinkles, fruit |
The dairy is non-negotiable for that creamy texture. Whole milk and heavy cream are must-haves—don’t try to cut corners with low-fat. For the ice, crushed works best (a rolling pin on a bag of cubes does the trick). Rock salt is key—Morton’s at any grocery store will do. The bags matter too: gallon-size freezer bags for the cream mixture, sandwich bags for the ice. Don’t skimp on quality here.
No vanilla extract? A vanilla bean scraped works even better. Want to skip the sugar? Honey or maple syrup at the same amount. The mix-ins are where you get creative—chocolate chips, crushed cookies, fresh berries all work. If you’re worried about the bags leaking, double-bag the cream mixture. It’s a small hassle for zero mess.
This is best eaten right away, but you can freeze leftovers. They’ll keep for 1 week in an airtight container, though the texture softens a bit. The salt and ice are reusable for 2-3 batches if you refresh with new ice. Keep the bags for next time—they’re perfect for this method.
Why You’ll Love This Recipe
- No Churn Needed: I just shake the bag for 5 minutes and—boom—creamy vanilla ice cream with zero special equipment.
- Velvety Vanilla: The heavy cream and real vanilla extract make it taste like the good stuff from the parlor, not the freezer aisle.
- Kid Friendly Fun: My nieces beg to make this at sleepovers—it’s their activity and dessert in one.
- Budget Treat: A pint of store-bought costs more than what I spend on cream, milk, and sugar for a double batch.
Step-by-Step Instructions for Homemade Ice Cream in a Bag
This no-churn method delivers creamy, dreamy ice cream in minutes with just a little shaking.
Step 1: Combine the Ice Cream Base
In the zip-top freezer bag, pour in the 1 cup Heavy Cream, 1 cup Whole Milk, 0.25 cup Granulated Sugar, 1 tsp Vanilla Extract, and 0.25 tsp Table Salt. Press out excess air and seal tightly—double-check the closure to prevent leaks.
Squish the bag gently with your hands to combine all the ingredients until the sugar fully dissolves. You’ll feel the mixture become smoother as you work it. If using 0.5 cup Optional Mix-Ins, add them now and distribute evenly throughout the liquid.
Step 2: Prepare the Ice Bath
Fill the zip-top sandwich bag halfway with the 4 cups Ice Cubes. Then add the 0.5 cup Rock Salt on top. The rock salt lowers the freezing point of the ice, which is critical for turning your liquid base into ice cream.
Seal the sandwich bag securely, pressing out as much air as possible. The ice and salt mixture should be packed tightly but still allow the freezer bag to move within it.
Step 3: Shake Vigorously Until Thickened
Place the sealed freezer bag containing your ice cream base into the sandwich bag with ice and salt. Seal the outer bag as well, ensuring no water can leak in. Wrap the whole thing in a towel for insulation and grip.
Shake continuously for 10-15 minutes. You’ll notice the mixture start to thicken—keep going until it reaches a soft-serve consistency. The colder your initial ingredients, the faster this process will work.
Step 4: Check Texture and Adjust
After 15 minutes, open the outer bag and check the texture of your ice cream. It should be firm but still slightly pliable. If it’s too soft, reseal both bags and shake for another 5 minutes.
If the ice has mostly melted, replace it with fresh 4 cups Ice Cubes and 0.5 cup Rock Salt, then continue shaking. This ensures the temperature stays low enough to freeze the mixture properly.
Step 5: Serve Immediately or Freeze for Firmer Texture
Once thickened to your liking, remove the freezer bag from the ice bath. Open it carefully and scoop the ice cream into bowls for immediate serving. It will have a soft, creamy texture perfect for eating right away.
For a firmer consistency, transfer the ice cream to a lidded container and freeze for 2-4 hours. This step is optional but recommended if you prefer a more traditional scoopable texture. Serve with additional Optional Mix-Ins on top if desired.
Pro Tips For Making Homemade Ice Cream Recipe In A Bag
- Chill the Cream First: I learned this the hard way—using room temperature heavy cream makes the ice cream take forever to set in the bag. Stick it in the fridge for at least 2 hours before mixing.
- Double Bag It: Sounds weird, but it works: put your ice cream bag inside a second zip-top bag to prevent leaks when you’re shaking it in the salt-ice mixture.
- Use Fine Salt: Table salt is fine, but if you have kosher salt, grind it a bit—larger grains don’t dissolve as well in the ice and slow down the freezing.
- Shake for 10 Minutes: After burning through a few batches that turned out soupy, I finally figured out you need a full 10 minutes of vigorous shaking to get that perfect creamy texture.
Best Sauces and Condiments for This homemade ice cream recipe in a bag
Spicy Options
For those who love a kick, try drizzling sriracha caramel sauce over your homemade ice cream in a bag. The sweet and spicy combo is a crowd-pleaser! You can find this sauce in specialty stores or make your own by mixing caramel with a dash of sriracha. Another great option is chocolate-chili sauce, which adds depth with a hint of heat. Store-bought versions like Stonewall Kitchen’s Chocolate Chili Sauce work well, but a homemade blend of melted chocolate, chili powder, and cream is just as easy.
Sweet and Tangy
Balance the richness of your ice cream with a tangy twist! Raspberry coulis is a classic choice—simply blend fresh or frozen raspberries with sugar and strain for a smooth texture. For a store-bought shortcut, Smucker’s Raspberry Syrup does the trick. If you prefer citrus, a lemon curd drizzle adds a zesty, creamy contrast. Homemade versions are simple to whip up, but brands like Dickinson’s Lemon Curd save time without sacrificing flavor.
Decadent Chocolate
No ice cream is complete without chocolate! A warm fudge sauce is a must—try Hershey’s Chocolate Syrup for convenience or make your own with cocoa powder, butter, and sugar. For a gourmet touch, Ghirardelli Hot Fudge Sauce is a reader favorite. White chocolate lovers can drizzle melted Lindor White Chocolate for a silky, sweet finish.
Nutrition Facts

- 6 Egg Cake Recipe with Oil: Light as Air With Buttery Moisture - October 4, 2026
- 4 Bean Casserole Recipe: One-Pan Heartiness With Smoky Paprika Depth - October 4, 2026
- 3-Ingredient Keto Mug Cake Recipe: Microwave Magic in 2 Minutes - October 4, 2026