
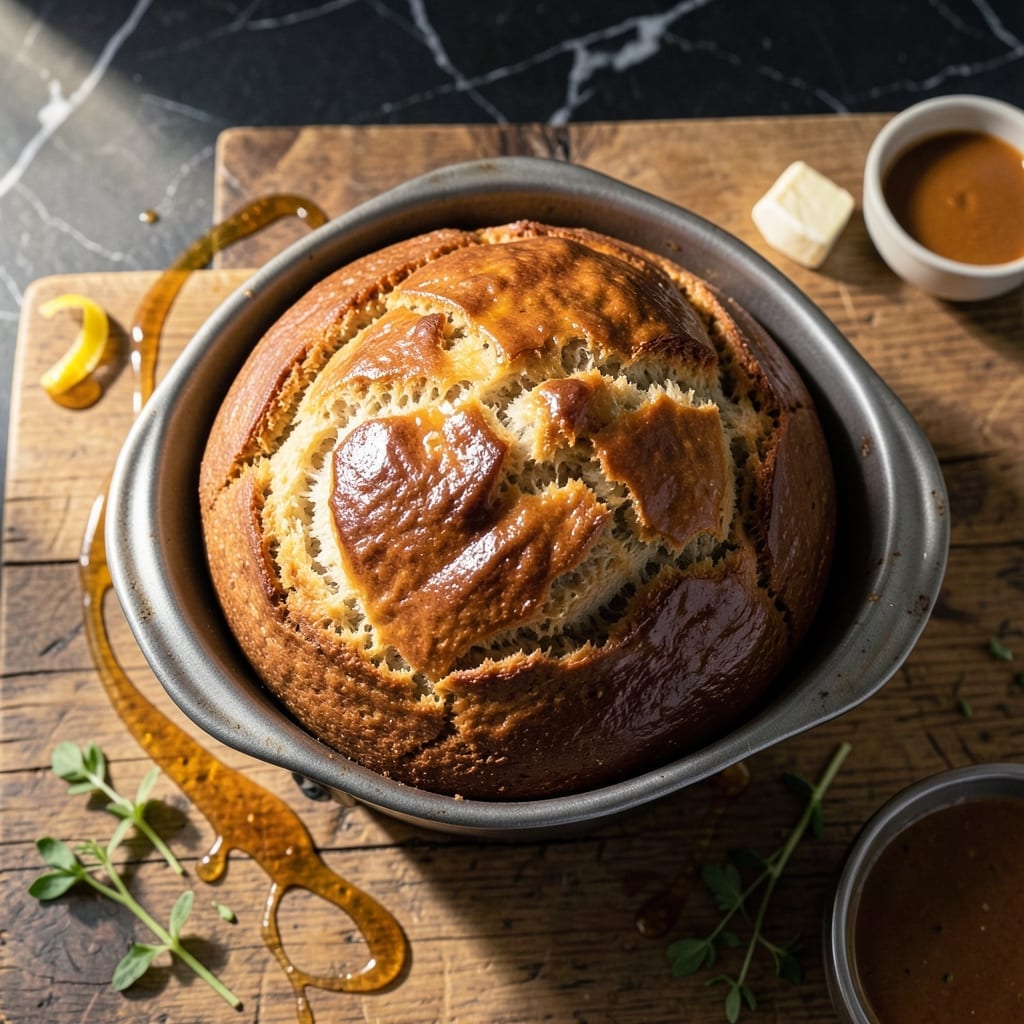
There’s something deeply satisfying about the aroma of fresh bread filling your kitchen, especially when it requires almost no effort on your part.
This method delivers perfectly golden, lightly sweet loaves with a tender crumb, thanks to the natural sweetness of honey and the precision of a bread machine.
Ingredients for Honey Bread Recipe for Bread Machine
Simple pantry staples create that golden, honey-sweet aroma with almost no effort.
| Ingredient | Amount | Notes |
|---|---|---|
| Bread Flour 🌾 | 3 ½ cups | All-purpose works in pinch |
| Warm Water 💧 | 1 ¼ cups | 110°F, not hot |
| Honey 🍯 | ⅓ cup | Pure, not imitation |
| Unsalted Butter 🧈 | 2 tbsp | Melted and cooled |
| Active Dry Yeast 🍞 | 2 ¼ tsp | One packet, fresh |
| Salt 🧂 | 1 ½ tsp | Fine sea salt preferred |
| Large Egg 🥚 | 1 whole | Room temperature |
| Whole Milk 🥛 | ¼ cup | Warm, 110°F |
| Granulated Sugar 🍚 | 2 tbsp | Helps yeast activate |
| Olive Oil 🫒 | 1 tbsp | For greasing pan |
| Vanilla Extract 🌿 | 1 tsp | Pure extract preferred |
| Cinnamon 🌶️ | ½ tsp | Ground, for warmth |
The flour is the foundation here. King Arthur bread flour gives the best rise and crumb, but Gold Medal works too. Honey quality matters—local raw honey adds depth you won’t get from grocery store blends. Look for thick, cloudy honey (the good stuff, not the clear, runny kind). Yeast is non-negotiable—check the expiration date and store it in the freezer if you don’t bake often.
No bread flour? All-purpose plus 1 tbsp vital wheat gluten per cup gets you close. Short on honey? Maple syrup or agave at same amount works, but the flavor shifts slightly. Butter can be swapped for coconut oil (melted) if you’re avoiding dairy. The milk? Whole is ideal, but 2% or even water pinches in—just add an extra tbsp of butter for richness.
Bread machine loaves taste best fresh but keep 3-4 days wrapped in foil. Slice and freeze extras—they toast up beautifully. Store yeast in an airtight container in the freezer for 6 months of peak potency.
Why You’ll Love This Recipe
- Set and Forget: I toss everything in the bread machine and let it do the work—no kneading, no watching, just perfect honey bread hours later.
- Sweet Simplicity: That warm, golden honey flavor shines through every slice, balanced by the richness of butter.
- Gift-Worthy Loaves: I bake extra to share with neighbors—they always ask for the recipe after the first bite.
- Budget-Friendly Batch: A pound of flour and a little honey make two loaves, stretching my grocery budget further than store-bought.
Step-by-Step Instructions for Honey Bread
Here’s your foolproof method for sweet, fragrant loaf with minimal effort.
Step 1: Activate the Yeast and Prepare Wet Ingredients
In your bread machine pan, start with the 1.25 cups Warm Water. Add the 0.33 cup Honey, 2 tbsp Granulated Sugar, 0.25 cup Whole Milk, and 1 whole Large Egg. I always crack the egg into a small bowl first to avoid shell fragments in the mix.
The sugar and honey feed the 2.25 tsp Active Dry Yeast, creating that perfect rise. Make sure your liquids are 110°F—too hot kills the yeast, too cold slows activation. I test with my finger: it should feel warm but not uncomfortable.
Step 2: Add Dry Ingredients and Butter
Create a well in the center of the wet ingredients and add the 2.25 tsp Active Dry Yeast. Then, add the 3.5 cups Bread Flour around the edges, making sure it doesn’t touch the yeast directly. This prevents premature activation.
Add the 1.5 tsp Salt, 2 tbsp Unsalted Butter, 1 tsp Vanilla Extract, and 0.5 tsp Cinnamon. The butter should be melted and cooled to room temperature. Distribute the flour evenly—this ensures consistent mixing and prevents dense spots in the finished loaf.
Step 3: Set the Bread Machine and Begin the Cycle
Insert the pan into your bread machine and close the lid. Select the “Basic” or “Sweet Bread” cycle, depending on your machine’s options. Set the crust to medium—this gives you that perfect golden-brown finish without being too thick.
Press start and let the machine work its magic. The kneading should begin within 5-10 minutes. If the dough looks too wet or dry during the first knead cycle, add 1 tablespoon of flour or water as needed, but resist the urge to over-adjust.
Step 4: Monitor and Finish the Bake
About 1 hour into the cycle, check the dough ball. It should be smooth, elastic, and slightly tacky. The machine will handle the rising and baking, but I like to peek through the window to ensure everything’s on track.
The entire process takes 3-4 hours, depending on your machine. When the cycle completes, the loaf should be golden brown and sound hollow when tapped. If it’s not quite done, you can extend the bake time for 10-15 minutes.
Step 5: Cool and Serve
Once the bread is finished, carefully remove the pan from the machine using oven mitts. Let the loaf cool in the pan for 5 minutes, then transfer it to a wire rack. This prevents the bottom from becoming soggy.
Let it cool completely before slicing—this ensures clean cuts and allows the crumb to set. The aroma of honey and cinnamon will fill your kitchen, and each slice should be soft, slightly sweet, and perfect for toasting or enjoying as is.
Pro Tips For Making Honey Bread Recipe For Bread Machine
- Check Yeast First: Always proof your active dry yeast in the warm water with a pinch of sugar before adding it to the machine—if it doesn’t foam in 5 minutes, your bread won’t rise. I learned this the hard way after wasting a whole batch of flour.
- Warm the Honey: Microwave the honey for 10-15 seconds to thin it out before measuring. Sounds weird, but it works: thick honey sticks to the spoon and throws off your ratios.
- Soften Butter Right: Use butter that’s soft but still cool—press your finger into it and it should leave a slight indentation but not melt. Too warm and it’ll make your dough greasy instead of tender.
- Skip Overfilling: Resist the urge to max out your bread machine’s capacity. Honey bread rises more than you expect, and I’ve had dough overflow onto the heating element more times than I’d like to admit.
Make-Ahead Tips for This honey bread recipe for bread machine
🔪 Week Before
Start by checking your pantry for essentials like flour, honey, and yeast. If anything’s missing, add it to your shopping list. For the best flavor, buy fresh honey and ensure your yeast is unexpired. 2-3 days before baking, store flour in an airtight container to keep it fresh. This prep ensures you’re ready to go when the craving hits! 💡
⏰ Day Before
Measure dry ingredients (flour, salt, yeast) and store them in separate containers. This saves time and reduces mess on baking day. If using milk or eggs, take them out of the fridge 1 hour before assembling to bring them to room temperature. Prepping now makes the next day effortless! ✨
🍳 Day Of
Add all ingredients to your bread machine pan in the order recommended by the manufacturer (usually liquids first, then dry). Set the machine to the sweet bread or basic cycle. Plan for 3-4 hours of hands-off baking time, depending on your machine. Avoid opening the lid during kneading or rising to prevent disrupting the process. 🎯
🌡️ Last-Minute Tasks
Once the bread is done, let it cool in the pan for 5-10 minutes, then transfer to a wire rack. Resist slicing immediately—wait at least 1 hour for the best texture. If adding a glaze, warm honey slightly and brush it over the loaf while still warm for a glossy finish. 🔥
Nutrition Facts

- 6 Egg Cake Recipe with Oil: Light as Air With Buttery Moisture - October 4, 2026
- 4 Bean Casserole Recipe: One-Pan Heartiness With Smoky Paprika Depth - October 4, 2026
- 3-Ingredient Keto Mug Cake Recipe: Microwave Magic in 2 Minutes - October 4, 2026