
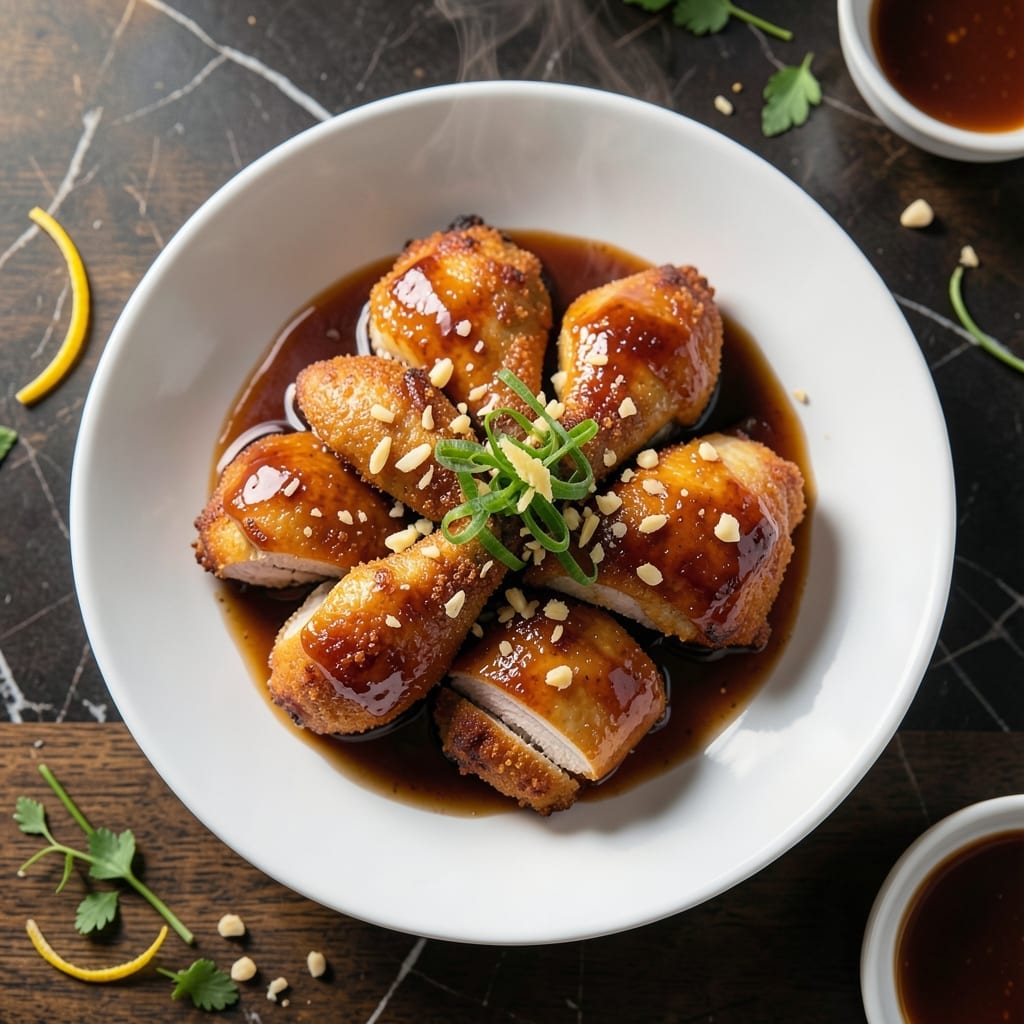
This Chinese-style honey chicken delivers the perfect balance of sweet and savory with a glossy, sticky glaze that clings to every bite. The dish combines tender chicken pieces with a rich sauce that’s both aromatic and deeply flavorful.
I’ve refined this recipe to ensure the chicken stays juicy while the sauce caramelizes just enough to create that signature restaurant-quality finish. A quick marinade and high-heat wok-tossing make all the difference.
The result is tender chicken coated in a glossy, finger-licking glaze that’s irresistibly addictive. The sauce thickens beautifully, ensuring each piece is perfectly coated without being soggy.
Serve it over steamed rice to soak up every last drop of the delicious sauce. This dish is sure to become a weeknight favorite.
Ingredients for Honey Chicken Recipe Chinese
Tender chicken meets a glossy, sticky glaze with pantry staples and fresh aromatics.
| Ingredient | Amount | Notes |
|---|---|---|
| Boneless Skinless Chicken Thighs 🍗 | 1 ½ lb | Cut into 1-inch pieces |
| Honey 🍯 | ½ cup | Pure, not synthetic |
| Soy Sauce 🫒 | ⅓ cup | Low-sodium preferred |
| Rice Vinegar 🍚 | 2 tbsp | Unseasoned variety |
| Minced Garlic 🧄 | 4 cloves | Freshly minced best |
| Fresh Ginger 🌿 | 1 tbsp | Finely grated or minced |
| Cornstarch 🌾 | 2 tbsp | For thickening sauce |
| Brown Sugar 🍚 | 3 tbsp | Light or dark works |
| Sesame Oil 🫒 | 1 tsp | Toasted variety preferred |
| Red Pepper Flakes 🌶️ | ½ tsp | Adjust for heat preference |
| Green Onions 🧅 | 3 whole | Thinly sliced for garnish |
| Vegetable Oil 🫒 | 3 tbsp | High smoke point for frying |
| Dry Sherry 🍷 | 1 tbsp | Or substitute Shaoxing wine |
The chicken is everything here. Boneless thighs stay juicier than breasts—look for good marbling at Whole Foods or your local butcher. If you’re using frozen, thaw it completely and pat it dry (the drier the better for that crispy crust). The honey matters too—local, raw honey adds depth, but any pure honey works in a pinch.
No dry sherry? Shaoxing wine or dry white wine gets you 90% there. Fresh ginger is ideal, but ground ginger at half the amount works if that’s what you’ve got. Skip the red pepper flakes for kid-friendly versions, or double them if you like heat. The soy sauce can be tamari for gluten-free—just watch the sodium content.
Sauce thickens as it cools, so don’t stress if it seems thin at first. Leftovers keep 3-4 days in the fridge, though the chicken is best fresh. Freezes okay for 1 month (reheat in a skillet to crisp it back up).
Why You’ll Love This Recipe
- I’ll be real: it tastes even better the next day, and chicken thighs stay juicy no matter what.
- One Pan Wonder: I toss everything in a skillet and let the honey and soy sauce work their magic while I set the table.
- Sweet & Savory Fix: That sticky honey glaze with the garlic and vinegar? Honestly, I could drink it with a spoon.
- Weeknight Hero: Between us, this is my secret for getting dinner on the table faster than takeout would arrive.
Step-by-Step Instructions for Honey Chicken
Here’s the method I rely on for that perfect balance of sweet, savory, and sticky every time.
Step 1: Prep and Coat the Chicken
Cut the 1.5 lb Boneless Skinless Chicken Thighs into 1-inch pieces and pat them completely dry. This ensures they’ll brown properly rather than steam. Place the pieces in a bowl and toss with the 2 tbsp Cornstarch until evenly coated.
The cornstarch creates a light barrier that helps the chicken stay tender while giving the sauce something to cling to. I’ve found this small step makes a noticeable difference in the final texture—crisp at the edges but juicy inside.
Step 2: Create the Honey Sauce Base
In a separate bowl, whisk together the 0.5 cup Honey, 0.33 cup Soy Sauce, 2 tbsp Rice Vinegar, 3 tbsp Brown Sugar, 4 cloves Minced Garlic, 1 tbsp Fresh Ginger, 1 tsp Sesame Oil, 0.5 tsp Red Pepper Flakes, and 1 tbsp Dry Sherry until fully combined.
This is where the magic happens. The vinegar and sherry add depth that balances the sweetness of the honey and sugar. I always let this mixture sit for 5 minutes while the chicken cooks—it gives the flavors time to meld before they hit the hot pan.
Step 3: Cook the Chicken Until Golden
Heat the 3 tbsp Vegetable Oil in a large skillet or wok over medium-high heat until it shimmers. Add the coated chicken in a single layer and cook undisturbed for 3-4 minutes until the bottoms turn golden brown.
Flip the pieces and cook for another 3-4 minutes until fully cooked through and golden all over. Don’t crowd the pan—if needed, cook in batches. The chicken should be just cooked when you remove it, as it’ll finish in the sauce later.
Step 4: Combine and Reduce to Perfection
Pour the honey sauce mixture into the skillet and bring to a simmer. Return the chicken to the pan and toss to coat evenly. Cook for 2-3 minutes, stirring constantly, as the sauce thickens and becomes glossy.
You’ll notice the sauce transforming from thin to a beautiful, sticky glaze that coats each piece. This is when you know it’s ready. The cornstarch from the chicken coating helps thicken the sauce naturally without making it gummy.
Step 5: Garnish and Serve Immediately
Transfer the honey chicken to a serving platter and sprinkle with the 3 whole Green Onions, thinly sliced. The green onions add a fresh contrast to the rich, sweet sauce.
Serve this immediately while the sauce is at its glossiest. The chicken should be coated in a thick, sticky glaze with visible flecks of garlic and ginger. This dish doesn’t wait well, so have your rice ready to go before you start cooking.
Pro Tips For Making Honey Chicken Recipe Chinese
- Velvet the Chicken: Cut the thighs into 1-inch pieces and marinate with 1 tsp soy sauce, 1 tsp rice vinegar, and 1 tsp cornstarch for 15 minutes—this keeps them absurdly tender even after frying. I learned this the hard way after chewing through rubbery chicken in my first few attempts.
- Bloom the Garlic: Cook the minced garlic in oil over medium-low until just golden, about 30 seconds, before adding anything else. Sounds simple, but raw garlic in the sauce gives it that harsh bite nobody wants.
- Reduce the Sauce: Simmer the honey, soy sauce, and rice vinegar mixture for 2-3 minutes until it thickens slightly—this prevents a watery glaze that slides right off the chicken. After burning three batches, I finally figured out patience beats high heat here.
- Use Dark Soy: Swap half the regular soy sauce for dark soy sauce if you have it—adds depth and that classic Chinese takeout color. My grandmother swore by this, and she was right: it’s the thing that matters most for authentic flavor.
Pro Cooking Tips for This Dish
Wok Selection Matters
A well-seasoned carbon steel wok is my go-to for this dish—it heats evenly and develops a natural non-stick surface. If you don’t have one, a heavy stainless steel skillet works too. Avoid non-stick pans; they can’t handle the high heat needed for proper caramelization. 🔥
High Heat Control
Get your wok screaming hot before adding oil—water droplets should sizzle and evaporate instantly. I use medium-high to high heat throughout cooking. If your sauce starts burning, lower the heat slightly, but don’t let it simmer too gently or the glaze won’t form properly.
Batch Cooking Chicken
Don’t overcrowd the pan. Cook chicken in batches if needed, using 3 tbsp Vegetable Oil total. Each piece needs space to brown, not steam. I test the oil temperature by adding one chicken piece—if it sizzles immediately, it’s ready for the rest.
Sauce Timing Trick
Let your sauce mixture sit for 5 minutes after whisking. This gives the cornstarch time to fully dissolve and the flavors to meld. When you add it to the pan, pour it around the edges, not directly over the chicken, to prevent cooling the pan too much.
Glaze Perfection
The sauce should coat the back of a spoon before it’s ready. If it’s too thin, mix 1 tsp cornstarch with 1 tbsp water and stir in. If it thickens too much, add 1-2 tbsp water. The glaze should be sticky but still pourable. 💡
Rest Before Serving
Once the chicken is glossy and coated, let it rest off heat for 1-2 minutes. This lets the sauce set slightly so it clings better to each piece. Garnish with green onions just before serving for maximum freshness and color contrast.
Nutrition Facts
Frequently Asked Questions
Can I use chicken breast instead of thighs?
Yes, but thighs stay juicier. If using breast, cut into 1-inch pieces and reduce cooking time to 2-3 minutes per side to prevent dryness.
How do I make the sauce thicker?
Simmer the sauce longer or mix 1 tsp cornstarch with 1 tbsp water and stir in. The glaze should coat the back of a spoon when ready.
Can I prepare this in advance?
Best served fresh, but leftovers keep 3-4 days refrigerated. Reheat in a skillet over medium heat to restore the glaze.
What if I don’t have dry sherry?
Use Shaoxing wine or dry white wine as substitutes. In a pinch, 1 tbsp apple juice with a splash of vinegar works.

- 6 Egg Cake Recipe with Oil: Light as Air With Buttery Moisture - October 4, 2026
- 4 Bean Casserole Recipe: One-Pan Heartiness With Smoky Paprika Depth - October 4, 2026
- 3-Ingredient Keto Mug Cake Recipe: Microwave Magic in 2 Minutes - October 4, 2026