
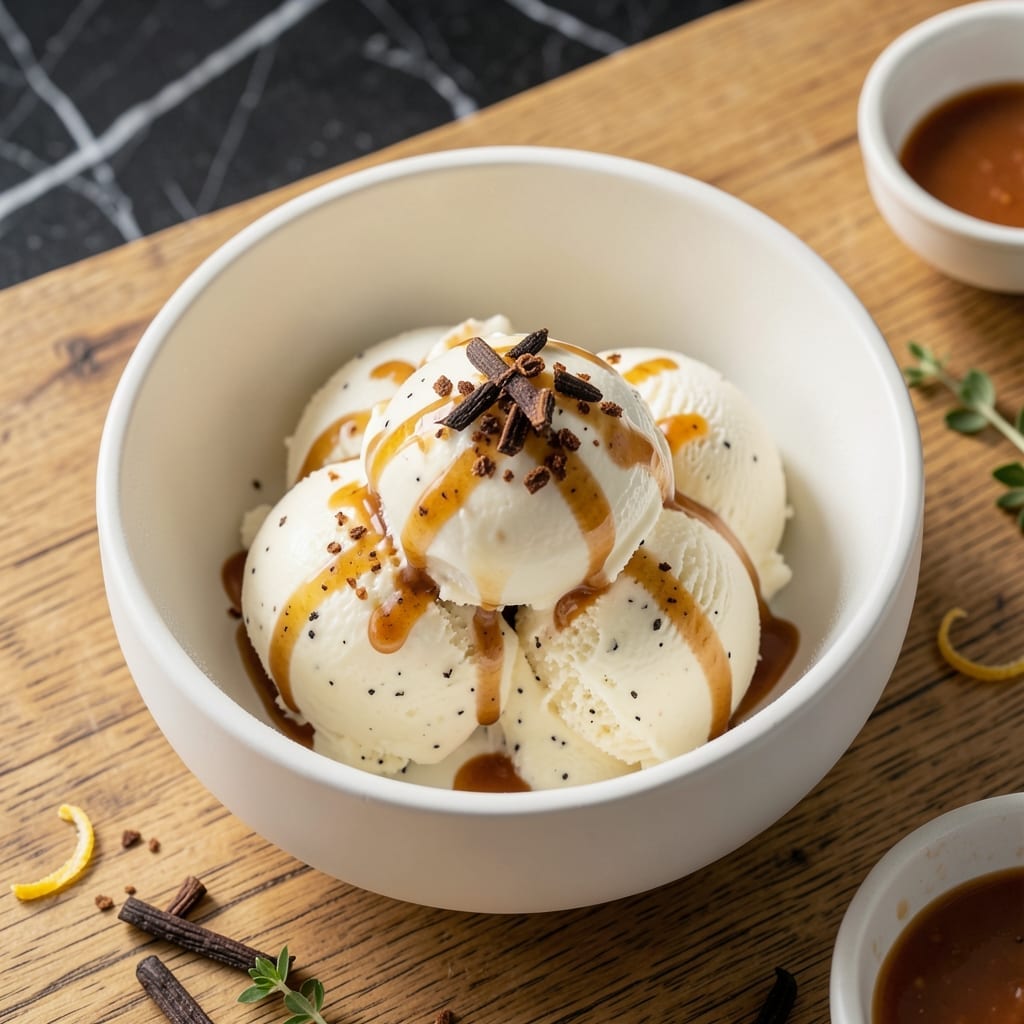
There’s something deeply satisfying about crafting homemade ice cream from scratch, where every spoonful carries the richness of real ingredients and care. This method delivers a velvety texture that store-bought versions simply can’t match.
I’ve refined this process to ensure smooth, creamy results without the need for an ice cream maker. The base combines heavy cream, whole milk, and sugar, heated just enough to dissolve the sweetness and create a silky foundation.
Once chilled and churned, the mixture transforms into a luxuriously smooth treat that’s ready to enjoy in 4 hours or less. The beauty lies in its simplicity—just a few ingredients and a little patience.
Customize with your favorite mix-ins or enjoy it plain for a pure, indulgent experience. Here’s how to make it.
Ingredients for Ice Cream
Rich, creamy, and endlessly customizable—just a handful of quality ingredients stand between you and perfect homemade ice cream.
| Ingredient | Amount | Notes |
|---|---|---|
| Heavy Cream 🥛 | 2 cups | Full-fat, cold from fridge |
| Whole Milk 🥛 | 1 cup | Full-fat preferred for creaminess |
| Granulated Sugar 🍚 | ¾ cup | Fine white sugar for smooth texture |
| Pure Vanilla Extract 🌿 | 1 tbsp | Real extract, not imitation |
| Table Salt 🧂 | ¼ tsp | Balances sweetness and enhances flavor |
| Large Egg Yolks 🥚 | 4 whole | Pasture-raised for rich color and flavor |
| Dark Chocolate Chunks 🍫 | ½ cup | Optional, for mix-in texture |
| Crushed Nuts 🌰 | ½ cup | Pecans or walnuts, optional mix-in |
| Vanilla Bean 🌿 | 1 whole | Scraped seeds for intense flavor |
| Fresh Strawberries 🍓 | 1 cup | Diced, optional for fruity variation |
The dairy is non-negotiable for that velvety texture. Whole Foods or local dairies have the best heavy cream—look for at least 36% fat. The egg yolks add richness, so spring for pasture-raised if you can. I grab mine from Trader Joe’s when I’m in a pinch. For the sugar, basic granulated is fine, but superfine dissolves faster if you want to get fancy. Vanilla? Nielsen-Massey or Rodelle are my go-tos.
No heavy cream? Half-and-half plus a splash of melted butter gets you close. Out of egg yolks? You can skip them, but the texture won’t be as luscious. Want to go wild? Swap vanilla for almond extract or bourbon. The chocolate can be chips, chunks, or even a chopped-up candy bar. Nuts? Toast them first—makes all the difference. Fresh strawberries should be ripe but firm (frozen works too, just thaw and drain them).
The base keeps in the fridge for 24 hours before churning. Once made, it’s best fresh but holds up in an airtight container for 1 week. Freeze for up to 2 months if you can resist eating it all immediately (good luck with that).
Why You’ll Love This Recipe
- 5-Minute Mix: No churning, no fuss—just whisk the cream, milk, sugar, and vanilla, then freeze. Honestly, it’s almost too easy.
- Velvety Vanilla: The heavy cream and real vanilla create that rich, smooth texture you’d pay premium for at a shop.
- Crowd Pleaser: I’ve served this at summer BBQs and quiet movie nights. Between us, it disappears faster than store-bought.
- Keeps Well: Leftovers? No problem. It freezes solid for weeks, so I always have a pint ready for sudden cravings.
Step-by-Step Instructions for Homemade Ice Cream
Here’s my foolproof method for velvety, rich ice cream that beats store-bought every time.
Step 1: Infuse the Cream and Milk
In a medium saucepan, combine the 2 cups Heavy Cream and 1 cup Whole Milk over medium heat. Split the 1 whole Vanilla Bean lengthwise, scrape out the seeds, and add both seeds and pod to the mixture.
Heat until the edges just begin to simmer—you’ll see tiny bubbles forming around the pan’s perimeter. Don’t let it boil. Remove from heat, cover, and let steep for 15 minutes to infuse the vanilla flavor deeply into the dairy.
Step 2: Temper and Cook the Custard Base
In a separate bowl, whisk together the 4 whole Large Egg Yolks and 0.75 cup Granulated Sugar until pale and slightly thickened. This takes about 2 minutes of vigorous whisking—look for the mixture to leave ribbons when the whisk is lifted.
Slowly pour about 1 cup of the warm cream mixture into the egg yolk mixture while whisking constantly. This tempering step prevents the eggs from scrambling. Pour the tempered mixture back into the saucepan and cook over medium-low heat.
Stir constantly with a wooden spoon until the custard thickens enough to coat the back of the spoon and holds a clear path when you run your finger through it. This should take 5-7 minutes. Remove from heat and stir in the 0.25 tsp Table Salt and 1 tbsp Pure Vanilla Extract.
Step 3: Chill the Custard Thoroughly
Strain the custard through a fine-mesh sieve into a clean bowl to remove the vanilla pod and any cooked egg bits. Press plastic wrap directly onto the surface of the custard to prevent a skin from forming.
Refrigerate for at least 4 hours, or preferably overnight. This chilling step is crucial—it ensures your ice cream will be creamy rather than icy. The custard should be cold to the touch and thick, almost like a loose pudding.
Step 4: Churn and Add Mix-Ins
Pour the chilled custard into your ice cream maker and churn according to the manufacturer’s instructions, typically 20-25 minutes. The ice cream is ready when it resembles soft-serve and holds its shape when scooped.
During the last 2 minutes of churning, add the 0.5 cup Dark Chocolate Chunks, 0.5 cup Crushed Nuts, or 1 cup Fresh Strawberries if using. This ensures even distribution without overmixing. The mix-ins should be cold to prevent melting the ice cream.
Step 5: Freeze to Perfection
Transfer the churned ice cream to a freezer-safe container. Smooth the top with a spatula, then press parchment paper directly onto the surface to minimize ice crystals. Cover with a lid and freeze for at least 4 hours or until firm.
For the creamiest texture, let the ice cream sit at room temperature for 5-10 minutes before scooping. The final product should be smooth, rich, and packed with flavor in every bite.
Pro Tips For Making Ice Cream
- Chill the Base: Always refrigerate your cream-milk-sugar mixture for at least 4 hours before churning—I learned this the hard way after ending up with soupy ice cream that refused to set.
- Use Full-Fat Dairy: Skip the low-fat milk or half-and-half; the high butterfat in whole milk and heavy cream is non-negotiable for that rich, creamy texture.
- Don’t Overchurn: Watch the ice cream closely in the machine—once it reaches a soft-serve consistency (usually 20-25 minutes), stop, or it’ll turn hard and icy.
- Add Vanilla Last: Stir in the vanilla extract after churning, not before heating, to preserve its delicate flavor—my grandmother swore by this, and she was right.
Storing and Reheating Leftovers
Freezer Storage
Transfer your ice cream to an airtight container with parchment pressed directly on the surface. This prevents ice crystals from forming. I use Glasslock containers for best results. Store at 0°F or below for up to 2 months. ❄️
Fridge Storage
If enjoying within 1 week, the freezer is fine, but for the creamiest texture, eat within 3-4 days. The flavors peak during this window. Always use a container with a tight-sealing lid to lock out freezer odors.
Thawing for Serving
Let the container sit at room temperature for 5-10 minutes before scooping. This softens it just enough for easy serving without melting into a soupy mess. A warm spoon dipped in hot water helps create perfect scoops.
Avoiding Freezer Burn
If storing long-term, wrap the container in plastic wrap before sealing the lid. This double barrier protects against freezer burn. I also label containers with the date to track freshness.
For mix-ins like chocolate chunks or nuts, store them separately and fold in fresh when serving to maintain texture. 💡
Nutrition Facts
Frequently Asked Questions
Can I make this without an ice cream maker?
Yes! Pour the chilled custard into a shallow freezer-safe dish. Freeze for 1 hour, then vigorously whisk to break up ice crystals. Repeat every 30 minutes for 3-4 hours until firm.
Why does my ice cream turn icy?
Icy texture usually means the custard wasn’t chilled long enough or overchurned. Ensure it’s 0°F before freezing and avoid opening the freezer during the first 4 hours.
Can I use a vanilla bean substitute?
Replace with 1 tbsp vanilla extract or 1 tsp vanilla powder. For intense flavor, try 1/2 tsp almond extract alongside the vanilla.
How long can I store homemade ice cream?
In an airtight container at 0°F, it stays fresh for up to 2 months. For best texture, enjoy within 1 week.

- 6 Egg Cake Recipe with Oil: Light as Air With Buttery Moisture - October 4, 2026
- 4 Bean Casserole Recipe: One-Pan Heartiness With Smoky Paprika Depth - October 4, 2026
- 3-Ingredient Keto Mug Cake Recipe: Microwave Magic in 2 Minutes - October 4, 2026