
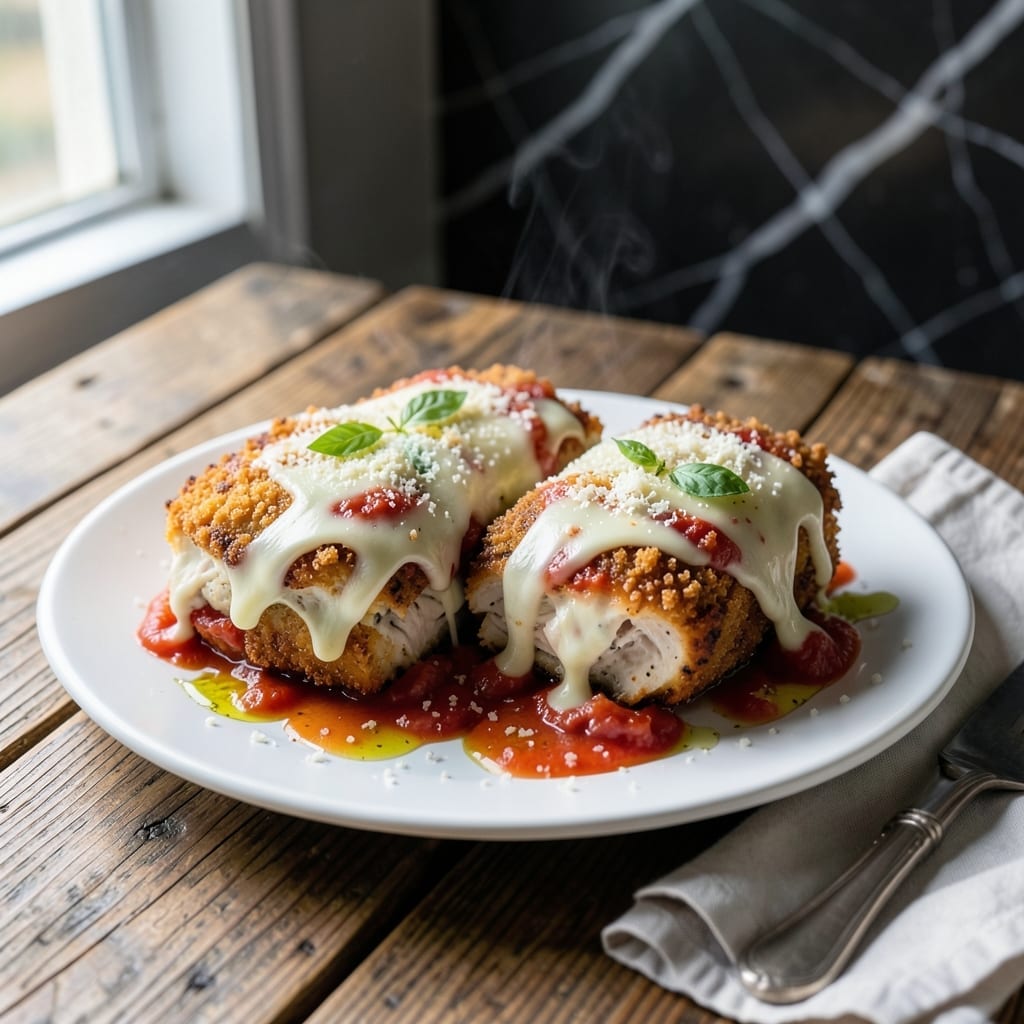
This recipe delivers crispy, golden-brown chicken cutlets topped with tangy marinara and melted mozzarella, a combination that never fails to impress. I’ve refined the technique to ensure the breading stays perfectly crunchy even after baking.
The secret lies in a two-step breading process and briefly frying the cutlets before baking. This creates a barrier that keeps the chicken juicy while the cheese melts into a bubbly, golden layer.
Each bite offers a contrast of textures: the snap of the breading, the tenderness of the chicken, and the gooey stretch of the cheese. It’s a dish that feels special but comes together with straightforward steps.
Serve with pasta or a simple salad to round out the meal. Here’s how to make it perfectly every time.
Ingredients for Ina Garten Chicken Parmesan
These ingredients create crispy, cheesy chicken cutlets with minimal effort and maximum flavor.
| Ingredient | Amount | Notes |
|---|---|---|
| Chicken Breasts 🍗 | 1 ½ lb | Boneless, skinless, pounded to 1/4-inch thickness |
| All-Purpose Flour 🌾 | 1 cup | For initial dredging |
| Large Eggs 🥚 | 2 whole | Beaten for egg wash |
| Panko Breadcrumbs 🍞 | 2 cups | Japanese-style for extra crispiness |
| Parmesan Cheese 🧀 | ½ cup | Freshly grated from block |
| Mozzarella Cheese 🧀 | 8 oz | Low-moisture, shredded or sliced |
| Marinara Sauce 🍅 | 2 cups | High-quality jarred or homemade |
| Olive Oil 🫒 | ½ cup | For frying and baking |
| Kosher Salt 🧂 | 1 ½ tsp | Diamond Crystal preferred |
| Freshly Ground Black Pepper 🌶️ | 1 tsp | Coarse grind for texture |
| Garlic Cloves 🧄 | 3 cloves | Minced for sauce |
| Dried Oregano 🍃 | 1 tsp | For seasoning breadcrumbs |
| Dried Basil 🌿 | 1 tsp | For seasoning breadcrumbs |
| Red Pepper Flakes 🌶️ | ½ tsp | Optional, for heat |
| Fresh Basil Leaves 🌿 | ¼ cup | Chopped, for garnish |
The chicken breasts are the foundation—opt for thick, even cuts from a trusted butcher or Whole Foods. Pounding to uniform thickness ensures even cooking and prevents dry spots. For the breadcrumbs, Japanese panko (found at Trader Joe’s or most supermarkets) delivers the signature crunch. The Parmesan should be freshly grated from a wedge for best melt and flavor.
No panko? Substitute regular breadcrumbs but press them firmly onto the chicken to compensate for less crisp. For the mozzarella, low-moisture prevents a soggy crust—avoid fresh mozzarella here. San Marzano tomatoes in the marinara add depth, but a good jarred sauce like Rao’s works perfectly. The garlic can be swapped for 1 tsp garlic powder in the breading if fresh isn’t available.
Store raw chicken in the coldest part of your fridge for up to 2 days or freeze for 3 months. The breaded cutlets can be prepped a day ahead—cover and refrigerate. Leftovers keep 4-5 days in the fridge or freeze for 2 months.
Why You’ll Love This Recipe
- I’ll be real: it reheats beautifully, so I always make extra for lunches the next day.
- One Pan Magic: I love that this comes together on a single sheet pan—just coat the chicken in flour, egg, then panko and Parmesan, and bake.
- Crispy, Cheesy Bliss: The panko gives it that perfect crunch, while the melted Parmesan adds a rich, savory depth that’s honestly irresistible.
- Crowd Pleaser: Between us, this is my go-to for dinner parties or busy weeknights—everyone from kids to foodie friends devours it.
Step-by-Step Instructions for Chicken Parmesan
Here’s the method. Straightforward, tested, works every time.
Step 1: Prep and Bread the Chicken Breasts
Pat the 1.5 lb Chicken Breasts dry and pound them to an even 1/4-inch thickness between plastic wrap. This ensures even cooking and maximum crispiness. Season both sides with 1.5 tsp Kosher Salt and 1 tsp Freshly Ground Black Pepper.
Set up a breading station: place the 1 cup All-Purpose Flour in one shallow dish, beat the 2 whole Large Eggs in another, and combine the 2 cups Panko Breadcrumbs, 0.5 cup Parmesan Cheese, 1 tsp Dried Oregano, 1 tsp Dried Basil, and 0.5 tsp Red Pepper Flakes in a third. The cheese in the breading adds extra crunch and flavor.
Step 2: Pan-Fry to Golden Perfection
Heat 0.5 cup Olive Oil in a large skillet over medium heat until shimmering. Working in batches to avoid crowding, dredge each chicken breast in flour, shaking off excess, then dip in egg, and finally press into the breadcrumb mixture, coating completely.
Fry for 3-4 minutes per side until golden brown and crispy. The breading should be deep amber and audibly sizzle when placed in the pan. Transfer to a paper towel-lined plate to drain excess oil while maintaining that coveted crisp texture.
Step 3: Layer with Sauce and Cheeses
Preheat oven to 400°F. Spread 1 cup of the 2 cups Marinara Sauce in a baking dish. Place the fried chicken breasts in a single layer over the sauce. Top each with remaining marinara, dividing evenly.
Sprinkle the 8 oz Mozzarella Cheese over the chicken, then finish with a light dusting of extra Parmesan Cheese. The cheese should melt into a bubbly blanket that ties all the flavors together beautifully.
Step 4: Bake Until Bubbly and Serve
Bake for 15-20 minutes until the cheese is fully melted and bubbly, and the sauce is heated through. The edges of the cheese should just begin to turn light golden brown.
Garnish with 0.25 cup Fresh Basil Leaves and let rest for 5 minutes before serving. This brief rest allows the cheese to set slightly, making each portion easier to serve while preserving that perfect crispy coating beneath the melted toppings.
Pro Tips For Making Ina Garten Chicken Parmesan
- Pound the Chicken: Use a meat mallet to pound the chicken breasts to an even 1/2-inch thickness—this guarantees even cooking and prevents dry, overdone edges.
- Mix Parmesan Early: Combine the Parmesan cheese with the panko breadcrumbs before dredging; it sticks better and creates a crispier, more flavorful crust.
- Skip the Overcrowding: Fry the chicken in batches with space between each piece—crowding the pan steams the breading instead of crisping it.
- Rest Before Baking: Let the breaded chicken rest 5 minutes before baking to help the coating adhere, so you don’t lose half of it when transferring to the oven.
Make-Ahead Tips for This Dish
Bread Ahead
I always bread my chicken cutlets up to 24 hours ahead—this saves time and lets the coating set. Arrange them in a single layer on a wire rack over a baking sheet, cover loosely with plastic wrap, and refrigerate. The rack prevents sogginess on the bottom.
Fry Then Pause
After pan-frying the breaded cutlets until golden, let them cool completely before storing. I place them on a paper towel-lined tray, then transfer to an airtight container with parchment between layers. They’ll keep in the fridge for 1-2 days before baking. 💡
Sauce and Cheese Prep
Mix your marinara sauce with any add-ins like extra garlic or herbs and store it separately in the fridge. Shred the mozzarella cheese fresh right before assembling—pre-shredded can be waxy. This keeps everything at peak freshness.
Day-Of Assembly
When ready to bake, layer the cold fried cutlets with sauce and cheese in your baking dish. Add 5-10 minutes to the baking time since you’re starting with chilled ingredients. This ensures everything heats through perfectly.
Freeze for Later
For longer storage, freeze the breaded, uncooked cutlets on a tray first, then transfer to a freezer bag. They’ll keep for 1 month. Thaw overnight in the fridge before frying and baking as usual. ❄️
Nutrition Facts
Frequently Asked Questions
Can I use chicken tenders instead of breasts?
Yes! Chicken tenders work perfectly and cook faster. Pound them to 1/4-inch thickness and reduce frying time to 2-3 minutes per side. They’re a great shortcut without sacrificing flavor.
Why does the breading stay crispy after baking?
The pan-frying step creates a sturdy, golden crust that acts as a barrier against the sauce. Baking at 400°F melts the cheese quickly, preventing the breading from turning soggy underneath.
Can I make this gluten-free?
Swap the flour for cornstarch and use gluten-free panko. Ensure all other ingredients, like the marinara, are certified gluten-free. The texture will be just as crispy!
How do I prevent the cheese from sliding off?
Let the fried cutlets cool for 5 minutes before adding sauce and cheese. This helps the breading set. Also, use shredded mozzarella instead of slices for better adhesion.

- 6 Egg Cake Recipe with Oil: Light as Air With Buttery Moisture - October 4, 2026
- 4 Bean Casserole Recipe: One-Pan Heartiness With Smoky Paprika Depth - October 4, 2026
- 3-Ingredient Keto Mug Cake Recipe: Microwave Magic in 2 Minutes - October 4, 2026