
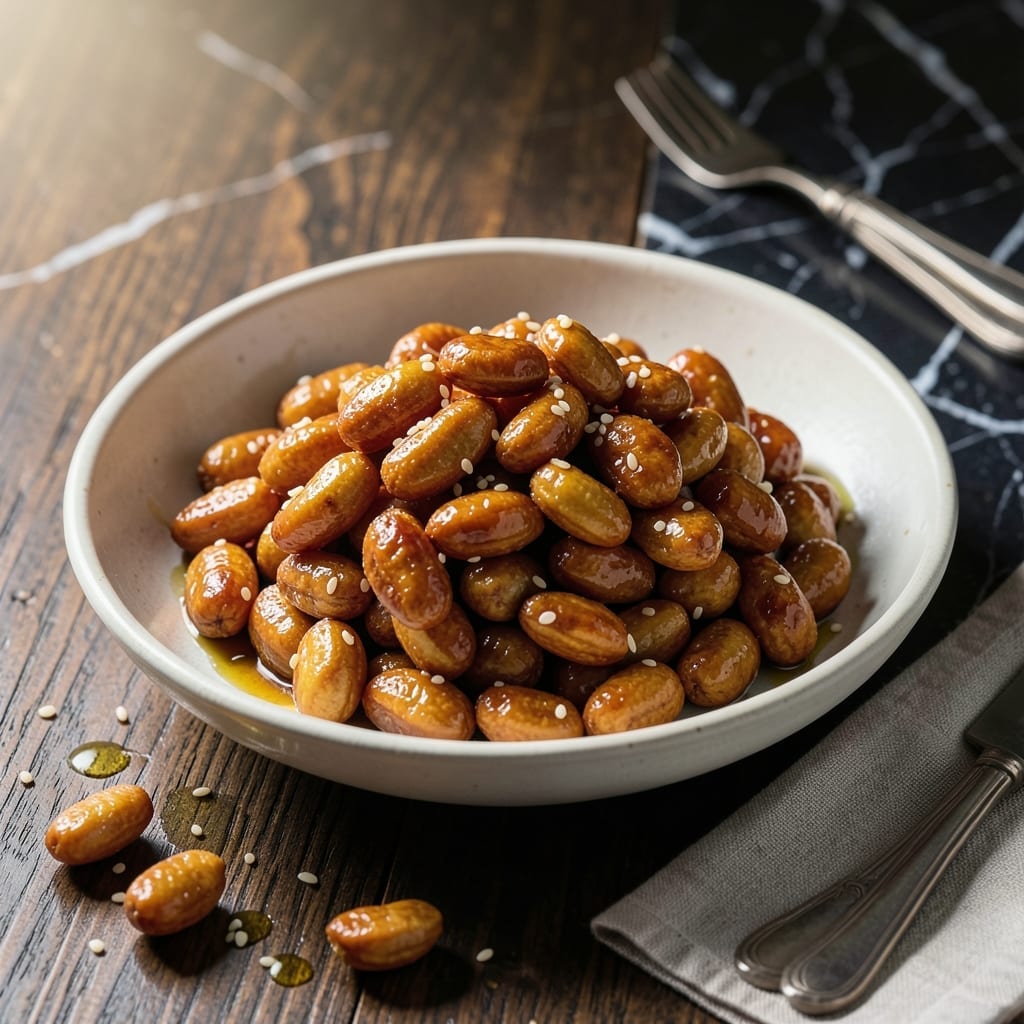
This Japanese peanut recipe delivers the perfect balance of sweet and salty that makes these coated nuts irresistibly addictive.
With just a few pantry staples and 15 minutes of active cooking time, you can create a snack that beats anything store-bought. The secret is in the precise sugar-to-soy ratio and careful toasting.
The result is crunchy peanuts with a glossy, caramelized coating that crackles with every bite. The flavor profile is complex—savory, sweet, and slightly smoky all at once.
These keep beautifully at room temperature, making them ideal for gifting or satisfying sudden cravings. The process is simple but requires attention to detail.
Ingredients for Japanese Peanuts
A handful of pantry staples transforms into these irresistibly crunchy, glossy coated nuts.
| Ingredient | Amount | Notes |
|---|---|---|
| Raw Peanuts 🥜 | 2 cups | Unsalted, skin-on preferred |
| Granulated Sugar 🍚 | ½ cup | White sugar for best caramelization |
| Soy Sauce 🫒 | 2 tbsp | Low-sodium recommended |
| Water 💧 | 2 tbsp | For sugar syrup formation |
| Neutral Oil 🫒 | 1 tbsp | Vegetable or canola oil |
| Sesame Seeds 🌾 | 1 tbsp | Toasted for garnish |
| Garlic Powder 🧄 | ½ tsp | Optional for depth |
| Ground Ginger 🌿 | ¼ tsp | Adds subtle warmth |
| Cayenne Pepper 🔥 | 0.125 tsp | Pinch for heat |
| Smoked Paprika 🌶️ | ¼ tsp | Enhances smoky flavor |
| Cornstarch 🌾 | 1 tsp | Thickens coating slightly |
The peanuts are non-negotiable here—raw, unsalted is what you want. Whole Foods or Asian markets have the best selection, but most supermarkets carry them in the baking aisle. Look for skin-on for texture. The soy sauce should be Japanese-style (like Kikkoman) rather than Chinese for the right flavor profile. For the sugar, basic granulated works perfectly (no need for fancy stuff).
No raw peanuts? Roasted unsalted can work in a pinch, but reduce toasting time by half. Swap soy sauce for tamari if gluten-free. Out of granulated sugar? Brown sugar at equal amount adds molasses notes. The oil can be any neutral type—avocado oil if you’re feeling fancy. Skip the cayenne if sensitive to heat, but the smoked paprika is worth hunting down.
Store in an airtight container at room temperature for up to 2 weeks. The coating stays crispest when kept dry—add a silica packet if you have one. These actually improve after a day as flavors meld. Perfect for gifting in cellophane bags with a ribbon.
Why You’ll Love This Recipe
- One Pot Magic: I just toss everything in a pan—peanuts, sugar, soy sauce, water—and let the stovetop do the work.
- Sweet-Savory Addiction: That first crunch hits you with salty soy, then the caramelized sugar lingers in the best way.
- Snack Stash Savior: I keep a jar on my desk, another in the car—honestly, they disappear faster than I can make them.
- Pocket Change Treat: A pound of raw peanuts and pantry staples cost less than a bag of chips, and taste way more interesting.
Step-by-Step Instructions for Japanese Peanuts
Master this technique for perfectly glazed peanuts with balanced sweetness and umami depth.
Step 1: Toast the Raw Peanuts
Heat 1 tbsp Neutral Oil in a large skillet over medium heat. Add all 2 cups Raw Peanuts and spread them in an even layer. Toast for 5-7 minutes, stirring frequently, until the peanuts turn light golden brown and become fragrant.
This toasting step develops the nutty base flavor and ensures the peanuts are crisp throughout. Watch carefully toward the end—they can go from perfectly toasted to burnt in under a minute. Remove from heat immediately once they reach the desired color.
Step 2: Create the Sugar Syrup Base
In the same skillet (off heat), add 0.5 cup Granulated Sugar, 2 tbsp Soy Sauce, and 2 tbsp Water. Stir to combine, then return to medium-low heat. Cook for 3-4 minutes without stirring until the mixture begins to bubble and thicken slightly.
The water helps dissolve the sugar evenly while the soy sauce provides the signature salty contrast. You’ll notice the syrup turning from cloudy to translucent with a glossy sheen. Resist the urge to stir constantly—this can cause crystallization.
Step 3: Coat and Season the Peanuts
Return the toasted peanuts to the skillet with the sugar syrup. Add 0.5 tsp Garlic Powder, 0.25 tsp Ground Ginger, 0.125 tsp Cayenne Pepper, and 0.25 tsp Smoked Paprika. Stir vigorously with a wooden spoon for 2-3 minutes until every peanut is evenly coated.
The spices will bloom in the hot syrup, infusing the peanuts with complex flavor. The mixture will appear wet at first but will begin to dry as the liquid evaporates. If the coating seems too thin, sprinkle in 1 tsp Cornstarch and stir well to thicken slightly.
Step 4: Dry and Crisp the Glaze
Spread the coated peanuts in a single layer on a parchment-lined baking sheet. Let them cool at room temperature for 10-15 minutes, stirring once halfway through to prevent clumping. The glaze will harden into a glossy, crackly shell as it cools.
This drying step is crucial for that signature crisp texture. If the peanuts still feel slightly sticky after cooling, return them to the skillet for an additional 1-2 minutes over low heat, stirring constantly to prevent burning.
Step 5: Garnish and Serve
Once completely cool and crisp, transfer the peanuts to a serving bowl. Sprinkle with 1 tbsp Sesame Seeds for visual appeal and an extra layer of nutty flavor. The sesame seeds add a subtle toasted note that complements the sweet-salty profile.
Serve immediately or store in an airtight container at room temperature for up to 5 days. The peanuts will maintain their crispness best if kept in a single layer. This recipe yields 4 servings of irresistibly crunchy, flavor-packed peanuts.
Pro Tips For Making Japanese Peanuts
- Dry the Peanuts: Pat the raw peanuts completely dry before frying—I learned this the hard way after my first batch turned soggy instead of crispy.
- Low and Slow: Cook the peanuts on medium-low heat after adding the sugar and soy sauce mixture to prevent burning; about 8-10 minutes of stirring does the trick.
- Use Fresh Oil: Sounds obvious, but old or reused oil can make your peanuts taste bitter—always start with fresh neutral oil for the best flavor.
- Stir Constantly: Resist the urge to walk away once the sugar starts caramelizing, or you’ll end up with a pan of burnt, stuck-together peanuts.
Troubleshooting This Recipe
Sticky Peanuts
If your peanuts remain sticky after cooling, they likely didn’t cook long enough in the syrup. Return them to the skillet over low heat for 1-2 minutes, stirring constantly. The residual moisture needs to evaporate completely for that crisp shell. 🔥
Burnt Sugar
Burnt spots on your coating mean the sugar caramelized too quickly. Lower your heat to medium-low next time and resist stirring the syrup until it starts bubbling. A heavier-bottomed pan (like my All-Clad) distributes heat more evenly.
Uneven Coating
For peanuts that aren’t evenly coated, ensure your syrup is thick enough before adding them back. If too thin, let it reduce for 1-2 more minutes. Then stir vigorously with a wooden spoon to fully envelope every peanut.
Clumping Peanuts
If peanuts clump during cooling, stir them on the baking sheet halfway through the 10-15 minute drying period. Separating them while warm prevents permanent clusters. A light sprinkle of cornstarch helps absorb excess moisture.
Bland Flavor
Taste seems flat? You might have under-seasoned. Don’t skip the smoked paprika—it adds crucial depth. Next batch, try adding an extra ¼ tsp of each spice. Freshly ground spices also make a noticeable difference.
Soggy Storage
If stored peanuts lose their crunch, moisture is the culprit. Ensure they’re completely cool before sealing. I add a silica packet to my airtight container for insurance. Keep them in a single layer rather than stacked. ✨
Nutrition Facts
Frequently Asked Questions
Can I use roasted peanuts instead of raw?
Yes, but reduce toasting time by half since they’re already cooked. Raw peanuts absorb the glaze better for maximum flavor and crunch.
Why do I need to stir constantly when coating?
Constant stirring prevents sugar from crystallizing and ensures every peanut gets an even, glossy coating. Stopping too soon can lead to clumping.
How long will these stay crisp?
Stored in an airtight container at room temperature, they’ll keep their crunch for up to 5 days. Add a silica packet for extra crispness.
Can I make these without soy sauce?
Tamari works as a gluten-free alternative. For a soy-free version, try coconut aminos, but the flavor will differ slightly.

- 6 Egg Cake Recipe with Oil: Light as Air With Buttery Moisture - October 4, 2026
- 4 Bean Casserole Recipe: One-Pan Heartiness With Smoky Paprika Depth - October 4, 2026
- 3-Ingredient Keto Mug Cake Recipe: Microwave Magic in 2 Minutes - October 4, 2026