
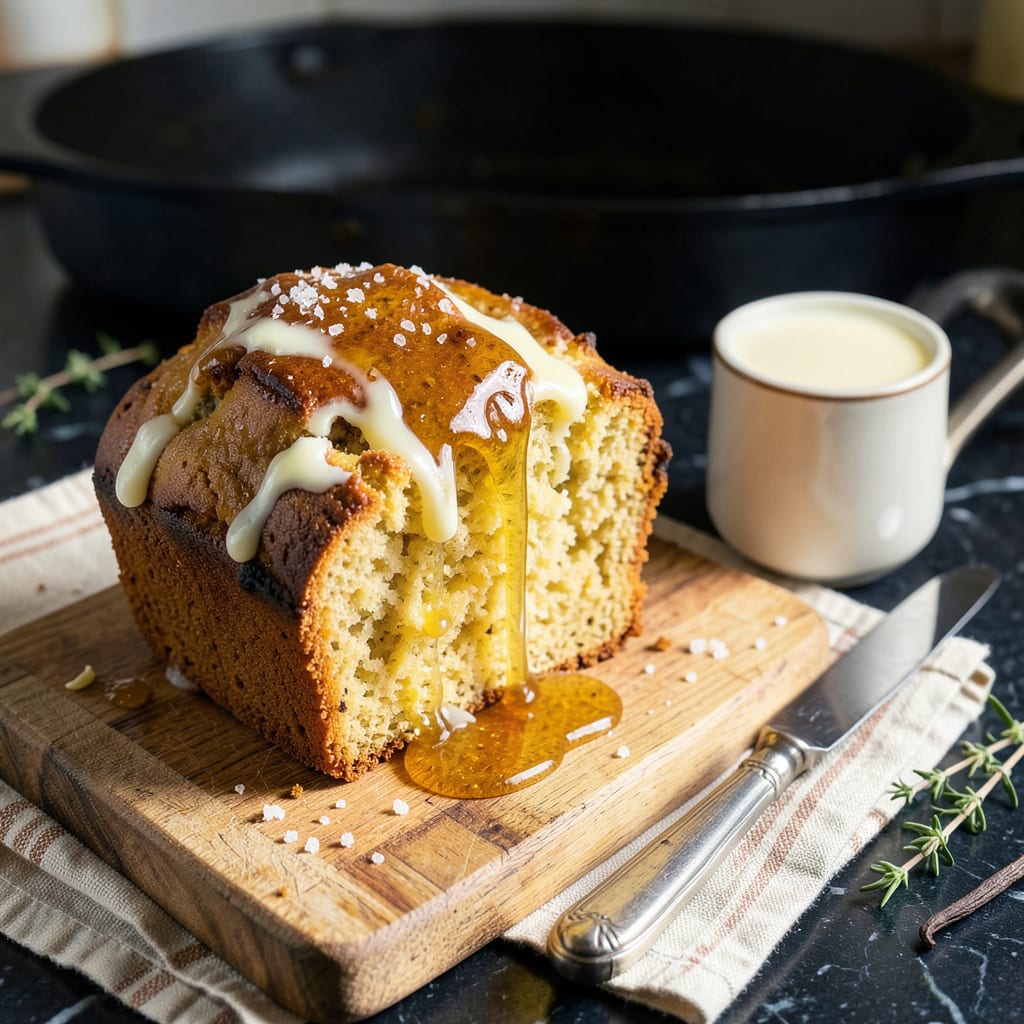
This Jiffy honey butter cornbread delivers on its promise of moist, golden perfection with minimal effort. The combination of boxed mix convenience and homemade richness creates a side dish that outshines traditional recipes. A simple addition of honey and butter transforms basic cornbread into something extraordinary.
The secret lies in the balance—just enough honey for sweetness without overpowering, and melted butter for that signature tender crumb. Baked at the right temperature, this cornbread develops a crisp golden crust while staying perfectly moist inside. It’s the ideal accompaniment to chili, fried chicken, or as a standalone treat.
Ingredients for Jiffy Honey Butter Cornbread
This professional-grade cornbread begins with Jiffy mix elevated by rich butter, golden honey, and carefully balanced enhancements for exceptional moisture and flavor.
| Ingredient | Amount | Notes |
|---|---|---|
| Jiffy Corn Muffin Mix 🌽 | 1 box | 8.5 oz package, unopened |
| Large Egg 🥚 | 1 whole | Room temperature preferred |
| Whole Milk 🥛 | ⅓ cup | Full-fat for optimal texture |
| Unsalted Butter 🧈 | ½ cup | Melted and slightly cooled |
| Pure Honey 🍯 | ⅓ cup | Clover or wildflower variety |
| Vanilla Extract 🌿 | 1 tsp | Pure extract, not imitation |
| Granulated Sugar 🍚 | 2 tbsp | Optional for enhanced sweetness |
| Fine Sea Salt 🧂 | ¼ tsp | Balances sweetness precisely |
| Sour Cream 🥄 | ¼ cup | Full-fat for moisture retention |
| All-Purpose Flour 🌾 | 2 tbsp | For structural integrity |
| Baking Powder 🧪 | ½ tsp | Ensures proper rise |
[recipeingredientscaler]
The Jiffy Corn Muffin Mix provides the ideal base—consistent texture without artificial aftertaste. Optimal results require full-fat dairy products; the whole milk and sour cream create the signature tender crumb mentioned in the introduction. For the butter, European-style unsalted (like Plugrá or Kerrygold) offers superior richness. Honey selection matters: local, raw varieties provide more complex flavor profiles than processed supermarket brands.
Substitutions must maintain the moisture balance. Buttermilk can replace whole milk at a 1:1 ratio for added tang. For dairy-free versions, coconut oil substitutes for butter (use refined to avoid coconut flavor), and almond yogurt replaces sour cream. Agave nectar works as a honey alternative, though it lacks honey’s depth. The 2 tablespoons of flour can be omitted in a pinch, but expect slightly less structural integrity in the final product.
Store the cornbread in an airtight container at room temperature for 2 days maximum—it’s best consumed fresh. For longer storage, refrigerate for up to 5 days or freeze individual slices wrapped in parchment for 3 months. Reheat frozen slices at 300°F for 10-12 minutes to restore the crisp crust while maintaining interior moisture. The batter itself can be refrigerated for 24 hours before baking, though leavening power diminishes slightly.
Why You’ll Love This Recipe
- I’ll be real: I make a double batch on purpose. Toasted leftovers with coffee? Breakfast solved. Crumbled over salad? Lunch upgrade. And that Jiffy mix costs less than a coffee shop muffin—so my wallet’s happy too.
- 5-Minute Mix: I dump the Jiffy mix, crack an egg, pour in milk—no measuring cups for the wet stuff if I’m honest—and stir. The oven does the rest while I set the table or (let’s be real) scroll through my phone for two seconds of peace.
- That Honey Butter Glaze: Here’s what sold me—the warm cornbread soaks up the melted butter and honey like a dream, creating this sticky-sweet crust that cracks just right. My picky nephew licks his plate. Every. Single. Time.
- Weeknight Hero: This is my Tuesday-night lifesaver when chili’s simmering or soup’s on the stove. But it’s also my potluck MVP because, somehow, it tastes fancy enough for company without me pretending I slaved over it.
Step-by-Step Instructions for Jiffy Honey Butter Cornbread
This method ensures perfectly moist, golden cornbread with rich honey-butter flavor in every bite.
Step 1: Prepare the Wet Ingredients and Melted Butter
Begin by melting the 0.5 cup unsalted butter in a small saucepan over low heat or in the microwave in 20-second intervals, stirring between each until just melted. Allow it to cool slightly for 5 minutes—it should feel warm but not hot to the touch. This prevents the butter from cooking the egg when combined.
In a large mixing bowl, whisk together the 1 whole large egg, 0.33 cup whole milk, 0.33 cup pure honey, and 1 tsp vanilla extract until fully combined and smooth. The honey may stick to the whisk slightly; this is normal. Add the slightly cooled melted butter and whisk vigorously for 30 seconds to create a homogenous emulsion.
Step 2: Combine Dry Ingredients for Optimal Texture
In a separate medium bowl, combine the 1 box Jiffy Corn Muffin Mix, 2 tbsp all-purpose flour, 0.5 tsp baking powder, 0.25 tsp fine sea salt, and 2 tbsp granulated sugar. Whisk these dry ingredients together thoroughly for 1 minute to distribute the leavening agents evenly. This step ensures consistent rise and texture throughout the cornbread.
The addition of flour and baking powder enhances the structural integrity of the final product, while the salt balances the sweetness from the honey and sugar. Make certain there are no visible clumps of baking powder in the mixture, as this could create uneven pockets of bitterness in the finished cornbread.
Step 3: Incorporate Sour Cream and Finalize the Batter
Add the 0.25 cup sour cream to the wet ingredient mixture and whisk until just combined. The sour cream should be fully incorporated but not overmixed at this stage. Pour the wet ingredients into the bowl with the dry ingredients and use a silicone spatula to fold them together gently.
Mix only until the dry ingredients are just moistened—about 15-20 strokes. The batter will be slightly lumpy, which is ideal. Overmixing at this stage would develop the gluten in the flour, resulting in a denser, less tender cornbread. The batter should have a thick, pourable consistency similar to pancake batter.
Step 4: Bake to Golden Perfection
Preheat your oven to 375°F and position the rack in the center. Lightly grease an 8×8-inch baking dish or 9-inch cast iron skillet with nonstick spray or a thin layer of butter. Pour the batter into the prepared pan and spread it evenly with the spatula.
Bake for 20-25 minutes until the top is golden brown and the edges begin to pull away from the sides of the pan. The cornbread is done when a toothpick inserted into the center comes out clean or with just a few moist crumbs clinging to it. Avoid overbaking, as this will compromise the moist texture we’ve worked to achieve.
Step 5: Cool and Serve for Maximum Flavor
Remove the cornbread from the oven and let it cool in the pan on a wire rack for 10 minutes. This brief resting period allows the structure to set while still maintaining warmth. Run a butter knife around the edges to loosen, then cut into 9 equal squares while still slightly warm.
Serve immediately for the best texture and flavor. The cornbread should have a tender, moist crumb with a slightly crisp golden crust. For enhanced presentation, brush the warm top with an additional 1 tablespoon of melted butter mixed with 1 teaspoon of honey, if desired. This recipe maintains its moisture remarkably well and can be stored in an airtight container at room temperature for up to 3 days.
Essential Equipment for This Recipe
Mixing Bowls Matter
I always reach for my stainless steel mixing bowls with non-slip bases when making this cornbread. The 3-quart size gives plenty of room to whisk wet ingredients without splashing. Look for bowls with measurement markings—it saves time when adding 0.33 cup honey or 0.25 cup sour cream. 🔥
Whisk Selection
A balloon whisk is my secret weapon for achieving that perfectly smooth wet mixture. The rounded shape incorporates air while blending the egg, milk, and honey thoroughly. I prefer OXO’s 11-inch whisk—its comfortable grip makes quick work of even thick batters.
Baking Pan Options
For that ideal golden crust, I alternate between two pans: a light-colored 8×8-inch metal baking dish for even browning, or my trusty Lodge 9-inch cast iron skillet for extra crispy edges. The skillet retains heat beautifully, creating a slightly caramelized bottom layer that’s absolutely delicious.
Precision Tools
Don’t overlook measuring cups and spoons—accuracy matters with baking. I use stainless steel measures for dry ingredients and glass Pyrex for liquids. The difference between 0.33 cup and 1/3 cup might seem small, but it affects the final texture of your cornbread.
Cooling Rack
A wire cooling rack is essential for preventing soggy bottoms. I place my hot pan directly on the rack after baking—this allows air to circulate underneath. Look for racks with small grid patterns to support the pan securely. The 10-minute cooling time mentioned in the instructions works perfectly with this setup.
Serving Knife
Use a serrated bread knife to cut clean squares without crushing the tender crumb. My 8-inch Wüsthof glides through the cornbread effortlessly. For that restaurant-style presentation, warm the knife briefly under hot water before slicing—it creates smoother edges every time. ✨
Nutrition Facts
Frequently Asked Questions
Can I use a different size pan?
An 8×8-inch or 9-inch skillet works best for even baking. Using a larger pan will create thinner cornbread that may dry out faster. For smaller pans, increase baking time by 5-7 minutes and check doneness with a toothpick.
Why does my cornbread turn out dry?
Overbaking is the most common cause. Remove it from the oven as soon as the edges pull away and a toothpick comes out with moist crumbs. Also, ensure you’re using full-fat dairy and not overmixing the batter, which can create a tough texture.
Can I make this ahead of time?
The batter can be mixed and refrigerated for up to 24 hours before baking. For best results, store baked cornbread in an airtight container at room temperature for 2-3 days. Reheat slices at 300°F for 8-10 minutes to restore freshness.
What’s the best honey to use?
Clover or wildflower honey works perfectly for balanced sweetness. Avoid strongly flavored varieties like buckwheat that might overpower. For deeper flavor, use local raw honey—it adds complexity without altering the recipe’s moisture balance.

- 6 Egg Cake Recipe with Oil: Light as Air With Buttery Moisture - October 4, 2026
- 4 Bean Casserole Recipe: One-Pan Heartiness With Smoky Paprika Depth - October 4, 2026
- 3-Ingredient Keto Mug Cake Recipe: Microwave Magic in 2 Minutes - October 4, 2026