
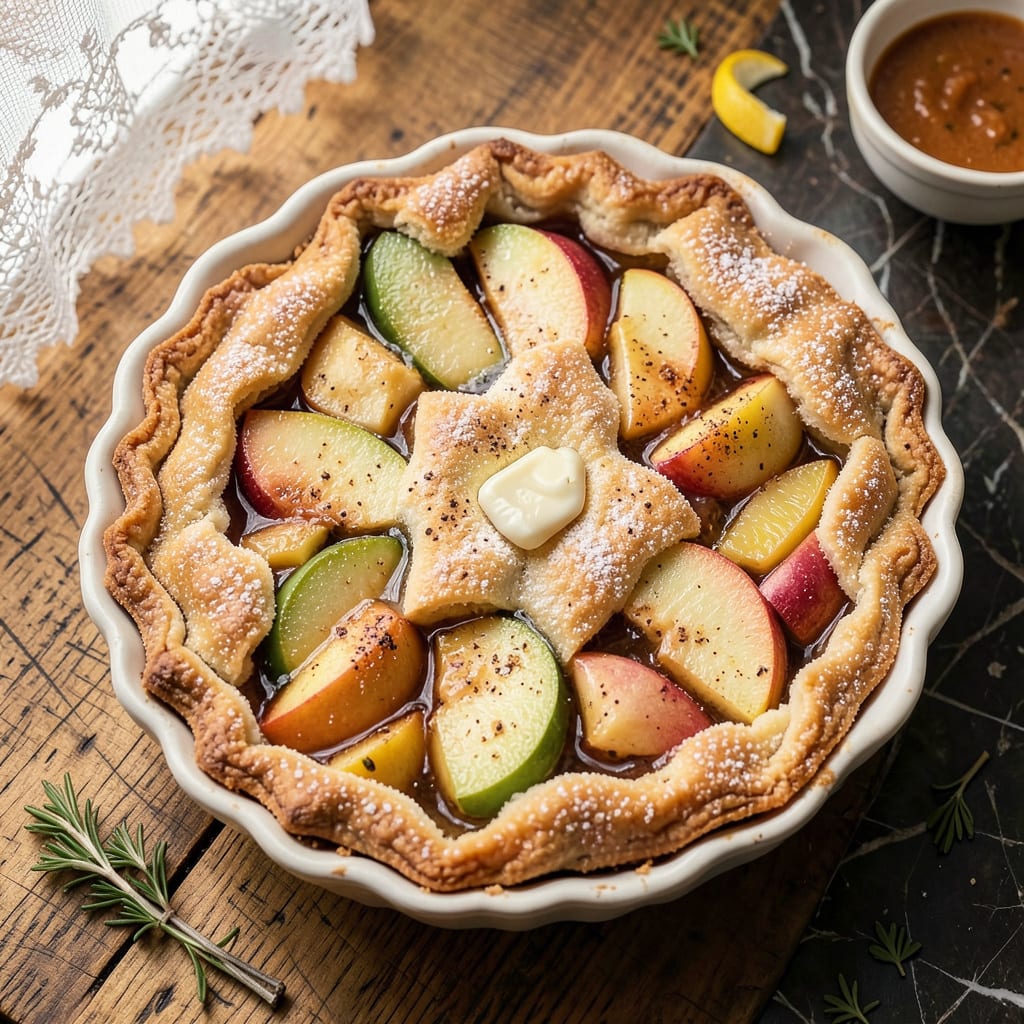
The perfect apple pie begins with a flaky, golden crust and a cinnamon-spiced filling that balances sweetness with just the right amount of tartness. This recipe delivers the classic comfort of homemade pie without the guesswork, using precise techniques to ensure professional results every time.
What sets this version apart is the attention to detail—from properly chilled butter for the crust to the ideal apple variety selection. The filling achieves that signature tender-yet-firm texture, while the lattice top creates visual appeal. Whether for holidays or weekend baking, this pie becomes the centerpiece of any dessert table.
Ingredients for Joy of Cooking Apple Pie
This professional-quality pie relies on precision ingredients: flaky crust essentials, tart-sweet apples, and aromatic spices for signature texture and flavor balance.
| Ingredient | Amount | Notes |
|---|---|---|
| All-purpose flour 🌾 | 2 ½ cups | Spooned and leveled, plus extra for dusting |
| Granulated sugar 🍬 | ¾ cup | Divided for crust and filling |
| Unsalted butter 🧈 | 1 cup | Chilled, cut into 1/2-inch cubes |
| Ice water 💧 | 6 tbsp | Plus additional as needed |
| Kosher salt 🧂 | 1 tsp | Diamond Crystal preferred |
| Mixed apples 🍏 | 3 lb | Peeled, cored, and sliced 1/4-inch thick |
| Light brown sugar 🍯 | ¾ cup | Packed, for filling |
| Ground cinnamon 🌿 | 2 tsp | Freshly opened for potency |
| Lemon juice 🍋 | 2 tbsp | Freshly squeezed, for brightness |
| Vanilla extract 💛 | 1 tsp | Pure extract recommended |
| Unsalted butter 🧈 | 2 tbsp | For dotting filling, chilled |
| Large egg 🥚 | 1 whole | For egg wash finish |
| Coarse sanding sugar 💎 | 1 tbsp | For lattice topping sparkle |
[recipeingredientscaler]
The crust demands cold, high-quality butter—European-style (82% fat) like Plugrá or Kerrygold creates superior flakiness. King Arthur Flour is optimal for its consistent protein content (11.7%), ensuring tender yet sturdy layers. For apples, Granny Smith provides tartness while Honeycrisp contributes sweetness; avoid mealy varieties like Red Delicious. The cinnamon should be freshly purchased—ground spices lose potency after six months. Diamond Crystal kosher salt is preferred for its clean flavor and easy measurement.
Substitutions require careful consideration: Shortening can replace butter in crust (1:1 ratio) but sacrifices flavor complexity. Swanson’s apple juice concentrate (thawed) can supplement sweetness if apples are overly tart. For gluten-free crusts, Cup4Cup blend performs best, though texture will differ. The egg wash may be replaced with heavy cream for richer color, or maple syrup for vegan adaptation. Cardamom (1/4 tsp) can complement cinnamon for sophisticated depth—standard in professional bakeries.
Prepare components separately before assembly. Crust dough keeps refrigerated for 48 hours or frozen for 3 months (thaw overnight). Peeled apples oxidize quickly—toss with lemon juice immediately. Completed pie bakes best day-of but holds at room temperature for 24 hours. For make-ahead convenience, assemble unbaked pie and freeze for 1 month; bake directly from frozen (add 15-20 minutes). Lattice strips can be pre-cut and refrigerated between parchment for 12 hours.
Why You’ll Love This Recipe
- I’ll be real: this crust comes together with just flour, butter, ice water, and salt—no fancy techniques. The cold butter trick makes it flaky every single time, even if your hands aren’t ice-cold (mine never are).
- No-Fuss Dough: I’ll be real: this crust comes together with just flour, butter, ice water, and salt—no fancy techniques. The cold butter trick makes it flaky every single time, even if your hands aren’t ice-cold (mine never are).
- Buttery, Crisp Magic: That first bite where the sugar caramelizes against the buttery crust? Worth every minute. The kosher salt balances the sweetness so it’s rich but never cloying—honestly, it’s the little things that make this pie addictive.
- Holiday or Tuesday: Between us, I’ve served this at Thanksgiving and on random weeknights when I needed comfort food. The dough freezes beautifully, so I always keep a disk ready for spontaneous baking (yes, even on a Tuesday night).
Step-by-Step Instructions for Classic Apple Pie
This method delivers a perfectly flaky crust and balanced cinnamon-spiced filling every time.
Step 1: Prepare the Flaky Pie Crust
In a large bowl, combine the 2.5 cups all-purpose flour and 1 tsp kosher salt. Add the 1 cup unsalted butter that’s been chilled and cut into ½-inch cubes. Use a pastry cutter or your fingertips to work the butter into the flour until the mixture resembles coarse crumbs with pea-sized butter pieces visible.
Sprinkle in the 6 tbsp ice water, 1 tablespoon at a time, mixing gently with a fork after each addition. The dough should just come together when pressed—don’t overwork it. Divide the dough into two equal portions, flatten into disks, wrap in plastic, and refrigerate for at least 1 hour. This resting period allows the gluten to relax and the butter to firm up, ensuring maximum flakiness.
Step 2: Prepare the Cinnamon Apple Filling
In a large bowl, toss the 3 lb mixed apples (peeled, cored, and sliced ¼-inch thick) with the 2 tbsp lemon juice. This prevents browning and adds brightness to the filling. Add the 0.75 cup light brown sugar, 2 tsp ground cinnamon, and 1 tsp vanilla extract, stirring gently to coat all apple slices evenly.
Let the mixture sit for 15 minutes, then drain off any accumulated liquid. This step concentrates the flavors and prevents a soggy crust. Dot the filling with the 2 tbsp unsalted butter before adding it to the crust—this creates delicious pockets of buttery richness throughout the pie.
Step 3: Assemble the Pie with Lattice Topping
Roll out one dough disk on a lightly floured surface to a 12-inch circle and transfer to a 9-inch pie dish. Trim the edges to leave a ½-inch overhang. Add the prepared apple filling, mounding it slightly in the center. Roll out the second dough disk and cut into 1-inch wide strips for the lattice topping.
Arrange the strips in a lattice pattern over the filling, weaving them over and under each other. Trim the strips to match the overhang of the bottom crust, then fold both crust edges under and crimp decoratively. Chill the assembled pie for 30 minutes to firm up the butter before baking—this prevents the crust from slumping.
Step 4: Bake to Golden Perfection
Preheat your oven to 375°F. Whisk the large egg with 1 tablespoon water to make an egg wash. Brush this evenly over the lattice topping and crust edges, then sprinkle with the 1 tbsp coarse sanding sugar for sparkle and crunch.
Place the pie on a parchment-lined baking sheet to catch any drips. Bake for 50-60 minutes until the crust is deep golden brown and the filling bubbles visibly through the lattice. If the edges brown too quickly, tent them with foil. The pie is done when the juices thicken and the apples are tender when pierced with a knife.
Step 5: Cool and Serve
Transfer the pie to a wire rack and let cool for at least 2 hours before slicing. This resting period allows the filling to set properly—the juices will thicken as they cool, preventing a runny pie when served. The crust will maintain its crispness while the filling becomes perfectly sliceable.
Serve warm or at room temperature. Each slice should reveal a flaky, golden crust encasing tender, cinnamon-spiced apples with just the right balance of sweetness and tartness. The lattice topping adds visual appeal while allowing steam to escape during baking, ensuring a perfectly set filling.
Storing and Reheating joy of cooking apple pie
Room Temperature Storage
Your freshly baked pie will stay delicious at room temperature for up to 2 days when properly covered. I use a pie keeper or inverted bowl to protect the crust while allowing airflow. Avoid plastic wrap directly on the pie—it traps moisture and makes the crust soggy. 🍏
Refrigerator Storage
For longer freshness, refrigerate your pie in an airtight container for up to 4 days. Let it come to room temperature for 30 minutes before serving to restore the crust’s crispness. The filling will actually taste more developed after a day in the fridge as flavors meld together.
Freezing Whole Pies
Unbaked pies freeze beautifully for up to 3 months. Wrap tightly in plastic wrap then heavy-duty foil, labeling with the date. Bake directly from frozen, adding 15-20 minutes to the baking time. I always freeze pies on a flat surface first to maintain their shape.
Freezing Individual Slices
Cut cooled pie into slices and wrap each piece in parchment paper then freezer bags. They’ll keep for 2 months—perfect for quick desserts. Reheat at 350°F for 10-12 minutes until warmed through. The lattice crust will stay crispier than with microwave reheating.
Oven Reheating Method
For best results, reheat slices at 300°F for 10-15 minutes on a baking sheet. This gentle heat revives the crust’s flakiness without drying out the filling. I sprinkle a few drops of water on the pie before reheating to add moisture back to the apples. 🔥
Microwave Quick Fix
When short on time, microwave individual slices for 20-30 seconds at 50% power. Place a damp paper towel over the slice to prevent the crust from becoming tough. Note that microwaving works best for the filling—expect the crust to soften slightly with this method.
Nutrition Facts
Frequently Asked Questions
What’s the secret to a flaky crust?
Cold butter is absolutely essential—keep it chilled until the moment you use it. Work quickly to prevent the butter from melting into the flour, which creates a tough crust instead of flaky layers. The ice water should be added gradually, just until the dough comes together.
Can I use pre-made crust instead?
Yes, but the texture will differ. Store-bought crusts often contain preservatives that affect flakiness. If using one, brush the bottom with a thin layer of beaten egg white before adding filling to create a moisture barrier. This helps prevent the dreaded soggy bottom.
Why did my filling turn out runny?
This usually happens when the pie isn’t cooled long enough. The filling needs at least 2 hours to set properly after baking. Also, be sure to drain excess liquid from the apples after tossing with sugar—this prevents a watery filling during baking.
How do I prevent the crust edges from burning?
If the edges brown too quickly, tent them with aluminum foil after 30 minutes of baking. You can also use a silicone crust shield. For extra protection, brush edges with egg wash only during the last 15 minutes of baking.
What’s the best way to reheat leftovers?
For best texture, reheat slices in a 300°F oven for 10-15 minutes. This restores the crust’s crispness without drying the filling. Avoid microwaving if possible—it makes the crust soft and chewy rather than flaky.

- 6 Egg Cake Recipe with Oil: Light as Air With Buttery Moisture - October 4, 2026
- 4 Bean Casserole Recipe: One-Pan Heartiness With Smoky Paprika Depth - October 4, 2026
- 3-Ingredient Keto Mug Cake Recipe: Microwave Magic in 2 Minutes - October 4, 2026