
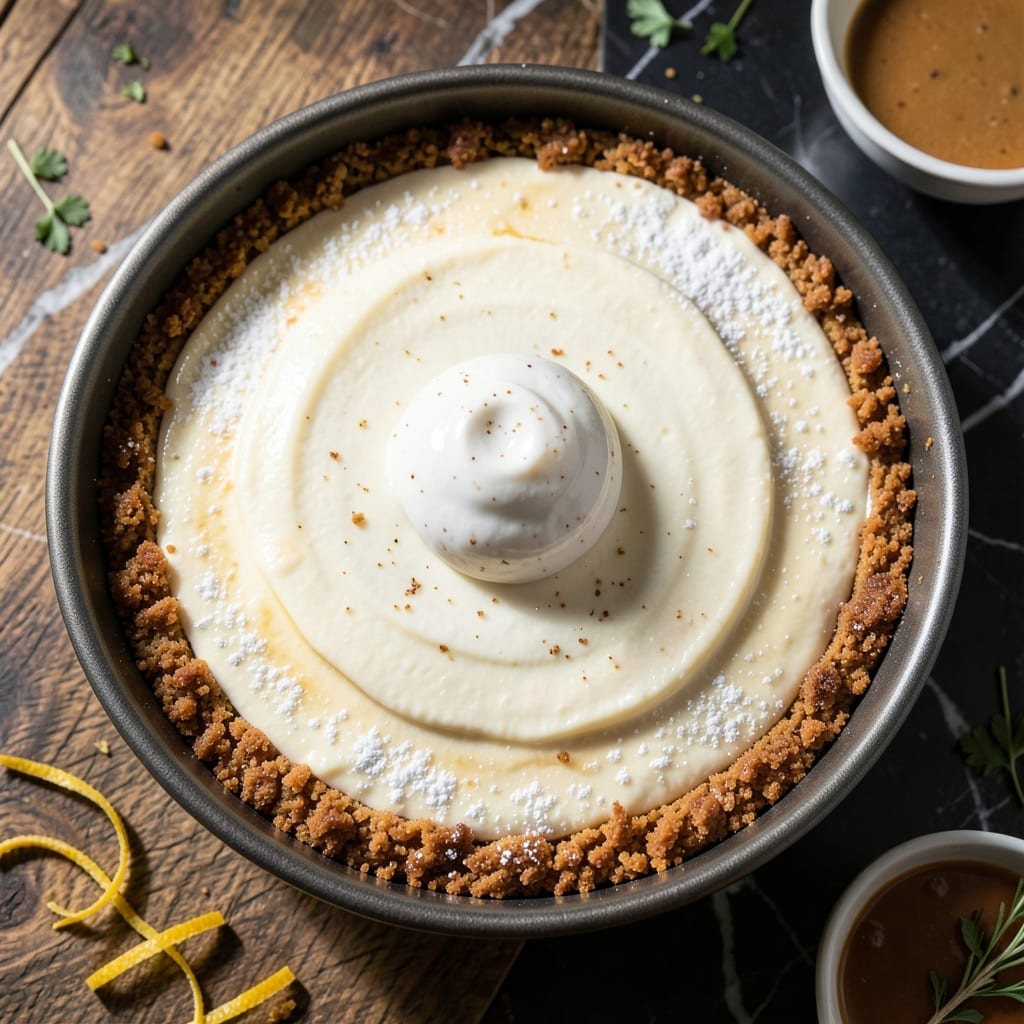
This New York-style cheesecake delivers the dense, velvety texture that made the original famous. The secret lies in using full-fat cream cheese and a precise baking method that prevents cracks.
I’ve refined this technique over years of testing to achieve that signature rich, creamy consistency without the need for a water bath. The graham cracker crust provides the perfect buttery base.
What emerges from the oven is a tall, smooth cheesecake with a slightly golden top. It chills to perfect sliceable firmness while maintaining that melt-in-your-mouth quality.
Serve it plain or with fresh berries for a classic dessert that impresses every time. Here’s the proven method.
Ingredients for King Arthur Cheesecake
Twelve ingredients create that signature New York density and velvety richness everyone expects from this classic.
| Ingredient | Amount | Notes |
|---|---|---|
| Graham Cracker Crumbs 🍪 | 2 cups | Finely ground from whole crackers |
| Granulated Sugar 🧈 | ¼ cup | For crust sweetness balance |
| Unsalted Butter 🧈 | ½ cup | Melted for crust binding |
| Full-Fat Cream Cheese 🧀 | 4 lb | Room temperature, block style |
| Granulated Sugar 🍚 | 1 ¾ cups | For filling sweetness |
| Sour Cream 🥛 | 1 cup | Full-fat for creaminess |
| Large Eggs 🥚 | 5 whole | Room temperature preferred |
| Pure Vanilla Extract 🌿 | 2 tsp | High-quality for best flavor |
| All-Purpose Flour 🌾 | ¼ cup | For structure stability |
| Salt 🧂 | ½ tsp | Fine sea salt preferred |
| Lemon Juice 🍋 | 1 tbsp | Freshly squeezed for brightness |
| Heavy Cream 🥛 | ½ cup | For ultra-velvety texture |
The cream cheese is non-negotiable for authentic texture—Philadelphia brand full-fat blocks are the gold standard here. Don’t substitute reduced-fat versions, as they contain more water and will compromise the dense structure. For the graham crackers, Honey Maid or Anna’s work perfectly. Always use unsalted butter so you control the salt content precisely. Room temperature ingredients blend more smoothly, which prevents lumps in your batter.
No graham crackers? Digestive biscuits or vanilla wafers make fine substitutes (use the same volume). Short on sour cream? Full-fat Greek yogurt at a 1:1 ratio works, though the tang will be slightly different. The eggs provide structure—don’t reduce them. For a gluten-free crust, use gluten-free graham crackers or almond flour with a touch more butter.
This cheesecake needs a full 24-hour chill to set properly—don’t rush it. Store covered in the fridge for up to 5 days, or freeze for 3 months (thaw overnight before serving). The texture actually improves after a day as the flavors meld together perfectly.
Why You’ll Love This Recipe
- No-Fuss Base: The graham cracker crust comes together in 5 minutes—just crumbs, sugar, and melted butter pressed into the pan.
- Rich, Creamy Bite: Full-fat cream cheese makes it decadently smooth, with just the right sweetness from the sugar.
- Crowd Pleaser: I’ve served this at potlucks, birthdays, and even a random Tuesday night—always disappears fast.
- Keeps Like a Dream: Leftovers taste even better the next day, and it freezes beautifully for up to a month.
Step-by-Step Instructions for New York-Style Cheesecake
Master the technique for a velvety texture and crack-free surface with this tested approach.
Step 1: Prepare and Press the Graham Cracker Crust
Preheat your oven to 325°F. In a medium bowl, combine the 2 cups Graham Cracker Crumbs, 0.25 cup Granulated Sugar, and 0.5 cup Unsalted Butter until the mixture resembles wet sand. The butter should fully coat the crumbs without pooling at the bottom.
Press the mixture firmly into the bottom of a 9-inch springform pan using the bottom of a measuring cup. Create an even layer about ¼-inch thick and extend it slightly up the sides. Bake for 10 minutes until the edges are lightly golden, then set aside to cool while preparing the filling.
Step 2: Beat Cream Cheese and Sugar Until Ultra-Smooth
In a stand mixer fitted with the paddle attachment, beat the 4 lb Full-Fat Cream Cheese on medium speed for 2 minutes until completely smooth and free of lumps. Scrape the bowl and paddle frequently to ensure even mixing.
Gradually add the 1.75 cups Granulated Sugar and continue beating for another 3-4 minutes until the mixture is fluffy and pale. This step is critical—under-mixing here results in a grainy texture. The sugar should be fully dissolved with no visible grains when rubbed between your fingers.
Step 3: Incorporate Remaining Filling Ingredients Methodically
Add the 1 cup Sour Cream, 2 tsp Pure Vanilla Extract, 0.25 cup All-Purpose Flour, 0.5 tsp Salt, and 1 tbsp Lemon Juice to the cream cheese mixture. Beat on low speed for 1 minute until just combined. Scrape the bowl thoroughly to incorporate all ingredients.
Add the 5 whole Large Eggs one at a time, mixing for 15-20 seconds after each addition until fully incorporated. Pour in the 0.5 cup Heavy Cream and mix on low speed for 30 seconds until the batter is smooth and silky. Avoid overmixing at this stage to prevent incorporating excess air, which can cause cracks.
Step 4: Bake in Water Bath for Even Cooking
Wrap the bottom of your springform pan with heavy-duty aluminum foil to prevent water seepage. Pour the batter over the cooled crust and smooth the top with a spatula. Place the pan in a large roasting pan and pour hot water into the roasting pan until it reaches halfway up the sides of the springform pan.
Bake at 325°F for 1 hour and 15 minutes, then turn off the oven and crack the door 1 inch. Allow the cheesecake to cool in the oven for 1 hour. The center should still have a slight wobble when gently shaken—this indicates perfect doneness. The edges will be set with a light golden hue.
Step 5: Chill Thoroughly Before Serving
Remove the cheesecake from the water bath and oven, then run a thin knife around the edge to loosen it from the pan. Cool at room temperature for 1 hour, then cover with plastic wrap (press it directly against the surface to prevent a skin from forming) and refrigerate for at least 8 hours or overnight.
For clean slices, use a hot knife dipped in hot water and wiped dry between cuts. The texture should be dense yet creamy, with a smooth, unbroken top. Serve chilled, allowing each slice to come to room temperature for 5-10 minutes before enjoying for the best flavor and mouthfeel.
Pro Tips For Making King Arthur Cheesecake
- Room Temp Cream Cheese: Pull your full-fat cream cheese out at least 2 hours before starting—cold blocks blend unevenly and leave lumps no matter how hard you beat them. I learned this the hard way after my first three cheesecakes had that cottage cheese texture.
- Pack the Crust: Press the graham cracker crumb mixture into the pan with the bottom of a glass, not just your fingers. It creates an even, dense base that won’t crumble when sliced—sounds weird, but it works.
- Skip the Overmixing: Once the eggs go in, mix just until combined. Overbeating adds air that causes cracks during baking, and nobody wants a cheesecake that looks like the San Andreas Fault.
- Water Bath Always: Wrap the springform pan in foil and bake in a water bath to prevent cracks and ensure even cooking. Yes, it’s a pain to set up, but your future self will thank you when the top comes out smooth as glass.
Essential Equipment for Great king arthur cheesecake
Springform Pan Essentials
Invest in a 9-inch springform pan with a removable bottom—I use Wilton’s nonstick version for reliable release. The tight seal prevents leaks during baking, and the nonstick coating makes crust removal effortless. Avoid cheap models that warp or leak. 💡
Stand Mixer Advantage
A stand mixer with paddle attachment is non-negotiable for this recipe. The KitchenAid 5-quart handles the dense batter without straining. Beat on medium speed for smooth cream cheese. Hand mixers work in a pinch, but require extra scraping.
Precision Thermometer
An oven thermometer ensures accurate 325°F baking—many home ovens run 10-15°F off. I hang a Taylor digital thermometer on the rack. This prevents overbaking, which causes cracks and dry texture.
Water Bath Tools
Use a large roasting pan (at least 12×18 inches) for your water bath. Heavy-duty aluminum foil wrapped tightly around the springform prevents water seepage. Fill with hot water halfway up the pan’s sides for even heat distribution.
Cooling Rack Setup
After baking, a wire cooling rack allows air circulation under the pan. I prefer OXO’s stackable racks for sturdy support. This prevents condensation from forming underneath, which could make your crust soggy.
Hot Knife Trick
For clean slices, use a thin, sharp knife dipped in hot water and wiped dry between cuts. A 10-inch chef’s knife works perfectly. Wipe with a damp towel between dips to remove residue. 🔥
Nutrition Facts
Frequently Asked Questions
Why does my cheesecake crack on top?
Cracks usually form from overmixing the batter or baking at too high a temperature. Beat ingredients just until combined and bake at 325°F. Cooling gradually in the oven with the door cracked also prevents sudden temperature changes.
Can I make this without a water bath?
You can, but the edges may bake faster than the center. To compensate, lower the oven temp to 300°F and extend baking time by 15-20 minutes. The water bath ensures even heat distribution for a smooth finish.
How far in advance can I make this?
This cheesecake tastes best after a full 24-hour chill and keeps well for up to 5 days in the fridge. For longer storage, freeze for up to 3 months—thaw overnight before serving.
What can I use instead of graham crackers?
Digestive biscuits or vanilla wafers work well as 1:1 substitutes. For a gluten-free option, use almond flour with extra butter. Press firmly into the pan to prevent crumbling.

- 6 Egg Cake Recipe with Oil: Light as Air With Buttery Moisture - October 4, 2026
- 4 Bean Casserole Recipe: One-Pan Heartiness With Smoky Paprika Depth - October 4, 2026
- 3-Ingredient Keto Mug Cake Recipe: Microwave Magic in 2 Minutes - October 4, 2026