
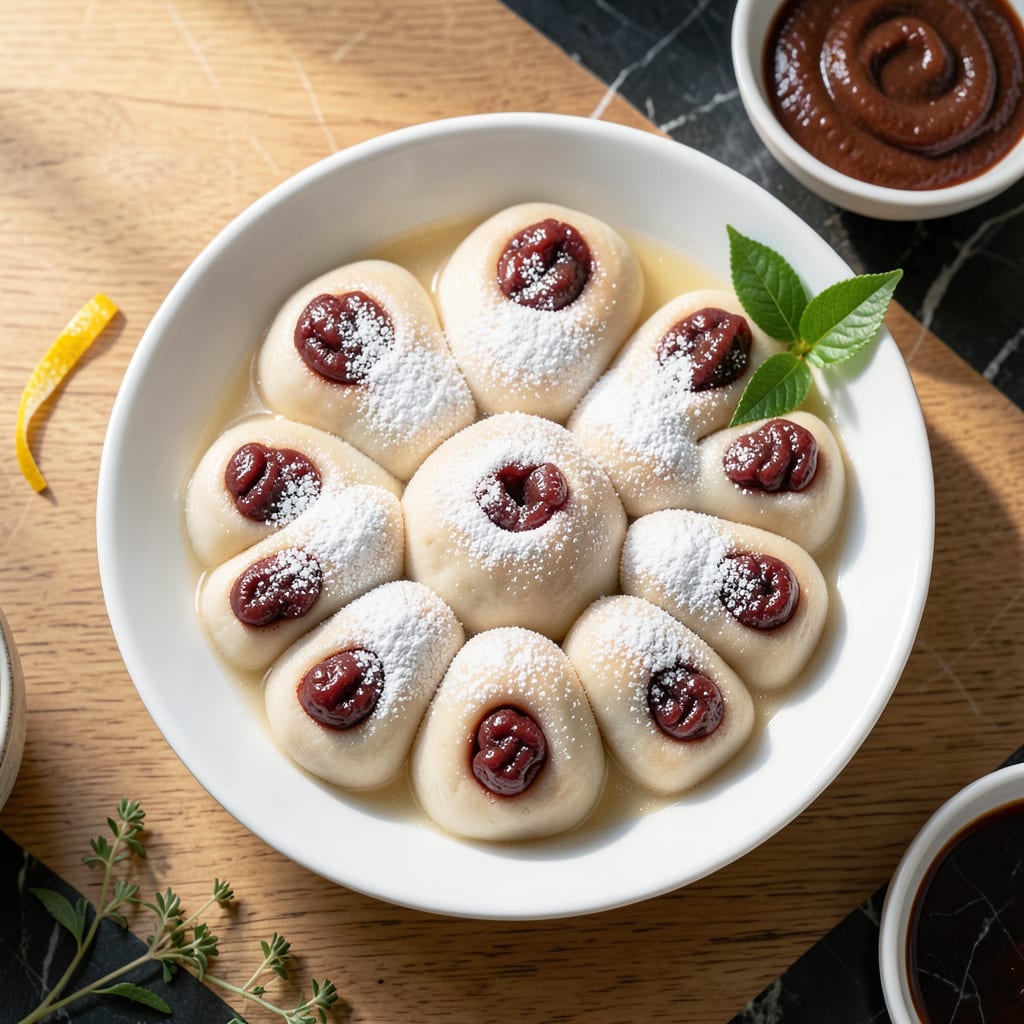
These pillowy buns deliver a traditional Korean treat with soft, slightly sweet dough hugging a rich red bean center. The steaming process creates their signature fluffy texture without needing an oven.
I’ve perfected the balance between the dough’s tenderness and the filling’s sweetness through precise resting and shaping. Every bite offers a delicate contrast that’s both comforting and authentic.
Ingredients for Korean Steamed Red Bean Bun
Soft, sweet, and totally vegan. These buns bring Korean bakery magic to your kitchen.
| Ingredient | Amount | Notes |
|---|---|---|
| All-Purpose Flour 🌾 | 3 cups | Plus extra for dusting |
| Granulated Sugar 🍚 | ¼ cup | For dough sweetness |
| Active Dry Yeast 🍞 | 1 tsp | One packet, about 2.25 tsp |
| Warm Water 💧 | ¾ cup | About 110°F for yeast activation |
| Vegan Butter 🧈 | ¼ cup | Melted and cooled |
| Plant-Based Milk 🥛 | ¼ cup | Unsweetened, any variety |
| Salt 🧂 | ½ tsp | Fine sea salt |
| Sweet Red Bean Paste 🫘 | 1 ½ cups | Store-bought or homemade |
| Cornstarch 🌽 | 1 tbsp | For thickening filling |
| Coconut Oil 🥥 | 1 tsp | For greasing steamer |
The red bean paste is the soul here. Look for vegan versions at Asian markets—many traditional brands use lard, so check labels. H Mart or 99 Ranch usually have safe options. For flour, King Arthur is my go-to, but any all-purpose works. Yeast should be fresh—if it doesn’t bubble in warm water within 5 minutes, toss it and start over (worth the extra minute).
No red bean paste? Sweet potato or lotus seed paste work as fillings too. Out of plant milk? Water plus a teaspoon of oil mimics the richness. Vegan butter can be swapped for coconut oil—just use the same amount. The dough is forgiving, so don’t stress over exact measurements (the good stuff, not the pre-shredded kind).
Dough rests best in a warm spot—turn your oven light on for a cozy proofing environment. Buns keep 2-3 days in an airtight container, but they’re best fresh. Freeze unsteamed buns for up to 1 month (don’t skip this part).
Why You’ll Love This Recipe
- No Fuss Dough: Here’s what sold me—the dough comes together with just flour, yeast, and warm water, no fancy steps.
- Sweet Surprise: That first bite of soft, pillowy bun with the sweet red bean filling? Ridiculously good.
- Breakfast or Snack: I pack these for lunchboxes or serve warm with tea—equally satisfying both ways.
- Stretch Your Dollar: A bag of flour and basic pantry staples make a dozen buns. Honestly, it’s my budget-friendly treat.
Step-by-Step Instructions for Korean Steamed Red Bean Bun
Here’s my tested method that delivers those fluffy, cloud-like buns with sweet filling every time.
Step 1: Activate the Yeast and Prepare the Dough
In a small bowl, combine the 1 tsp Active Dry Yeast with the 0.75 cup Warm Water and let it sit for 5-7 minutes until foamy. This confirms your yeast is alive and ready to work its magic. Meanwhile, whisk together the 3 cups All-Purpose Flour, 0.25 cup Granulated Sugar, and 0.5 tsp Salt in a large mixing bowl.
Once the yeast mixture is frothy, add it to the dry ingredients along with the 0.25 cup Vegan Butter and 0.25 cup Plant-Based Milk. Mix until a shaggy dough forms. The dough should feel slightly sticky but not wet—add a tablespoon of extra flour if needed, but don’t overdo it; a slightly tacky dough yields the softest buns.
Step 2: Knead and Proof the Dough
Turn the dough out onto a lightly floured surface and knead for 8-10 minutes until smooth and elastic. I like to use the heel of my hand and push the dough away, then fold it back over itself repeatedly. You’ll know it’s ready when it springs back slowly when poked and feels silky to the touch.
Place the kneaded dough in a lightly greased bowl, cover with a damp towel, and let it rise in a warm place for 1-2 hours, or until doubled in size. This is where patience pays off—fully proofed dough is the secret to that pillowy texture. If your kitchen is cool, place the bowl near a warm oven or on top of the fridge to speed things up.
Step 3: Prepare the Sweet Red Bean Filling
While the dough rises, mix the 1.5 cups Sweet Red Bean Paste with the 1 tbsp Cornstarch in a bowl until fully combined. The cornstarch helps thicken the filling, preventing it from leaking during steaming. If your paste is very runny, you can cook it down in a small saucepan over low heat for 3-4 minutes, stirring constantly, until it thickens.
Divide the filling into 8 equal portions (about 3 tablespoons each) and roll them into balls between your palms. Place them on a plate and refrigerate until ready to use. Chilling makes the filling easier to handle and less likely to stick to your hands when shaping the buns.
Step 4: Shape the Buns
Once the dough has doubled, punch it down to release the air and divide it into 8 equal pieces. Roll each piece into a ball, then flatten it into a 3-inch circle with your palms. Place a portion of the chilled sweet red bean paste in the center of each dough circle.
To seal the buns, pleat the edges of the dough around the filling, pinching them together as you go until the filling is completely enclosed. Roll the sealed bun gently between your palms to smooth out any seams. Place each finished bun on a small square of parchment paper to prevent sticking during steaming.
Step 5: Steam to Perfection
Line a bamboo steamer with parchment paper (poke a few holes for steam to escape) and lightly brush it with the 1 tsp Coconut Oil to prevent sticking. Arrange the buns in the steamer, leaving 1-2 inches of space between them to expand. Cover with the steamer lid.
Bring 2 inches of water to a boil in a pot that fits your steamer, then place the steamer on top. Steam over high heat for 15-18 minutes. Don’t lift the lid during steaming—condensation can cause the buns to collapse. They’re done when the dough looks glossy and feels slightly firm to the touch.
Turn off the heat and let the buns rest in the steamer for 5 minutes before carefully removing the lid. Serve warm, and watch them disappear in seconds.
Pro Tips For Making Korean Steamed Red Bean Bun
- Proof the Yeast: Always activate your yeast in warm water with a pinch of sugar first—I learned this the hard way after a few flat buns that never rose.
- Chill the Filling: Use cold red bean paste for filling so it doesn’t soften the dough while shaping, making a real difference in keeping the buns neat.
- Skip Overcrowding: Leave at least 1 inch between buns in the steamer or they’ll stick together, and you’ll be peeling them apart like I did my first three attempts.
- Steam on High: Bring the water to a full rolling boil before adding the buns, then steam for 15 minutes—this guarantees that fluffy, pillowy texture every time.
Make-Ahead Tips for This Dish
Prep Ahead Dough
You can make the dough the night before and let it rise overnight in the fridge. This slow fermentation actually enhances the flavor. Just bring it to room temperature before shaping.
Filling Prep
Prepare the red bean filling up to 2 days ahead and store it in an airtight container in the fridge. The cornstarch will keep it thick and ready to use.
Shaping and Freezing
Shape the buns and place them on parchment squares, then freeze in a single layer before transferring to a bag. They’ll keep for 1 month. Steam from frozen, adding 3-4 minutes to the cooking time.
Steamer Setup
If using a bamboo steamer, soak it in warm water for 10 minutes before use to prevent sticking. Line with parchment for extra insurance—this makes cleanup easier too. 💡
Reheating Leftovers
To revive steamed buns, place them in a steamer over boiling water for 3-4 minutes until soft. Microwaving works in a pinch, but cover with a damp paper towel to retain moisture.
Storage Tips
Store cooled buns in an airtight container at room temperature for up to 2 days. For longer storage, freeze unsteamed buns for the best texture when reheated.
Nutrition Facts
Frequently Asked Questions
Can I use store-bought red bean paste?
Just check labels for vegan status—many brands use lard. H Mart or Asian markets often carry vegan versions. For best results, mix in 1 tbsp cornstarch to thicken before using.
Why did my buns collapse after steaming?
This usually happens if the lid was lifted too soon. Let them rest 5 minutes in the steamer after turning off heat. Also ensure dough is fully proofed before shaping.
Can I steam these in a metal colander?
Yes, but line it with parchment and poke holes for steam. A bamboo steamer is ideal, but any heatproof colander over boiling water works. Keep water at 2 inches depth.
How do I know when the dough is properly kneaded?
It should spring back slowly when poked and feel smooth, not sticky. If it tears easily, knead for another 2-3 minutes. The windowpane test (stretching a small piece thin) helps confirm elasticity.

- 6 Egg Cake Recipe with Oil: Light as Air With Buttery Moisture - October 4, 2026
- 4 Bean Casserole Recipe: One-Pan Heartiness With Smoky Paprika Depth - October 4, 2026
- 3-Ingredient Keto Mug Cake Recipe: Microwave Magic in 2 Minutes - October 4, 2026