
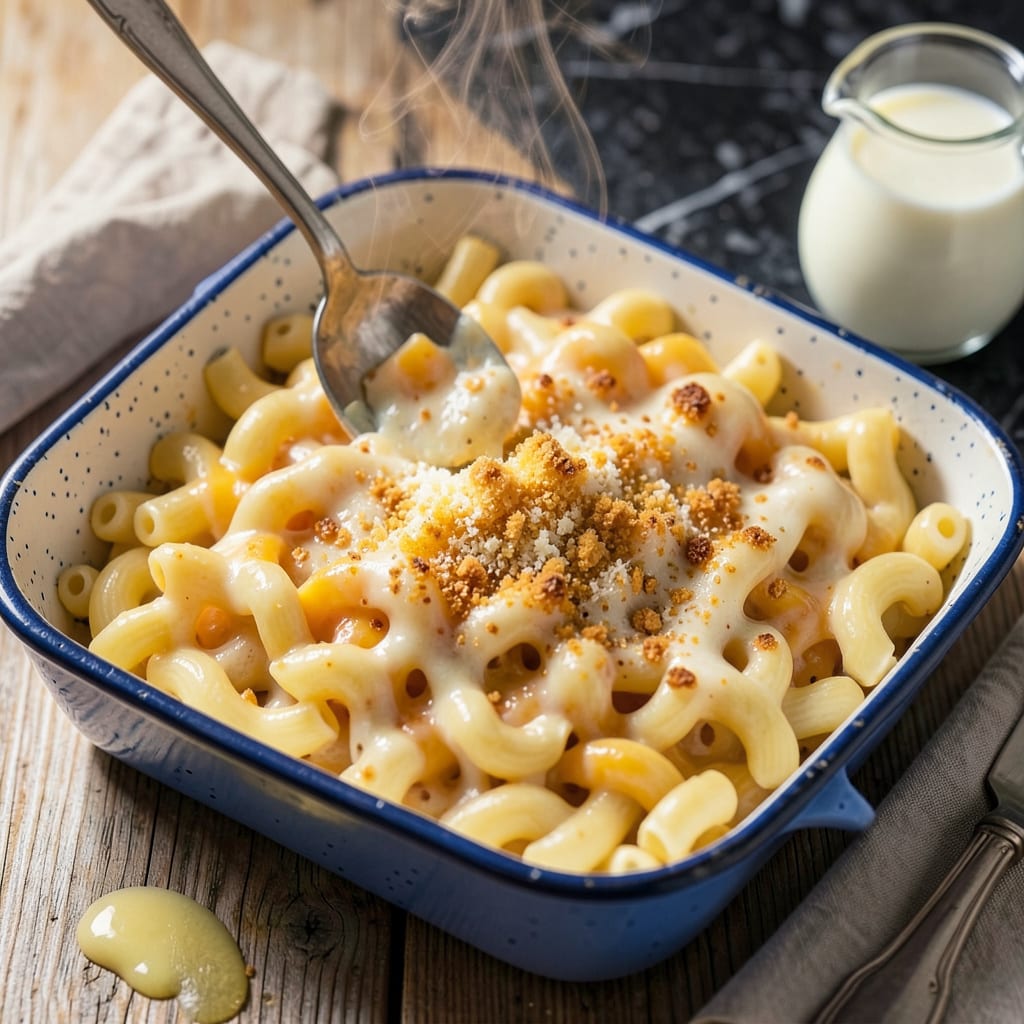
There’s a reason Kraft mac and cheese holds such nostalgic appeal—its creamy, cheesy comfort is unmatched. This homemade version captures that same beloved flavor while offering superior texture and quality ingredients. No artificial powders here, just real cheese and simple techniques that deliver the ultimate comfort food experience.
The secret lies in a smooth cheese sauce made with sharp cheddar and a touch of American cheese for that signature melt. Combined with perfectly cooked pasta, this recipe recreates the familiar taste you love with a richer, more satisfying result. Ready in under 30 minutes, it’s the ideal weeknight meal that both kids and adults will devour.
Ingredients for Kraft Mac and Cheese
This upgraded mac and cheese uses quality ingredients to recreate that nostalgic Kraft flavor with superior texture and depth.
| Ingredient | Amount | Notes |
|---|---|---|
| Elbow Macaroni 🍝 | 12 oz | Or substitute cavatappi pasta |
| Unsalted Butter 🧈 | 4 tbsp | European-style preferred for richness |
| All-Purpose Flour 🌾 | 2 tbsp | For roux consistency |
| Whole Milk 🥛 | 2 cups | Full-fat for optimal creaminess |
| Sharp Cheddar Cheese 🧀 | 8 oz | Freshly grated from block |
| American Cheese 🧀 | 4 oz | Deluxe slices for smooth melt |
| Dry Mustard Powder 🌿 | 1 tsp | Balances cheese sharpness |
| Garlic Powder 🧄 | ½ tsp | Enhances savory depth |
| Onion Powder 🧅 | ½ tsp | Adds subtle complexity |
| Kosher Salt 🧂 | 1 tsp | Diamond Crystal preferred |
| Freshly Ground Black Pepper 🌶️ | ¼ tsp | Medium-coarse grind |
| Heavy Cream 🥛 | ¼ cup | Optional for extra richness |
The cheese selection is paramount for authentic flavor. Sharp cheddar provides the backbone, while American cheese (specifically deluxe slices) delivers that signature melt. Opt for block cheeses and grate them yourself—pre-shredded contains anti-caking agents that compromise texture. For the milk, whole milk is non-negotiable; lower-fat versions yield a watery sauce. European-style butter (like Plugrá) enhances richness due to its higher fat content.
Substitutions require careful balance. Evaporated milk can replace heavy cream at a 1:1 ratio, though the sauce will be slightly less velvety. For a gluten-free version, use rice flour in the roux and certified gluten-free pasta. The dry mustard is essential for that Kraft-like tang, but Dijon mustard (½ tsp) works in a pinch. Avoid pre-grated Parmesan—its texture disrupts the sauce’s smoothness.
Store the cheese sauce separately from cooked pasta to prevent absorption. Refrigerated, it maintains optimal consistency for 3 days; reheat gently with additional milk as needed. The dry ingredients (flour, spices) keep indefinitely in airtight containers. For make-ahead convenience, prepare the sauce without pasta and refrigerate for up to 5 days—cook pasta fresh when ready to serve.
Why You’ll Love This Recipe
- I’ll be real: this comes together in a single pot while the pasta boils. No colander, no extra bowls—just melt butter, whisk in flour, pour milk, and let that sharp cheddar do its thing. The cleanup is almost as satisfying as the meal.
- One-Pot Magic: I’ll be real: this comes together in a single pot while the pasta boils. No colander, no extra bowls—just melt butter, whisk in flour, pour milk, and let that sharp cheddar do its thing. The cleanup is almost as satisfying as the meal.
- That Cheese Pull: Here’s what sold me—the first bite where the creamy sauce clings to every elbow, and the sharp cheddar hits you with just enough tang. It’s not the fancy baked version, but honestly? Sometimes the stovetop method nails it better.
- Weeknight Hero: Between us, this is my 6 p.m. panic dinner. Kids have soccer? Check. Forgot to meal prep? Check. Need something that pairs with steamed broccoli and hot dogs? (Yes, even on a Tuesday night.) It’s unfussy enough for chaos, but good enough to feel intentional.
Step-by-Step Instructions for Creamier Homemade Mac and Cheese
This method delivers the nostalgic comfort of boxed mac and cheese with superior texture and depth of flavor.
Step 1: Cook the Elbow Macaroni to Al Dente Perfection
Bring a large pot of salted water to a rolling boil. Add the 12 oz Elbow Macaroni and cook for 1 minute less than the package instructions indicate for al dente. You want the pasta slightly undercooked as it will continue to absorb liquid from the sauce later.
Stir occasionally during cooking to prevent sticking. The pasta should offer slight resistance when bitten but not be crunchy. Drain immediately in a colander, but do not rinse – the starch on the surface helps the sauce adhere better. Set aside while you prepare the cheese sauce.
Step 2: Create a Velvety Cheese Roux Base
In a large saucepan, melt the 4 tbsp Unsalted Butter over medium heat until foaming subsides. Immediately whisk in the 2 tbsp All-Purpose Flour to form a smooth paste. Cook this roux for 2 minutes, stirring constantly, until it develops a pale golden color and emits a nutty aroma.
The roux should bubble gently but not brown. This cooking step removes the raw flour taste and builds the foundation for your sauce. Gradually whisk in the 2 cups Whole Milk, starting with small additions to prevent lumps from forming. Continue whisking until the mixture is completely smooth before adding more milk.
Step 3: Develop the Cheese Sauce with Layered Flavors
Once all the milk is incorporated, increase heat to medium-high and cook, stirring frequently, until the sauce thickens enough to coat the back of a spoon – about 5-7 minutes. The sauce should leave a clear path when you run your finger through it on the spoon.
Reduce heat to low and stir in the 1 tsp Dry Mustard Powder, 0.5 tsp Garlic Powder, 0.5 tsp Onion Powder, 1 tsp Kosher Salt, and 0.25 tsp Freshly Ground Black Pepper. Then add the 8 oz Sharp Cheddar Cheese and 4 oz American Cheese gradually, stirring constantly until completely melted and smooth. The American cheese ensures creaminess while the sharp cheddar provides depth of flavor.
Step 4: Combine Pasta and Sauce for Optimal Texture
Add the cooked macaroni to the cheese sauce and stir gently but thoroughly to coat every piece. The sauce should cling to the pasta without pooling at the bottom of the pan. If the mixture appears too thick, stir in the 0.25 cup Heavy Cream to achieve your desired consistency.
Cook for an additional 2-3 minutes over low heat, stirring occasionally, to allow the flavors to meld and the pasta to absorb some of the sauce. The final texture should be creamy but not soupy, with the sauce evenly distributed throughout. Taste and adjust seasoning if needed, though be cautious as the flavors will intensify slightly upon standing.
Step 5: Rest and Serve for Perfect Consistence
Remove from heat and let the macaroni and cheese rest for 3-5 minutes before serving. This brief resting period allows the sauce to set slightly and the pasta to finish absorbing the creamy mixture. The surface should develop a very slight skin, indicating the starches have properly bonded.
Serve immediately while still warm and creamy. For best results, portion into bowls using a large spoon to create those classic ribbons of cheese sauce. The dish should maintain its creamy texture for about 20 minutes after serving, though it’s undoubtedly best enjoyed fresh from the pot.
Pro Cooking Tips for kraft mac and cheese
Perfect Pasta Texture
The key to that nostalgic Kraft texture starts with slightly undercooking your pasta. I cook my 12 oz elbow macaroni for exactly 1 minute less than package directions. This ensures the noodles absorb the cheese sauce perfectly without turning mushy. Trust me, that slight bite makes all the difference in the final dish. 💡
Roux Mastery
Your cheese sauce lives or dies by the roux. Cook the 2 tbsp flour and 4 tbsp butter mixture for a full 2 minutes until it smells nutty but doesn’t brown. This removes the raw flour taste while building flavor. I use a flat whisk for smoother results—it gets into the pan’s corners better than a regular whisk.
Cheese Melting Order
Always add the American cheese first when building your sauce. Its emulsifiers create a stable base before adding the sharp cheddar. I tear the American cheese into pieces rather than cubing—it melts faster and more evenly. Stir constantly in a figure-eight motion to prevent any cheese from sticking to the pan bottom.
Temperature Control
Never let your sauce boil after adding cheese. Keep it at a gentle low heat (about 160°F) to prevent separation. If it gets too thick, a splash of the pasta water works better than milk to loosen it. I check the temperature with an instant-read thermometer to be precise.
Resting Period
That 3-5 minute rest before serving isn’t optional. It allows the starches to fully absorb the sauce, creating that perfect creamy consistency. I cover the pot with a clean towel during resting to keep it warm without overcooking. The surface should look glossy but not soupy when ready to serve.
Equipment Upgrade
A heavy-bottomed saucepan makes all the difference for even heat distribution. I swear by my All-Clad 3-quart—it prevents hot spots that can cause the sauce to scorch. For grating cheese, a Microplane gives you the finest texture that melts instantly into the sauce. 🧀
Nutrition Facts

- 6 Egg Cake Recipe with Oil: Light as Air With Buttery Moisture - October 4, 2026
- 4 Bean Casserole Recipe: One-Pan Heartiness With Smoky Paprika Depth - October 4, 2026
- 3-Ingredient Keto Mug Cake Recipe: Microwave Magic in 2 Minutes - October 4, 2026