
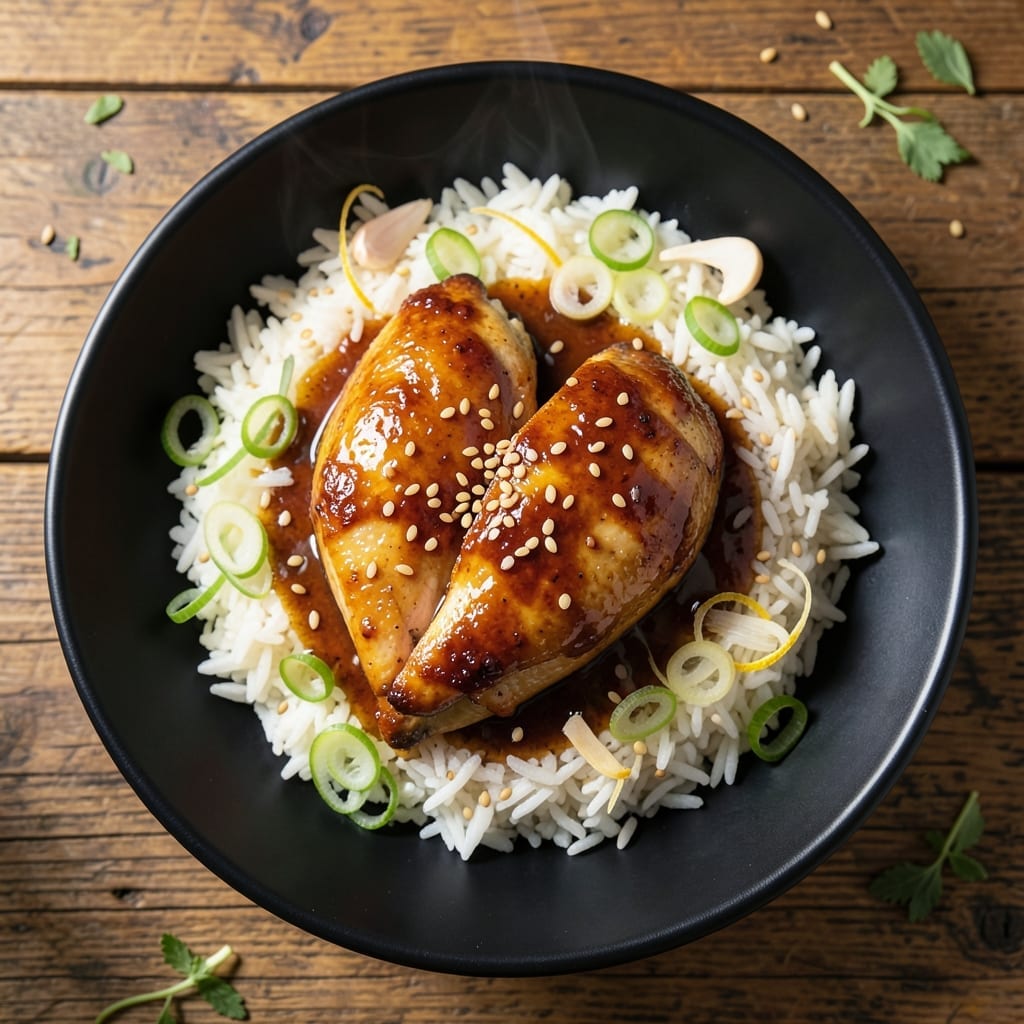
This glazed chicken delivers a perfect balance of sweet and savory without the guilt. A simple marinade and quick bake create tender, juicy meat with a sticky, caramelized finish.
The secret is in the glaze—a combination of honey, soy sauce, and garlic that transforms ordinary chicken into something special. Each bite offers a satisfying contrast of flavors that feels indulgent yet remains light and nutritious.
With minimal prep and 30 minutes of cooking time, this dish comes together effortlessly. The result is a restaurant-quality meal that’s perfect for busy weeknights or a healthy lunch option.
Serve it over rice or with steamed vegetables for a complete, well-rounded meal. Here’s how to make it at home.
Ingredients for Lean Cuisine Glazed Chicken
Tender chicken plus a vibrant glaze make this light, flavorful dish come alive effortlessly.
| Ingredient | Amount | Notes |
|---|---|---|
| Boneless Skinless Chicken Breasts 🍗 | 1 ½ lb | Pounded to even thickness |
| Honey 🍯 | ¼ cup | Pure for best flavor |
| Low-Sodium Soy Sauce 🥢 | ¼ cup | Tamari for gluten-free option |
| Garlic Cloves 🧄 | 4 cloves | Minced finely for glaze |
| Fresh Ginger 🌿 | 1 tbsp | Grated for depth |
| Rice Vinegar 🍚 | 1 tbsp | For brightness and balance |
| Olive Oil 🫒 | 1 tbsp | Extra-virgin preferred |
| Kosher Salt 🧂 | ½ tsp | Diamond Crystal brand recommended |
| Black Pepper 🌶️ | ½ tsp | Freshly ground for best flavor |
| Dijon Mustard 🟡 | 1 tbsp | For glaze complexity |
| Red Pepper Flakes 🔥 | ¼ tsp | Optional for subtle heat |
| Cornstarch 🌾 | 1 tsp | For thickening glaze |
| Water 💧 | 2 tbsp | To mix with cornstarch |
The chicken quality matters here. Air-chilled, antibiotic-free breasts from Whole Foods or Trader Joe’s deliver the best texture—avoid the enhanced or pre-brined varieties, as they can make the meat mushy. Pounding to an even thickness ensures uniform cooking. For the soy sauce, Kikkoman Low-Sodium strikes the right balance of salt and umami without overpowering the other flavors.
No honey? Pure maple syrup at equal volume works well, though it adds a slightly different depth. Fresh ginger can be swapped for ground ginger at one-quarter the amount. If rice vinegar isn’t on hand, apple cider vinegar is a fine substitute. For a gluten-free version, tamari or coconut aminos replace the soy sauce seamlessly. Dijon mustard can be omitted, but it adds a nice tang.
Store raw chicken in the coldest part of the fridge—use within 2 days for best quality. The glaze keeps in an airtight container for up to 1 week. Leftovers? They reheat well and taste even better the next day after the flavors meld for 3-4 days.
Why You’ll Love This Recipe
- One Pan Wonder: I love that I can sear the chicken, whisk the honey-soy glaze, and let it all come together without dirtying every pot in my kitchen.
- Sweet-Savory Magic: The honey caramelizes just enough while the garlic and ginger in the glaze give that deep, warm kick I crave.
- Meal Prep MVP: I’ll make a double batch on Sunday—this chicken stays tender and the glaze soaks in even better the next day.
- Budget-Friendly Protein: Boneless skinless chicken breasts are lean and affordable, and this glaze makes them taste like a restaurant dish.
Step-by-Step Instructions for Glazed Chicken
This method ensures tender chicken with a glossy, flavorful glaze every time.
Step 1: Prepare and Season the Chicken
Begin by pounding the 1.5 lb boneless skinless chicken breasts to an even ½-inch thickness using a meat mallet. This ensures uniform cooking and prevents dry spots. Season both sides generously with the 0.5 tsp kosher salt and 0.5 tsp black pepper.
Pat the chicken dry with paper towels after seasoning—this step is crucial for achieving a proper sear. The surface should feel slightly tacky from the seasoning, but not wet. This preparation guarantees even browning and maximum flavor penetration during cooking.
Step 2: Create the Glaze Base
In a small bowl, whisk together the 0.25 cup honey, 0.25 cup low-sodium soy sauce, 1 tbsp rice vinegar, 1 tbsp Dijon mustard, minced 4 cloves garlic cloves, and grated 1 tbsp fresh ginger. The mixture should be smooth and well combined, with no visible separation.
For a subtle kick, stir in the 0.25 tsp red pepper flakes. In a separate small bowl, mix the 1 tsp cornstarch with 2 tbsp water until completely dissolved—this slurry will thicken the glaze to the perfect consistency later.
Step 3: Sear and Simmer the Chicken
Heat the 1 tbsp olive oil in a large skillet over medium-high heat until it shimmers but doesn’t smoke. Add the chicken breasts and cook for 4-5 minutes per side until they develop a golden-brown crust and release easily from the pan.
Reduce heat to medium-low, pour the honey-soy mixture over the chicken, and add the cornstarch slurry. Simmer for 3-4 minutes, spooning the glaze over the chicken occasionally, until the sauce thickens to a syrupy consistency and the chicken reaches an internal temperature of 165°F.
Step 4: Rest and Serve
Transfer the glazed chicken to a serving platter and let it rest for 3-5 minutes. This allows the juices to redistribute throughout the meat, ensuring each bite remains moist and flavorful. The glaze will continue to set slightly as it cools.
Spoon any remaining glaze from the skillet over the chicken before serving. The sauce should cling to the chicken with a beautiful sheen. Serve immediately while hot, as the glaze is at its most vibrant and fluid state.
Pro Tips For Making Lean Cuisine Glazed Chicken
- Pound the Chicken: Even thickness means even cooking—pound the breasts to about ½ inch so they cook through without drying out. I learned this the hard way after too many dry, overcooked edges.
- Bloom the Aromatics: Cook the minced garlic and grated ginger in a little oil for 30 seconds before adding liquids. Sounds small, but it wakes up their flavor in the glaze.
- Simmer the Glaze: After mixing honey and soy sauce, let it simmer for 2-3 minutes to thicken slightly before coating the chicken. Resist the urge to rush—it clings better when reduced.
- Rest Before Slicing: Give the chicken 5 minutes under foil after cooking. It keeps the juices inside where they belong, not all over your cutting board.
Creative Variations of This Recipe
Spicy Sriracha Twist
Add 1 tbsp Sriracha and an extra ½ tsp red pepper flakes to the glaze for a fiery kick. The heat balances beautifully with the honey’s sweetness. I love this version when I’m craving bold flavors. 🌶️
Citrus Orange Glaze
Replace 1 tbsp rice vinegar with 2 tbsp fresh orange juice and add 1 tsp orange zest. The citrus brightens the glaze and pairs wonderfully with steamed broccoli or roasted carrots.
Maple Mustard Fusion
Swap the 0.25 cup honey for 0.25 cup pure maple syrup and increase the Dijon mustard to 2 tbsp. This creates a deeper, more complex flavor profile that reminds me of fall comfort food.
Asian-Inspired Teriyaki
Add 1 tbsp grated fresh ginger (extra) and 1 tbsp toasted sesame oil to the glaze. Garnish with toasted sesame seeds and sliced green onions after cooking. Serve over jasmine rice for a complete Asian-inspired meal.
Balsamic Honey Glaze
Replace 1 tbsp rice vinegar with 2 tbsp balsamic vinegar. The result is a richer, more sophisticated glaze that pairs beautifully with roasted Brussels sprouts. I often make this for dinner parties. ✨
Lemon Herb Variation
Add 1 tbsp lemon juice and 1 tsp dried thyme to the glaze. The lemon adds a bright, zesty note that complements the chicken’s natural flavors. This version feels particularly light and fresh.
Nutrition Facts
Frequently Asked Questions
Can I use chicken thighs instead of breasts?
Use boneless, skinless thighs and reduce cooking time to 3-4 minutes per side. They stay juicier and pair perfectly with the glaze.
How can I make the glaze thicker?
Simmer the glaze for an extra 2-3 minutes after removing the chicken. For instant thickening, add ½ tsp more cornstarch mixed with water.
What if my glaze burns in the pan?
Lower the heat to medium and stir constantly. If it darkens too much, add 1-2 tbsp water to loosen it.
Can I prep this ahead of time?
Marinate the chicken in the glaze for up to 4 hours in the fridge. Cook just before serving for best texture.

- 6 Egg Cake Recipe with Oil: Light as Air With Buttery Moisture - October 4, 2026
- 4 Bean Casserole Recipe: One-Pan Heartiness With Smoky Paprika Depth - October 4, 2026
- 3-Ingredient Keto Mug Cake Recipe: Microwave Magic in 2 Minutes - October 4, 2026