
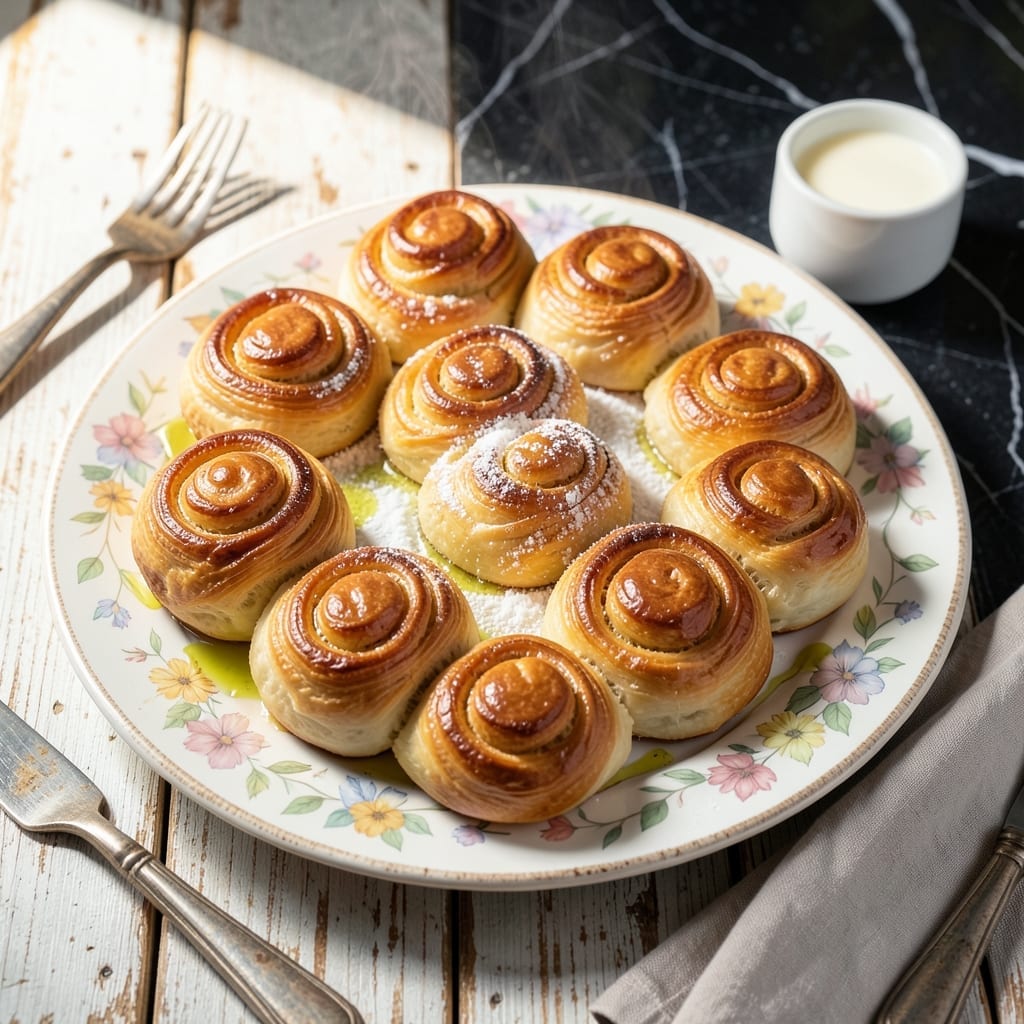
These Hawaiian-style butter rolls deliver the same pillowy softness and delicate sweetness that made Liliha Bakery famous. The secret lies in a precise balance of ingredients and a patient rising process that creates that signature cloud-like texture.
I’ve refined this recipe to capture the bakery’s authentic taste without complicated techniques. The dough comes together with basic pantry staples, and the baking method ensures golden, buttery tops every time.
What you’ll get is a batch of rolls so light and tender they practically melt in your mouth. Their subtle sweetness makes them perfect for dinner or as a standalone treat.
This method guarantees consistent results, whether you’re baking for a crowd or just craving that nostalgic flavor.
Ingredients for Liliha Bakery Butter Rolls
Basic pantry staples transformed into bakery-worthy soft, sweet rolls with cloud-like texture.
| Ingredient | Amount | Notes |
|---|---|---|
| All-Purpose Flour 🌾 | 4 cups | Sifted for even texture |
| Granulated Sugar 🍚 | ¼ cup | Fine grain for smooth dough |
| Active Dry Yeast 🍞 | 2 ¼ tsp | One packet plus extra boost |
| Whole Milk 🥛 | ¾ cup | Warmed to 110°F for yeast activation |
| Unsalted Butter 🧈 | ½ cup | Softened to room temperature |
| Large Egg 🥚 | 1 whole | Room temperature for even mixing |
| Fine Sea Salt 🧂 | 1 tsp | Balances sweetness precisely |
| Vanilla Extract 🌿 | 1 tsp | Pure for authentic flavor |
| Bread Flour 🍞 | ½ cup | Adds structure to rolls |
| Honey 🍯 | 1 tbsp | For subtle natural sweetness |
| Egg Yolk 🥚 | 1 whole | For golden color on tops |
| Melted Butter 🧈 | 2 tbsp | For brushing finished rolls |
The flour quality is non-negotiable here. King Arthur or Gold Medal all-purpose flour provides consistent protein content crucial for that pillowy structure. For the milk, whole milk yields the richest flavor and tenderest crumb—avoid low-fat varieties. Yeast freshness is key: check expiration dates and store unopened packets in the freezer to extend shelf life. The butter should be high-quality, like Plugrá or European-style, for superior flavor and texture.
No whole milk? Half-and-half mixed with water at a 1:1 ratio works as a substitute. For a dairy-free version, full-fat coconut milk maintains richness. The honey can be replaced with maple syrup or agave at equal amounts. If you’re out of bread flour, simply use all all-purpose—the rolls will be slightly less chewy but still delicious. The vanilla extract should be pure, not imitation, for the most authentic bakery flavor.
The dough can be prepared a day ahead and refrigerated overnight for the first rise. Baked rolls stay fresh at room temperature for 2 days in an airtight container, or freeze for up to 3 months. For best results, reheat frozen rolls in a 350°F oven for 10-15 minutes before serving.
Why You’ll Love This Recipe
- I’ll be real: these work just as well with jam at sunrise as they do soaking up gravy at the dinner table.
- One Bowl Wonder: I mix everything right in the stand mixer—no extra bowls, just flour, yeast, warm milk, and butter coming together smooth as can be.
- Buttery Clouds: Honestly, that first bite with the crisp top giving way to the fluffy, buttery layers? I’ve yet to find a store-bought roll that compares.
- Breakfast to Dinner: I’ll be real: these work just as well with jam at sunrise as they do soaking up gravy at the dinner table.
Step-by-Step Instructions for Hawaiian-Style Butter Rolls
Master the technique for achieving that signature pillowy texture and golden finish.
Step 1: Activate the Yeast and Bloom the Dairy
Warm the 0.75 cup Whole Milk to exactly 110°F—any hotter will kill the yeast, any cooler won’t activate it. I use an instant-read thermometer for precision. Whisk in the 2.25 tsp Active Dry Yeast and 1 tbsp Honey, then let sit for 5-7 minutes until foamy and fragrant.
The honey not only feeds the yeast but adds subtle depth to the dough’s sweetness. You’ll see the mixture transform from cloudy to bubbly with a distinct yeast aroma—this visual confirmation means your yeast is alive and ready to work its magic on the 4 cups All-Purpose Flour and 0.5 cup Bread Flour.
Step 2: Combine Wet and Dry Ingredients into a Smooth Dough
In a stand mixer fitted with the dough hook, combine the 0.25 cup Granulated Sugar, 1 tsp Fine Sea Salt, 4 cups All-Purpose Flour, and 0.5 cup Bread Flour. The bread flour adds structure while the all-purpose keeps the rolls tender. Create a well in the center for your wet ingredients.
Add the yeast mixture, 0.5 cup Unsalted Butter (softened), 1 whole Large Egg, and 1 tsp Vanilla Extract. Mix on low for 2 minutes until combined, then increase to medium for 6-8 minutes until the dough pulls away from the bowl and becomes smooth and elastic. The dough should be slightly tacky but not sticky.
Step 3: First Rise Until Doubled in Volume
Transfer the dough to a lightly greased bowl, turning once to coat all sides. Cover with a damp kitchen towel and place in a warm, draft-free spot. I like to use my turned-off oven with the light on for consistent warmth. Let rise for 1.5-2 hours or until nearly doubled in size.
You’ll know it’s ready when the dough springs back slowly when pressed lightly with a finger, leaving a slight indentation. This first rise develops the gluten structure that gives these rolls their signature soft yet sturdy texture. Resist the urge to rush this step—proper fermentation is key to that authentic Liliha Bakery quality.
Step 4: Shape, Second Rise, and Bake to Golden Perfection
Punch down the risen dough and divide into 12 equal portions (about 3.5 ounces each). Shape each into a smooth ball by pinching the bottom seam. Arrange in a greased 9×13-inch baking pan, spacing them slightly apart. Cover and let rise again for 45-60 minutes until puffy and nearly touching.
Preheat oven to 350°F. Brush the risen rolls with 1 whole Egg Yolk beaten with 1 tablespoon of water for a deep golden finish. Bake for 20-25 minutes until the tops are deep golden brown and the internal temperature reaches 190°F. The rolls should sound hollow when tapped lightly on top.
Step 5: Finish with Butter Glaze for Signature Shine
Immediately after removing from the oven, brush the hot rolls with all 2 tbsp Melted Butter. This not only adds a beautiful sheen but also infuses each roll with extra richness. Let cool in the pan for 10 minutes before serving—this allows the structure to set while still warm.
The final result should be rolls with a tender, pull-apart interior and a slightly crisp, buttery crust. Each bite should deliver that perfect balance of sweetness from the sugar and honey with the rich depth from the butter and egg. Serve warm for the ultimate experience.
Pro Tips For Making Liliha Bakery Butter Rolls
- Proof the Yeast: Always bloom your active dry yeast in warm whole milk (110°F) with a pinch of sugar for 5-10 minutes until foamy—skip this and your rolls won’t rise like Liliha’s.
- Use Room-Temp Butter: Take the unsalted butter out 1 hour before mixing; cold butter tears the dough, and you’ll end up with dense rolls instead of flaky layers.
- Don’t Overflour: I learned this the hard way—dust your surface lightly when rolling, because too much flour toughens the dough and mutes that buttery softness.
- Chill Before Cutting: After laminating the dough with butter, pop it in the fridge for 15 minutes before slicing—this keeps the layers distinct and prevents the butter from smearing into the flour.
Common Mistakes When Making Great liliha bakery butter rolls
Yeast Temperature Issues
Using milk that’s too hot will kill your yeast instantly. Always warm it to exactly 110°F—I use a ThermoWorks thermometer for accuracy. If too cool, your dough won’t rise properly, resulting in dense rolls instead of that signature cloud-like texture. 🌡️
Overproofing the Dough
Letting the dough rise too long causes it to collapse when baking. Watch for the 1.5-2 hour first rise mark and the 45-60 minute second rise. The dough should spring back slowly when pressed, not feel slack or smell overly sour.
Insufficient Kneading
Under-kneaded dough leads to tough rolls. Mix for the full 6-8 minutes on medium speed until smooth and elastic. The dough should pull away from the bowl but remain slightly tacky. This develops the gluten needed for that pillowy softness.
Uneven Portioning
Eyeballing portions results in some rolls baking faster than others. Use a kitchen scale to divide into 12 equal portions of about 3.5 ounces each. Consistent sizing ensures even baking and a uniform golden finish.
Skipping the Butter Glaze
Brushing with 2 tbsp melted butter immediately after baking is non-negotiable. This adds the signature shine and infuses extra richness. Don’t wait—the butter needs to soak into the hot rolls for maximum flavor impact. 🧈
Rushing the Cooling
Cutting into rolls too soon causes them to lose structure. Let them cool in the pan for at least 10 minutes after baking. This allows the internal structure to set while keeping the exterior slightly crisp.
Nutrition Facts
Frequently Asked Questions
Can I use a hand mixer instead of a stand mixer?
Yes, but kneading by hand will take 10-12 minutes of vigorous work. The dough should be smooth and elastic. A stand mixer is ideal for consistent results.
Why did my rolls turn out dense?
Dense rolls usually mean the yeast wasn’t active or the dough didn’t rise long enough. Ensure your milk is exactly 110°F and allow full rise times.
How do I store leftovers?
Keep in an airtight container at room temperature for up to 2 days. For longer storage, freeze for up to 3 months and reheat in a 350°F oven.
Can I make the dough ahead?
Prepare the dough, cover tightly, and refrigerate overnight for the first rise. This slow fermentation enhances flavor.

- 6 Egg Cake Recipe with Oil: Light as Air With Buttery Moisture - October 4, 2026
- 4 Bean Casserole Recipe: One-Pan Heartiness With Smoky Paprika Depth - October 4, 2026
- 3-Ingredient Keto Mug Cake Recipe: Microwave Magic in 2 Minutes - October 4, 2026