
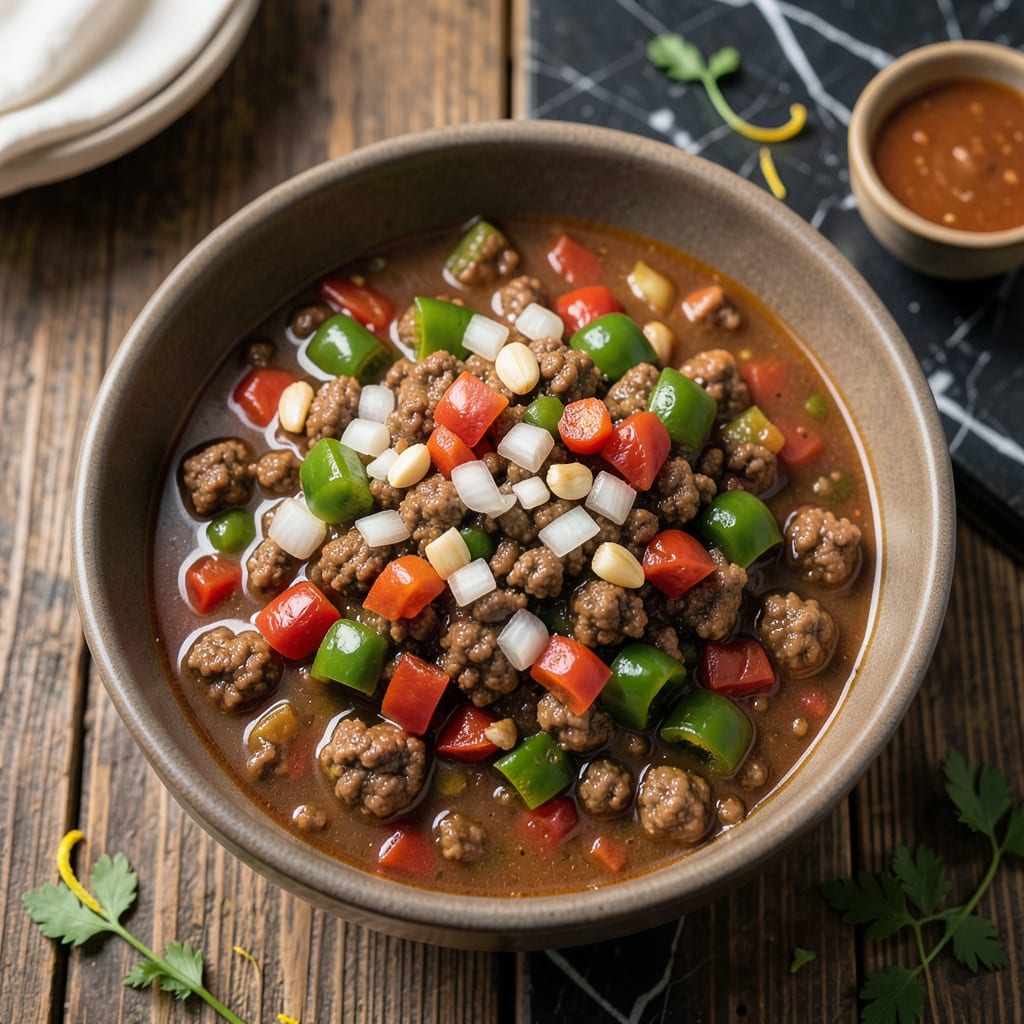
This kidney-friendly chili delivers bold flavor while keeping potassium levels in check. I’ve carefully selected ingredients that maintain richness without compromising dietary needs.
The result is a hearty, satisfying dish with tender meat, aromatic spices, and a thick, savory broth—all while staying mindful of potassium content. Perfect for a comforting meal that doesn’t sacrifice taste.
Ingredients for Low Potassium Chili
Hearty and bold with kidney-conscious ingredients. Every bite delivers savory satisfaction without compromise.
| Ingredient | Amount | Notes |
|---|---|---|
| Ground Beef 🥩 | 1 lb | 85/15 lean-to-fat ratio preferred |
| White Onion 🧅 | 1 whole | Medium, finely diced |
| Garlic Cloves 🧄 | 3 cloves | Minced for depth of flavor |
| Green Bell Pepper 🌶️ | 1 whole | Diced, seeds removed |
| Low-Sodium Beef Broth 💧 | 2 cups | Reduced potassium content |
| Canned Diced Tomatoes 🍅 | 1 can | No salt added, drained |
| Tomato Paste 🍅 | 2 tbsp | For concentrated tomato flavor |
| Chili Powder 🌶️ | 2 tbsp | Mild or medium heat |
| Ground Cumin 🌿 | 1 tbsp | Toasted for enhanced aroma |
| Dried Oregano 🍃 | 1 tsp | Mediterranean variety preferred |
| Smoked Paprika 🌶️ | 1 tsp | Adds depth without potassium |
| Cayenne Pepper 🔥 | ¼ tsp | Adjust to heat preference |
| Apple Cider Vinegar 💧 | 1 tbsp | For brightness and balance |
| Olive Oil 🫒 | 1 tbsp | For sautéing vegetables |
The beef is critical here—opt for 85/15 ground chuck from Whole Foods or a trusted butcher. This ratio ensures tenderness while keeping moisture in check. The onion and bell pepper should be fresh and firm; avoid pre-cut versions as they lose texture. Low-sodium beef broth is essential for potassium control, so check labels carefully at Kroger or Safeway.
Need a swap? Ground turkey works but may need extra oil to compensate for leanness. For the broth, homemade with no-salt-added ingredients is ideal, but store-bought low-sodium is fine. No fresh peppers? Frozen diced bell peppers (thawed and drained) are a good alternative. Skip the canned tomatoes with added salt—no-salt-added versions are widely available.
Store ground beef in the coldest part of your fridge and use within 2 days. Canned tomatoes and broth keep for 12-18 months unopened. Once cooked, chili stays fresh in the fridge for 4-5 days or freezes beautifully for 3 months.
Why You’ll Love This Recipe
- One Pot Wonder: I brown the beef, toss in the onion, garlic, and peppers—everything cooks together in one pot.
- Rich Without Guilt: The beef broth and garlic build deep, savory flavor without loading up on potassium.
- Meal Prep Hero: I make a double batch on Sunday and it reheats beautifully all week.
Step-by-Step Instructions for Low Potassium Chili
This method ensures maximum flavor while maintaining kidney-friendly nutritional values throughout the process.
Step 1: Brown the Ground Beef and Build the Base
Heat the 1 tbsp olive oil in a large Dutch oven over medium-high heat. Add the 1 lb ground beef and cook, breaking it apart with a wooden spoon, for 5-7 minutes until evenly browned and no pink remains.
This step develops the meat’s natural flavors through Maillard browning. Drain any excess fat, leaving just enough to coat the bottom of the pot—this prevents greasiness while preserving richness. The beef should be crumbly and deep brown in color.
Step 2: Sauté the Aromatic Vegetables
Reduce heat to medium and add the 1 whole white onion (finely diced), 1 whole green bell pepper (diced), and 3 cloves garlic cloves (minced). Cook for 4-5 minutes, stirring frequently, until the vegetables soften and the onion becomes translucent.
The trio of onion, pepper, and garlic creates the flavor foundation. I cook until the raw garlic aroma mellows into a sweet, fragrant scent—this indicates the alliums have properly caramelized without burning. The bell pepper should be tender but still retain some texture.
Step 3: Incorporate Spices and Tomato Elements
Stir in the 2 tbsp chili powder, 1 tbsp ground cumin, 1 tsp dried oregano, 1 tsp smoked paprika, and 0.25 tsp cayenne pepper. Toast the spices for 1 minute to deepen their flavors before adding the 2 tbsp tomato paste.
Cook the tomato paste with the spices for 2 minutes until it darkens slightly—this removes the raw taste and intensifies its umami properties. Then add the 1 can canned diced tomatoes (drained) and 2 cups low-sodium beef broth, scraping up any browned bits from the bottom of the pot.
Step 4: Simmer for Optimal Flavor Development
Bring the mixture to a boil, then reduce heat to low. Partially cover and simmer for 30-40 minutes, stirring occasionally, until the chili thickens and the flavors meld together. The surface should show gentle bubbles, not a rolling boil.
During this time, the liquid reduces by about one-third, and the beef becomes exceptionally tender. The spices mellow and distribute evenly throughout the dish. Taste and adjust the cayenne pepper if you prefer more heat.
Step 5: Finish and Balance the Flavors
Remove from heat and stir in the 1 tbsp apple cider vinegar. This final addition brightens all the flavors and balances the richness of the beef and spices. Let the chili rest for 10 minutes before serving.
The vinegar’s acidity cuts through the fat, while the resting period allows the flavors to settle. The finished chili should have a thick, hearty consistency with visible bits of beef and vegetables suspended in a rich, aromatic sauce. Serve warm for the best texture and flavor.
Pro Tips For Making Low Potassium Chili
- Brown the Beef First: I learned this the hard way—skip draining the fat too early. Cook the ground beef until deeply browned (about 7-8 minutes on medium-high) to develop flavor before adding veggies.
- Soak the Peppers: Green bell peppers can have higher potassium— slice them, then soak in cold water for 10 minutes and drain to reduce potassium content before adding to the pot.
- Skip the Tomatoes: Most chili recipes call for tomatoes, but they’re high in potassium. Use extra low-sodium beef broth (about 1-2 cups) for liquid instead to keep it kidney-friendly.
- Double the Garlic: Sounds weird, but it works: garlic adds big flavor without the potassium punch. Mince 4-5 cloves instead of the usual 2—this dish needs the boost since we’re skipping higher-potassium ingredients.
Essential Equipment for low potassium chili
Dutch Oven Essentials
I always use a 5-6 quart enameled cast iron Dutch oven—my Le Creuset has lasted over a decade. The heavy base prevents scorching, while the tight lid traps moisture for even cooking. It handles both stovetop browning and long simmering beautifully.
Quality Cutting Tools
A sharp 8-inch chef’s knife makes quick work of dicing onions and peppers. I swear by Wüsthof for durability. Pair it with a wooden cutting board to protect your knife edge and prevent slipping during prep.
Accurate Measuring
Precision matters with spices, so I use stainless steel measuring spoons from OXO. The magnetic set stays organized, and the long handles fit into spice jars easily. For liquids, a glass measuring cup with clear markings ensures accuracy.
Thermometer for Safety
Even with chili, I check the beef’s internal temperature hits 160°F using my ThermoWorks Instant Read. It gives peace of mind and prevents overcooking. The probe’s thin design means quick, accurate readings without piercing large holes.
Stirring and Serving
A wooden spoon won’t scratch your Dutch oven while stirring. For serving, a ladle with a long handle makes portioning easy. I also keep small bowls ready for garnishes like shredded cheese or green onions. 💪
Storage Solutions
Leftovers stay fresh in glass containers with airtight lids. I prefer Pyrex because it goes from fridge to microwave safely. For freezing, quart-sized freezer bags lay flat to save space and thaw quickly.
Nutrition Facts
Frequently Asked Questions
Can I use ground turkey instead of beef?
Yes! Ground turkey works well, but use 85/15 fat ratio for best results. It may need extra oil to prevent dryness.
Why drain the canned tomatoes?
Draining removes excess liquid and potassium. This keeps the chili thick and reduces potassium content per serving.
How long will leftovers keep?
Store in an airtight container in the fridge for 4-5 days. For longer storage, freeze for up to 3 months.
Can I add beans to this recipe?
Avoid high-potassium beans like kidney or black. Low-potassium options like green beans (in moderation) may work if approved by your dietitian.

- 6 Egg Cake Recipe with Oil: Light as Air With Buttery Moisture - October 4, 2026
- 4 Bean Casserole Recipe: One-Pan Heartiness With Smoky Paprika Depth - October 4, 2026
- 3-Ingredient Keto Mug Cake Recipe: Microwave Magic in 2 Minutes - October 4, 2026