
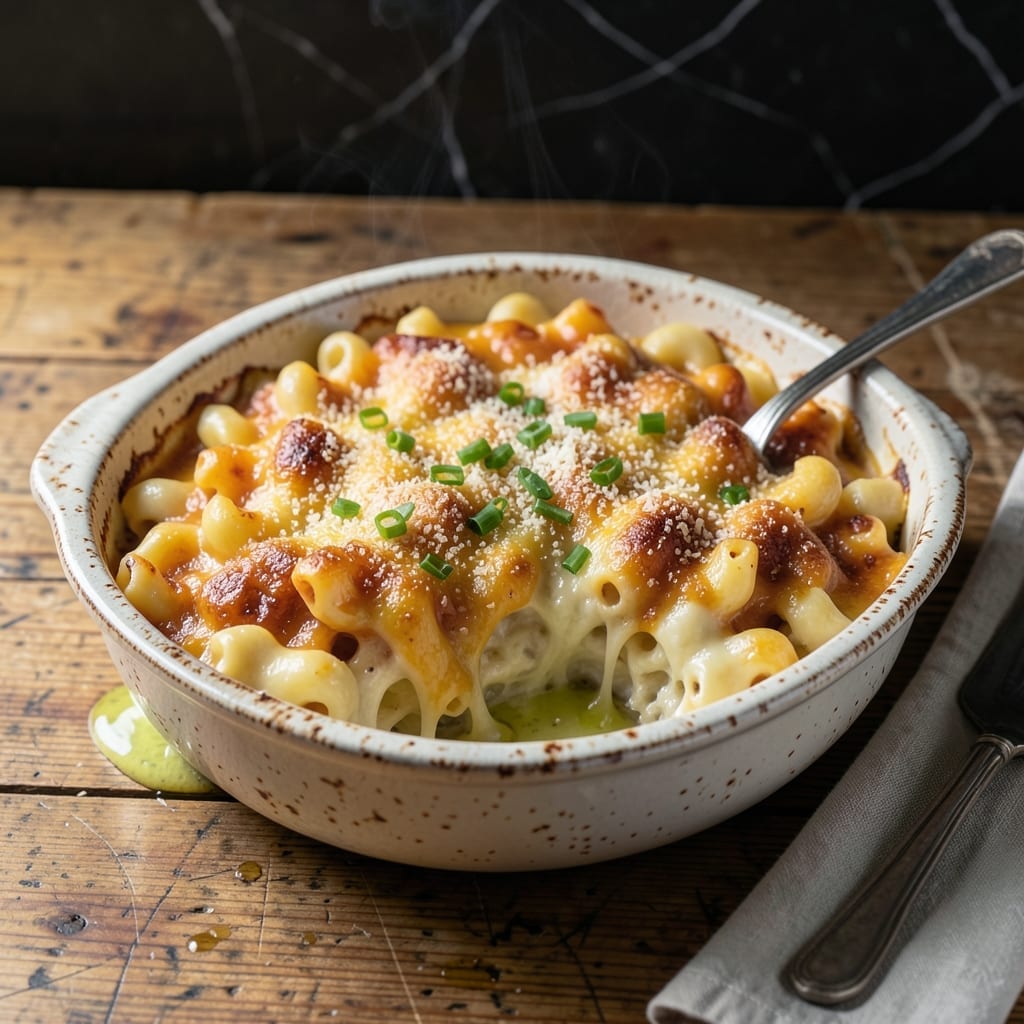
I’ve perfected a no-roux mac and cheese that delivers the same creamy, velvety texture without flour. The secret lies in a simple evaporation method that thickens the sauce naturally.
This approach eliminates the risk of lumps while keeping the dish rich and smooth. With just a few pantry staples and 20 minutes, you can create a sauce that clings perfectly to every noodle.
What results is a bowl of mac and cheese with a silky consistency and deep cheesy flavor. It’s a foolproof method that never fails to impress.
Serve it as a comforting main or a crowd-pleasing side. Here’s how to make it.
Ingredients for Mac and Cheese Recipe No Roux
Pantry staples and sharp cheeses create this silky, flour-free mac and cheese in minutes.
| Ingredient | Amount | Notes |
|---|---|---|
| Elbow Macaroni 🍝 | 12 oz | Or any short pasta shape |
| Whole Milk 🥛 | 2 cups | Full-fat for creaminess |
| Sharp Cheddar Cheese 🧀 | 8 oz | Block, freshly grated |
| Gruyere Cheese 🧀 | 4 oz | Block, freshly grated |
| Parmesan Cheese 🧀 | 2 oz | Freshly grated from wedge |
| Unsalted Butter 🧈 | 4 tbsp | Divided for sauce and topping |
| All-Purpose Flour 🌾 | 0 tbsp | Omitted for no-roux method |
| Dijon Mustard 🟡 | 1 tsp | Smooth variety preferred |
| Garlic Powder 🧄 | ½ tsp | For depth of flavor |
| Onion Powder 🧅 | ½ tsp | Balances cheese richness |
| Salt 🧂 | ½ tsp | Kosher or sea salt |
| Black Pepper 🌶️ | ¼ tsp | Freshly ground preferred |
| Dry Mustard 🟡 | ½ tsp | Enhances cheesy flavor |
| Worcestershire Sauce 💧 | 1 tsp | Vegetarian version required |
The cheese selection is critical here. Sharp cheddar provides the backbone, while Gruyere adds depth and creaminess. Parmesan finishes it with a salty punch. Always buy blocks and grate them yourself—pre-shredded contains anti-caking agents that prevent smooth melting. Whole Foods and Trader Joe’s have excellent cheese selections for this.
No Gruyere? Fontina or Monterey Jack melt beautifully. For a stronger flavor, add Pepper Jack. Mustard fans can increase the Dijon to 2 teaspoons for extra tang. If using all cheddar, mix sharp and mild for balance. The vegetarian Worcestershire sauce (like Annie’s) ensures this stays meat-free while adding umami depth.
This mac and cheese holds well for 3-4 days refrigerated. Reheat gently with a splash of milk to restore creaminess. For make-ahead, undercook pasta by 1 minute, then bake with extra cheese on top. Freezes beautifully for up to 3 months in airtight containers.
Why You’ll Love This Recipe
- No-Fuss Method: I skip the roux entirely—just melt the cheddar, gruyere, and parmesan right into warm milk for a silky sauce.
- Cheesy Depth: The sharp cheddar and nutty gruyere create this rich, layered flavor that’s way more interesting than the boxed stuff.
- Feeds a Crowd: I double the batch and it reheats beautifully for potlucks or lazy leftovers the next day.
- Budget Stretcher: Elbow macaroni and block cheese cost less than fancy ingredients but taste like a million bucks.
Step-by-Step Instructions for Mac and Cheese No Roux
This method delivers a velvety cheese sauce without a single tablespoon of flour.
Step 1: Cook the Elbow Macaroni
Bring a large pot of salted water to a rolling boil. Add the 12 oz Elbow Macaroni and cook for 1 minute less than the package instructions for al dente. You want it slightly undercooked because it will finish in the oven.
Drain the pasta but do not rinse—starch on the surface helps the sauce cling. Transfer it to a large bowl and toss immediately with 1 tbsp Unsalted Butter to prevent sticking. The pasta should be firm with a slight bite, not mushy.
Step 2: Create the Cheese Sauce Base
In a saucepan over medium heat, melt the remaining 3 tbsp Unsalted Butter. Add the 2 cups Whole Milk, 1 tsp Dijon Mustard, 0.5 tsp Garlic Powder, 0.5 tsp Onion Powder, 0.5 tsp Salt, 0.25 tsp Black Pepper, 0.5 tsp Dry Mustard, and 1 tsp Worcestershire Sauce.
Stir frequently until tiny bubbles form at the edges and the mixture reaches 180°F. You’ll notice the surface becoming slightly foamy—this indicates the milk is properly heated without scorching. Do not let it boil.
Step 3: Melt and Emulsify the Cheeses
Reduce heat to low and gradually add the 8 oz Sharp Cheddar Cheese and 4 oz Gruyere Cheese, a handful at a time, whisking constantly until each addition is fully melted. This slow incorporation prevents the sauce from breaking or becoming grainy.
Once smooth, stir in the 2 oz Parmesan Cheese until fully combined. The sauce should coat the back of a spoon with a glossy, velvety texture. If it appears too thick, add a splash of hot pasta water to reach the perfect consistency.
Step 4: Combine and Bake to Perfection
Pour the cheese sauce over the cooked pasta and fold gently until every piece is evenly coated. Transfer the mixture to a greased baking dish. The sauce will thicken slightly as it absorbs into the pasta.
Bake at 375°F for 15-20 minutes until the top is lightly golden and bubbling at the edges. For an extra-crispy topping, broil for 1-2 minutes at the end, watching closely to avoid burning. Let it rest for 5 minutes before serving.
Pro Tips For Making Mac And Cheese Recipe No Roux
- Cook Pasta Al Dente: Boil the elbow macaroni 1-2 minutes less than the package says—it’ll finish cooking in the hot cheese sauce and won’t turn mushy.
- Grate Your Own Cheese: Pre-shredded cheese has anti-caking agents that make the sauce grainy; freshly grated sharp cheddar and Gruyere melt smooth every time.
- Low Heat for Melting: After mixing the hot pasta with milk, keep the burner at medium-low to prevent the cheese from separating or turning stringy.
- Add Parmesan Last: Stir in the Parmesan right before serving so its sharp, salty flavor stays bright instead of dissolving into the sauce.
Essential Equipment for Great mac and cheese recipe no roux
Heavy Saucepan
A 3-4 quart heavy-bottomed saucepan is essential for even heat distribution. I use my All-Clad stainless steel pan—it prevents hot spots that could scorch the milk. Thin pans lead to burnt sauce and ruined texture. 🔥
Whisk for Smoothness
A sturdy balloon whisk helps emulsify the cheese into the milk smoothly. I prefer OXO’s 11-inch whisk for its comfortable grip and reach. The constant motion keeps the sauce velvety and lump-free.
Instant Read Thermometer
An instant-read thermometer ensures your milk reaches exactly 180°F without boiling. I rely on my ThermoWorks ThermoPop for accuracy. This small tool prevents overheating that could break your sauce.
Cheese Grater
Freshly grated cheese melts better than pre-shredded. I use a box grater with multiple sides for different textures. Block cheese like sharp cheddar and Gruyere shred perfectly in seconds.
Baking Dish
A 9×13-inch baking dish provides the right depth for even baking. I love my Le Creuset stoneware for its heat retention. The size accommodates the full recipe with room for bubbling.
Heat-Resistant Spatula
A silicone spatula helps fold the sauce into pasta without scratching your pans. I keep a Cuisinox one in my drawer—it’s heat-resistant up to 600°F and lasts for years.
Nutrition Facts
Frequently Asked Questions
Why use whole milk instead of 2%?
Whole milk creates a richer, creamier sauce that clings better to pasta. The higher fat content prevents graininess and adds luxury to the texture.
Can I use pre-shredded cheese?
No, pre-shredded contains anti-caking agents that prevent smooth melting. Always grate blocks yourself for the best results.
How do I fix a grainy sauce?
Remove from heat immediately and whisk in 1 tbsp hot water or milk. If needed, add 1 tsp cornstarch mixed with cold water.
Can I make this ahead?
Yes! Assemble completely, cover, and refrigerate up to 24 hours. Add 5 minutes to baking time if cold.

- 6 Egg Cake Recipe with Oil: Light as Air With Buttery Moisture - October 4, 2026
- 4 Bean Casserole Recipe: One-Pan Heartiness With Smoky Paprika Depth - October 4, 2026
- 3-Ingredient Keto Mug Cake Recipe: Microwave Magic in 2 Minutes - October 4, 2026