
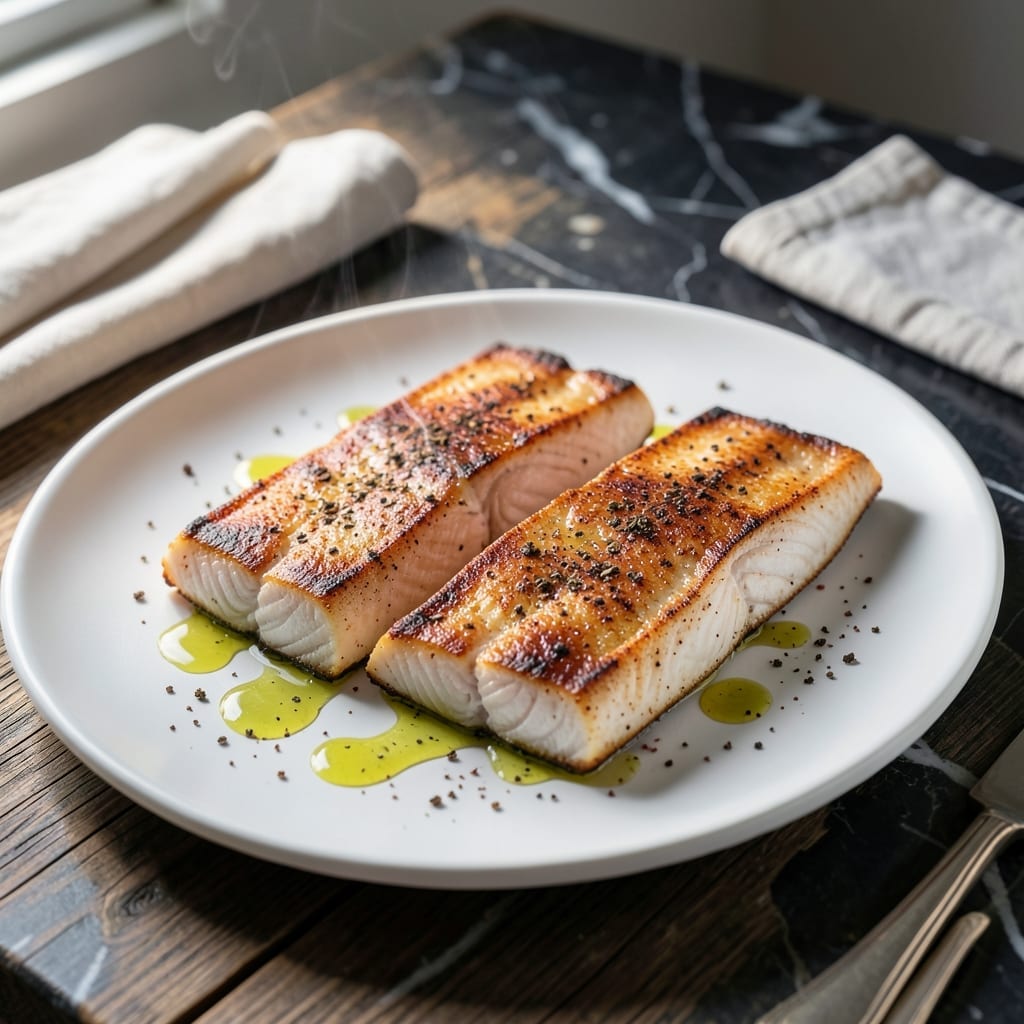
Pan-frying mahi mahi creates a dish with crispy skin and tender, flaky flesh that’s hard to resist. This method brings out the fish’s natural sweetness while adding a satisfying texture contrast.
The secret lies in a hot pan and dry fillets. Pat the mahi mahi thoroughly before seasoning, then cook skin-side down first for maximum crispiness. A simple lemon finish brightens each bite without overpowering the fish.
You’ll achieve restaurant-quality results with minimal effort. The skin becomes shatteringly crispy, while the inside stays moist and perfectly cooked. A quick pan sauce ties everything together beautifully.
Serve immediately for the best texture. This technique works for both thick and thin fillets, making it versatile for any meal.
Ingredients for Mahi Mahi Recipe Pan Fried
Crispy-skinned mahi mahi requires quality fish, bold seasonings, and minimal effort for restaurant-style results.
| Ingredient | Amount | Notes |
|---|---|---|
| Mahi Mahi Fillets 🐟 | 1 ½ lb | Skin-on, about 1-inch thick |
| Kosher Salt 🧂 | 1 ½ tsp | Diamond Crystal preferred for texture |
| Freshly Ground Black Pepper 🌶️ | ½ tsp | Coarse grind for best results |
| Smoked Paprika 🌶️ | ½ tsp | Adds depth to rub |
| All-Purpose Flour 🌾 | ¼ cup | For light dusting before cooking |
| Extra-Virgin Olive Oil 🫒 | 3 tbsp | High smoke point, divided |
| Unsalted Butter 🧈 | 2 tbsp | For basting and pan sauce |
| Fresh Lemon 🍋 | 1 whole | Zested and juiced |
| Garlic Cloves 🧄 | 3 cloves | Minced, for pan sauce |
| Fresh Parsley 🌿 | ¼ cup | Chopped, for garnish |
| Capers 🌿 | 1 tbsp | Drained, for briny finish |
| Dry White Wine 🍷 | ¼ cup | Such as Sauvignon Blanc |
The mahi mahi is non-negotiable. Look for skin-on fillets at Whole Foods or a trusted fishmonger—the skin should be iridescent and moist, not dull or dry. Wild-caught is ideal, but farmed from reputable sources works too. The thickness matters: 1-inch fillets cook evenly without drying out. Pat them bone-dry with paper towels before seasoning (this is what ensures that shatteringly crispy skin).
No mahi mahi? Swordfish or halibut are the closest substitutes—same firm texture, same cooking time. No white wine? Chicken broth with a squeeze of lemon gets you 90% there. The capers add a briny pop, but chopped green olives work in a pinch. Fresh parsley is ideal, but cilantro or chives bring their own freshness. Skip the flour if gluten is a concern—the fish will still crisp up.
Cook and serve immediately—the crispy skin waits for no one. Leftovers keep 2-3 days in the fridge, but the skin loses its crunch. Reheat gently in a skillet to revive some texture. The pan sauce holds for 1 week if stored separately.
Why You’ll Love This Recipe
- One Pan Wonder: I love that this comes together in a single skillet with just flour, smoked paprika, and the fish—minimal mess, maximum flavor.
- Crispy & Smoky: That paprika gives the mahi mahi this deep, smoky crust while keeping the inside tender. Honestly, it’s the kind of bite that makes you pause mid-meal.
- Weeknight Hero: Between us, this is my go-to for busy evenings—ready faster than takeout and fancy enough for guests.
- Budget-Friendly Luxe: Mahi mahi feels like a splurge but cooks up affordably, and leftovers (if there are any) taste just as good cold the next day.
Step-by-Step Instructions for Pan Fried Mahi Mahi
Master the method for achieving perfectly crispy skin and tender, flaky flesh with a bright lemon finish.
Step 1: Season and Dredge the Mahi Mahi Fillets
Pat the 1.5 lb Mahi Mahi Fillets completely dry with paper towels—this is essential for achieving that coveted crispy skin. Season both sides evenly with the 1.5 tsp Kosher Salt, 0.5 tsp Freshly Ground Black Pepper, and 0.5 tsp Smoked Paprika.
Lightly dredge the fillets in the 0.25 cup All-Purpose Flour, shaking off any excess. The flour creates a delicate crust that enhances crispiness while adding a subtle depth to the seasoning. This step also helps absorb excess moisture from the surface of the fish.
Step 2: Pan-Fry to Golden Perfection
Heat 2 tbsp of the 3 tbsp Extra-Virgin Olive Oil in a large, heavy skillet over medium-high heat until it shimmers. Place the fillets skin-side down in the hot oil and press gently with a spatula for the first 10 seconds to prevent curling.
Cook undisturbed for 4-5 minutes until the skin is deep golden brown and crispy. Flip the fillets carefully and cook for an additional 3-4 minutes until the flesh is opaque and flakes easily with a fork. Transfer the fillets to a warm plate, leaving the rendered oil in the pan.
Step 3: Create the Lemon-Garlic Pan Sauce
Reduce the heat to medium and add the remaining 1 tbsp Extra-Virgin Olive Oil to the skillet. Add the minced 3 cloves Garlic Cloves and sauté for 30 seconds until fragrant, without letting it brown.
Pour in the 0.25 cup Dry White Wine and deglaze the pan, scraping up any browned bits with a wooden spoon. Simmer for 2-3 minutes until the liquid reduces by half. Stir in the 2 tbsp Unsalted Butter, the zest of the 1 whole Fresh Lemon, and the 1 tbsp Capers, cooking until the butter melts and the sauce emulsifies.
Step 4: Finish and Garnish
Return the Mahi Mahi fillets to the skillet and spoon the sauce over them. Squeeze the juice of the 1 whole Fresh Lemon evenly over the fillets and let them warm in the sauce for 1 minute.
Transfer the fillets to serving plates, drizzle with the remaining sauce, and garnish with the 0.25 cup Fresh Parsley. The skin should remain crispy while the fish stays moist and tender, with each bite complemented by the bright, zesty sauce.
Pro Tips For Making Mahi Mahi Recipe Pan Fried
- Pat Dry First: Blot the fillets with paper towels until bone-dry—any moisture will steam the fish instead of frying it, and you’ll lose that crispy crust.
- Hot Pan, Fast Cook: Get the pan screaming hot before adding the oil, then cook the mahi mahi for just 3-4 minutes per side; it’s lean and cooks fast, so high heat prevents dryness.
- Season the Flour: Mix the kosher salt, black pepper, and smoked paprika right into the flour before dredging—this ensures every bite is evenly seasoned and saves time.
- Skip the Crowding: I learned this the hard way—cook the fillets one at a time if needed, because overcrowding the pan drops the temperature and turns your crispy coating into a soggy mess.
Wine and Beer Pairings for These Flavors
White Wine Pairings
A crisp Sauvignon Blanc is my top choice—the citrus notes echo the lemon in your dish while the acidity cuts through the richness. Look for New Zealand or California options with bright grapefruit and passionfruit flavors. 🍷
Light Red Options
Surprisingly, a chilled Pinot Noir works beautifully. The light body and red fruit notes complement the fish without overwhelming it. I prefer ones from Oregon or Burgundy for their earthy undertones.
Beer Selections
A Belgian witbier like Hoegaarden offers citrus and spice notes that harmonize with the pan sauce. The effervescence cleanses your palate between bites of crispy-skinned fish.
Rosés to Consider
Dry Provence rosés bring strawberry and melon flavors that pair wonderfully. Their crisp finish balances the fish’s natural sweetness. I always keep a bottle of Whispering Angel on hand for just this occasion.
Non-Alcoholic Choices
For alcohol-free options, try a sparkling lemonade with fresh mint. The bubbles and acidity mimic wine’s palate-cleansing effect. Add a splash of elderflower syrup for extra sophistication. 💫
Serving Temperature
Serve whites and rosés at 45-50°F—too cold masks the flavors. For reds, 55°F is ideal. I pull my bottle from the fridge 15 minutes before serving to let it warm slightly.
Nutrition Facts
Frequently Asked Questions
How do I know when the fish is done?
The flesh should turn opaque and flake easily with a fork. For best results, cook skin-side down for 4-5 minutes, then flip and cook 3-4 minutes more.
Why isn’t my skin getting crispy?
Pat the fillets completely dry before cooking and use medium-high heat. Press fillets gently with a spatula for the first 10 seconds to prevent curling and ensure even contact with the pan.
Can I use a nonstick pan?
Yes, but a heavy stainless steel or cast iron skillet works better for achieving that golden, crispy skin. Nonstick pans don’t get as hot and may not develop the same depth of color.
What if I don’t have white wine?
Substitute with chicken broth plus a squeeze of lemon. The acidity helps deglaze the pan and create a flavorful sauce. The result will be nearly as delicious!

- 6 Egg Cake Recipe with Oil: Light as Air With Buttery Moisture - October 4, 2026
- 4 Bean Casserole Recipe: One-Pan Heartiness With Smoky Paprika Depth - October 4, 2026
- 3-Ingredient Keto Mug Cake Recipe: Microwave Magic in 2 Minutes - October 4, 2026