
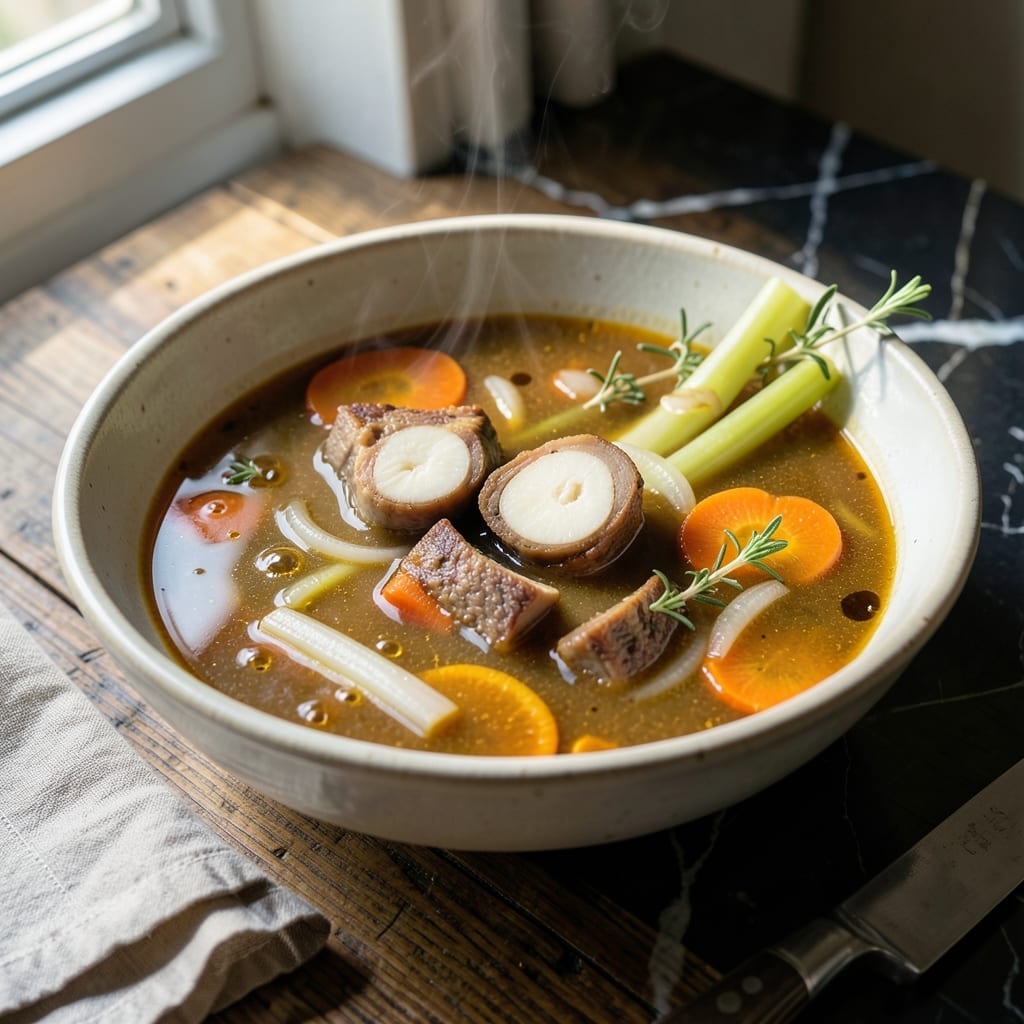
There’s something deeply satisfying about a pot of bone broth simmering on the stove, filling the kitchen with its rich, savory aroma. This recipe unlocks the full potential of marrow bones, transforming them into a nourishing liquid gold that’s as versatile as it is flavorful.
The process is straightforward but demands patience. A long, gentle simmer coaxes out the collagen, minerals, and deep umami flavors trapped within the bones. Skimming the surface occasionally ensures a clear, clean broth every time.
What you’ll end up with is a rich, velvety broth that can serve as a base for soups, sauces, or simply sipped on its own. The depth of flavor and silky texture are a testament to the slow, deliberate method.
Perfect for batch cooking and freezing, this broth is a staple worth keeping on hand.
Ingredients for Marrow Bone Broth
Transform marrow bones into liquid gold with these carefully selected ingredients for depth and richness.
| Ingredient | Amount | Notes |
|---|---|---|
| Beef Marrow Bones 🍖 | 3 lb | Split, raw, with marrow intact |
| Cold Water 💧 | 4 cups | Enough to cover bones completely |
| Apple Cider Vinegar 🍎 | 2 tbsp | Raw, unfiltered preferred |
| Yellow Onion 🧅 | 1 whole | Quartered, skin on for color |
| Carrots 🥕 | 2 whole | Roughly chopped, unpeeled |
| Celery Stalks 🌿 | 2 whole | Including leaves, chopped |
| Garlic Cloves 🧄 | 4 cloves | Smashed, skin on |
| Bay Leaves 🍃 | 2 whole | Dried, for aromatic depth |
| Black Peppercorns 🌶️ | 1 tbsp | Whole, for infused flavor |
| Kosher Salt 🧂 | 1 tsp | Adjust to taste after straining |
| Fresh Thyme Sprigs 🌿 | 4 pieces | Optional, for added complexity |
| Fresh Parsley Stems 🌿 | ½ cup | Stems only, no leaves |
The marrow bones are the foundation. Source from a trusted butcher—look for grass-fed, organic if possible. Split bones expose more surface area for better extraction. Whole Foods or local farms often carry high-quality options. The vinegar is critical (don’t skip it)—Bragg’s raw apple cider vinegar works best to draw out minerals from the bones. Always use cold water to start for a clearer broth.
No marrow bones? Beef knuckle or oxtail bones work well, though flavor profiles differ slightly. Short on time? An Instant Pot on high pressure for 2-3 hours mimics the slow simmer. If missing fresh herbs, dried thyme at one-third the amount suffices. The onion skin adds color—don’t peel it. For extra depth, add a splash of soy sauce or fish sauce (if not strict vegetarian).
Broth keeps 5 days refrigerated or 6 months frozen. Strain and cool quickly to prevent bacterial growth. Store in airtight glass jars—leave headspace for freezing. For best results, skim fat after chilling and portion for easy use in future recipes.
Why You’ll Love This Recipe
- Set It and Forget: I toss everything in the pot and let it simmer for hours with zero babysitting.
- Rich, Deep Flavor: The marrow bones and apple cider vinegar create a broth so velvety, I sip it straight from the mug.
- Meal Prep Magic: I make a big batch on Sunday and use it all week—soups, risottos, even for cooking grains.
- Penny-Wise Comfort: Honestly, a few bones and veggies stretch into quarts of liquid gold for pennies per serving.
Step-by-Step Instructions for Marrow Bone Broth
Master the technique for a deeply flavorful and nutrient-rich broth with proper extraction and clarity.
Step 1: Roast the Beef Marrow Bones
Preheat your oven to 400°F. Arrange the 3 lb Beef Marrow Bones on a baking sheet in a single layer, marrow-side up. Roasting is essential for developing deep, caramelized flavors that will infuse the broth.
Roast for 20-25 minutes until the bones are deep golden brown and the marrow begins to soften slightly. This step also helps render some fat, which can be skimmed off later for a cleaner broth. Remove the bones from the oven and transfer them directly to your stockpot.
Step 2: Deglaze and Combine All Ingredients
Place the baking sheet on the stovetop over medium heat. Pour the 2 tbsp Apple Cider Vinegar onto the sheet and scrape up all the browned bits with a wooden spoon. This deglazing captures every bit of flavor from the roasting process.
Transfer the vinegar and all its dissolved fond to your stockpot with the bones. Add the 4 cups Cold Water, 1 whole Yellow Onion (quartered with skin on), 2 whole Carrots (roughly chopped), 2 whole Celery Stalks (chopped with leaves), 4 cloves Garlic Cloves (smashed with skin on), 2 whole Bay Leaves, 1 tbsp Black Peppercorns, 1 tsp Kosher Salt, 4 pieces Fresh Thyme Sprigs, and 0.5 cup Fresh Parsley Stems. The skin on the onion and garlic adds color and depth to the broth.
Step 3: Simmer Gently for Maximum Extraction
Bring the mixture to a boil over high heat, then immediately reduce to a low simmer. A gentle simmer—just a few bubbles breaking the surface occasionally—prevents cloudiness while allowing the collagen and minerals to slowly leach from the bones.
Partially cover the pot and maintain this simmer for 12-24 hours. The longer the simmer, the more gelatinous and rich your broth will become. Skim off any foam or fat that rises to the top during the first hour of simmering for a cleaner final product.
Step 4: Strain and Finish the Broth
After simmering, carefully strain the broth through a fine-mesh sieve into a large bowl or another pot. Discard all the solids—they’ve given up their flavor and nutrients to the liquid. For an ultra-clear broth, strain a second time through a cheesecloth-lined sieve.
Let the broth cool slightly, then refrigerate until the fat solidifies on the surface. Skim off this fat layer if you prefer a leaner broth, or leave it for added richness. Adjust the seasoning with additional kosher salt to taste if needed. The broth should have a deep amber color and a rich, meaty aroma that signals its concentration of flavor and nutrients.
Pro Tips For Making Marrow Bone Broth
- Roast the Bones: Toss the marrow bones with a little oil and roast at 400°F for 20-30 minutes until deeply browned—I learned this the hard way after making pale, bland broth for years.
- Use Cold Water: Always start with cold water to slowly extract gelatin and flavor; hot water can shock the bones and seal in the good stuff.
- Add Vinegar Early: Stir in the apple cider vinegar right at the beginning—about 2 tablespoons per gallon of water—to help pull minerals from the bones.
- Skim the Foam: In the first hour, skim off any scum that rises to the surface with a fine-mesh strainer; I skip this when I’m lazy, but the broth is noticeably cleaner when I don’t.
Common Mistakes When Making marrow bone broth
Boiling Too Vigorously
A rolling boil breaks down collagen too quickly, making your broth cloudy and bitter. Keep it at a gentle simmer—just 2-3 bubbles breaking the surface per second. I use a flame tamer on my gas stove to maintain perfect control. 🔥
Skipping the Roast
Unroasted bones produce a flat, dull broth. Always roast at 400°F for 20-25 minutes first to develop deep, caramelized flavors. The marrow should look slightly softened but not fully rendered.
Not Skimming Foam
The first hour of simmering creates impurities that rise to the top. Skim this foam every 15-20 minutes with a fine-mesh skimmer for a cleaner final product. I keep a small bowl nearby for easy disposal.
Overcrowding the Pot
Too many bones or too little water prevents proper extraction. Use 4 cups water per 3 lb bones and ensure bones are fully submerged. A 7-8 quart stockpot works perfectly for this ratio.
Short Simmer Time
Less than 12 hours won’t extract enough gelatin and minerals. I set my slow cooker to low overnight for 18-24 hours. The longer simmer transforms the liquid into a rich, jelly-like consistency when cooled. 💪
Adding Salt Too Early
Salt reduces as the broth simmers, potentially making it too salty. Wait until after straining to season with kosher salt. Taste and adjust—you’ll likely need about ½ tsp per cup of finished broth.
Nutrition Facts
Frequently Asked Questions
How long should I simmer the bones?
Simmer for 12-24 hours on low heat for the richest, most gelatinous results. The longer time extracts more collagen and minerals from the bones.
Shorter simmers under 12 hours produce a weaker broth with less body.
Can I use a slow cooker instead of a stovetop?
Yes! A slow cooker on low for 18-24 hours works perfectly. It maintains a consistent, gentle heat ideal for extraction.
Why add vinegar to the broth?
The 2 tbsp apple cider vinegar helps draw out minerals from the bones, especially calcium and magnesium. It won’t make your broth taste sour.
Use raw, unfiltered vinegar for best results.
How do I store the finished broth?
Store in airtight containers in the fridge for up to 5 days, or freeze for 6 months.
Leave 1 inch headspace in containers for freezing expansion.

- 6 Egg Cake Recipe with Oil: Light as Air With Buttery Moisture - October 4, 2026
- 4 Bean Casserole Recipe: One-Pan Heartiness With Smoky Paprika Depth - October 4, 2026
- 3-Ingredient Keto Mug Cake Recipe: Microwave Magic in 2 Minutes - October 4, 2026