
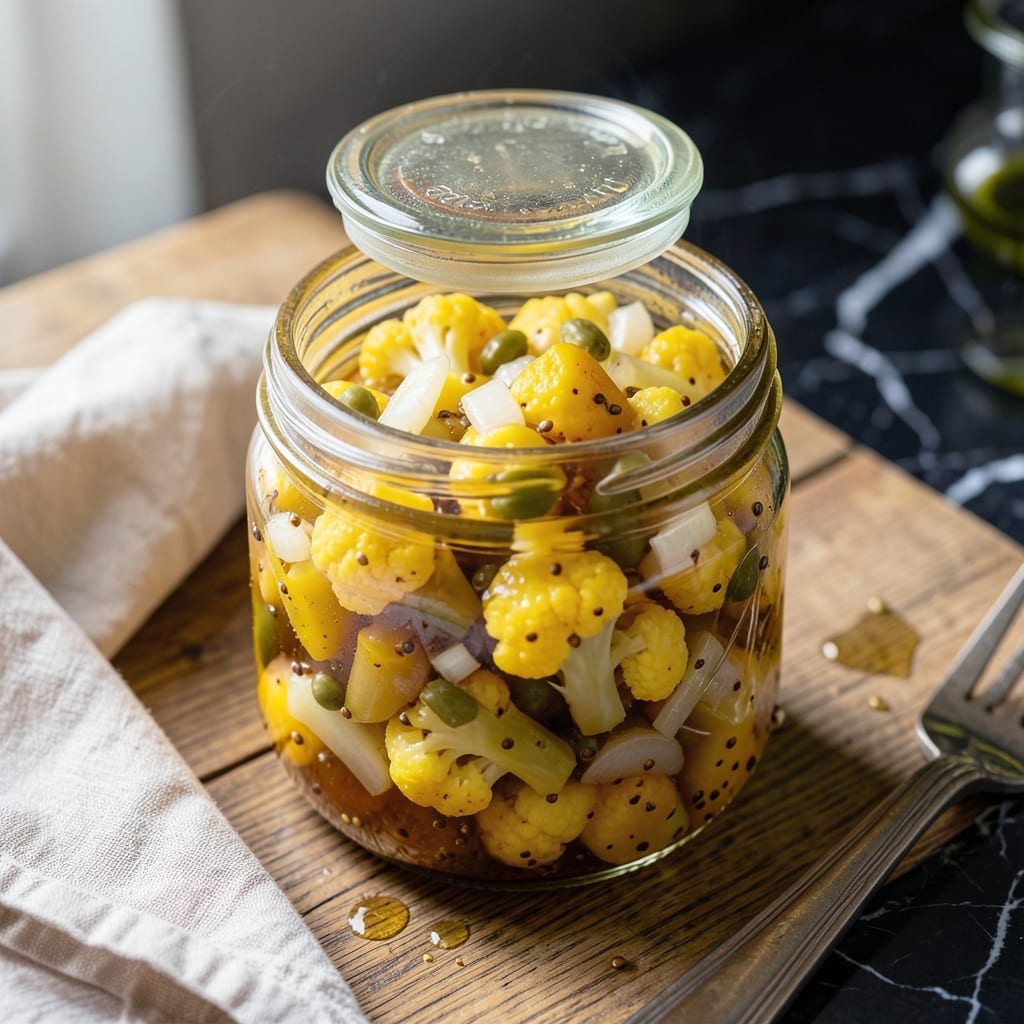
This British pickled condiment transforms any meal with its tangy, slightly sweet flavor and satisfying crunch. A staple in UK households, it elevates cheese boards, cold cuts, and even sandwiches with minimal effort.
The magic lies in the balance of vegetables, vinegar, and spices that create a chunky, vibrant relish. The process involves pickling mixed vegetables in a spiced vinegar solution, resulting in a preserve that improves with time.
What makes this version special is its versatility—it pairs equally well with sharp cheddar as it does with roasted meats. The preparation is straightforward, though it requires patience as the flavors meld over days.
Store in sterilized jars, and it will keep for months, ready to brighten any dish with its distinctive zing.
Ingredients for Mary Berry Piccalilli
Nine simple ingredients create this vibrant, tangy British preserve with satisfying crunch.
| Ingredient | Amount | Notes |
|---|---|---|
| Cauliflower Florets 🥦 | 2 cups | Cut into small, even pieces |
| White Onion 🧅 | 1 whole | Finely chopped for texture |
| Gherkins 🥒 | ½ cup | Drained and sliced thin |
| Distilled White Vinegar 💧 | 2 cups | 5% acidity for preservation |
| Granulated Sugar 🍚 | ½ cup | Dissolved completely in brine |
| Mustard Seeds 🌿 | 2 tbsp | Yellow or brown variety |
| Ground Turmeric 🌶️ | 2 tsp | For vibrant golden color |
| Ground Ginger 🌿 | 1 tsp | Freshly ground preferred |
| Cornstarch 🌾 | 1 tbsp | Mixed with 2 tbsp water |
| Salt 🧂 | 1 tbsp | Pickling or kosher salt |
The vegetables are key—fresh cauliflower and crisp gherkins give the signature texture. Sainsbury’s or Waitrose stock excellent pickling vinegar with consistent 5% acidity, essential for safety. Yellow mustard seeds are traditional, but brown seeds add a deeper, earthier note. Look for turmeric with a bright orange hue, indicating freshness and potency for that classic golden color.
No gherkins? Small cornichons or dill pickles work as substitutes. Apple cider vinegar at equal volume can replace white vinegar, though the flavor will be slightly fruitier. For heat, add half a teaspoon of mustard powder to the brine. The cauliflower can be swapped with broccoli, but cut it into smaller florets to maintain the chunky consistency.
Sterilized jars are non-negotiable for long-term storage. Once sealed, this keeps for up to 6 months in a cool, dark place. The flavors deepen over time—wait at least 2 weeks before opening for optimal taste. Refrigerate after opening and use within 1 month.
Why You’ll Love This Recipe
- Minimal Chopping: I love that this only needs rough chopping of the cauliflower and onions—no fancy knife skills required.
- Zesty Tangy Kick: The vinegar and sugar balance creates that signature sweet-sour crunch I crave with cheese boards.
- Jars for Gifts: Honestly, I double the batch just to have ready-made presents for neighbors at Christmas.
- Fridge Staple: Keeps for months, so I always have a jar ready to perk up sandwiches or cold cuts.
Step-by-Step Instructions for Piccalilli
Master this traditional technique for a perfectly balanced, tangy preserve every time.
Step 1: Prepare the Vegetables for Pickling
Cut the 2 cups cauliflower florets into small, even ½-inch pieces to ensure uniform texture. Finely chop the 1 whole white onion—consistency matters for both appearance and flavor distribution in the final product.
Drain and thinly slice the ½ cup gherkins. I like to cut them into rounds for visual appeal and even pickling. Combine all vegetables in a large heatproof bowl. This preparation step ensures each bite delivers the perfect crunch and flavor balance.
Step 2: Create the Spiced Vinegar Brine
In a medium saucepan, combine the 2 cups distilled white vinegar, ½ cup granulated sugar, 2 tbsp mustard seeds, 2 tsp ground turmeric, 1 tsp ground ginger, and 1 tbsp salt.
Bring the mixture to a rolling boil over medium-high heat, stirring constantly until the sugar and salt dissolve completely. The turmeric will give the brine its signature golden hue. Watch for the first bubbles—this is your signal that the spices are infusing properly into the liquid.
Step 3: Blanch the Vegetables in Hot Brine
Pour the boiling brine over the prepared vegetables in the heatproof bowl. Use a spoon to press them down slightly so they’re fully submerged in the liquid. Cover the bowl with a clean kitchen towel and let it steep for 12-24 hours at room temperature.
This blanching period allows the vegetables to soften slightly while absorbing the vinegar’s tang and the spices’ warmth. Stir once or twice during this time to redistribute the vegetables. The cauliflower should turn a vibrant yellow while retaining a slight bite.
Step 4: Thicken the Mixture to Perfection
After steeping, transfer the vegetables and brine to a large pot. Mix the 1 tbsp cornstarch with 2 tbsp water until smooth, then stir this slurry into the pot. Bring the mixture to a gentle boil over medium heat, stirring constantly.
Cook for 5-7 minutes until the liquid thickens to a syrupy consistency that coats the back of a spoon. The transformation is subtle but crucial—you want a glossy finish that clings to the vegetables without becoming gluey. Remove from heat as soon as you reach this stage.
Let the piccalilli cool for 10-15 minutes before transferring to sterilized jars. The mixture will thicken further as it cools, creating that characteristic chunky texture that makes this condiment so special.
Pro Tips For Making Mary Berry Piccalilli
- Soak the Cauliflower: I learned this the hard way—soak your cauliflower florets in salted water for 30 minutes before cooking to remove any bitterness and guarantee a crisp texture.
- Uniform Dice Matters: Cut your onion and cauliflower into even, bite-sized pieces so everything cooks at the same rate and looks as good as it tastes.
- Simmer, Don’t Boil: Keep the vinegar-sugar mixture at a gentle simmer when adding the vegetables—boiling it too hard turns the pickles mushy and dulls the color.
- Use Cold Jars: Sterilize your jars, then let them cool completely before filling with hot piccalilli to prevent cracking and extend shelf life.
Regional Styles of mary berry piccalilli
Traditional British Style
This classic version stays true to UK roots with cauliflower, onion, and gherkins in a mustard-spiked brine. The turmeric gives that signature golden hue beloved in British pubs. I remember my gran serving this with ploughman’s lunch.
Scottish Variation
North of the border, they often add diced swede (rutabaga) for extra heartiness. The sweeter root vegetable balances the tang beautifully. 1 cup diced swede replaces some cauliflower for this regional twist.
Cornish Twist
Cornwall prefers a slightly sweeter profile with extra 2 tbsp sugar. They also add 1 tsp celery seeds for complexity. This pairs perfectly with Cornish pasties and sharp cheddar. 💛
Yorkshire Approach
In Yorkshire, they favor a coarser chop on the vegetables for rustic texture. The brine often includes 1 bay leaf during the steeping period. This version holds up well to hearty Yorkshire roasts.
Welsh Addition
Welsh cooks sometimes incorporate ½ cup diced leeks for a milder onion flavor. The leeks soften beautifully while maintaining color. This variation complements Welsh rarebit beautifully.
London Pub Style
Urban versions often add 1 tbsp English mustard powder to the brine for extra heat. The result is a piccalilli with more bite, perfect for cutting through rich pub foods. I love this with a cold pint. 🍺
Nutrition Facts
Frequently Asked Questions
How long does it need to mature?
For best flavor, let it mature for at least 2 weeks in a cool, dark place. The vegetables will soften and the flavors deepen significantly during this time.
Can I use a different vinegar?
Apple cider vinegar works as a substitute, but may add a fruitier note. Stick to 5% acidity for safety. Avoid balsamic or wine vinegars as they’ll alter the color and taste.
Why did my mixture turn out runny?
This usually means the cornstarch slurry wasn’t cooked long enough. Simmer for the full 5-7 minutes until it coats the spoon. Also, ensure you use the correct 1 tbsp cornstarch ratio.
What’s the best way to store it?
Use sterilized jars and store in a cool, dark cupboard. Once opened, keep refrigerated and use within 1 month. Unopened jars last up to 6 months.

- 6 Egg Cake Recipe with Oil: Light as Air With Buttery Moisture - October 4, 2026
- 4 Bean Casserole Recipe: One-Pan Heartiness With Smoky Paprika Depth - October 4, 2026
- 3-Ingredient Keto Mug Cake Recipe: Microwave Magic in 2 Minutes - October 4, 2026