
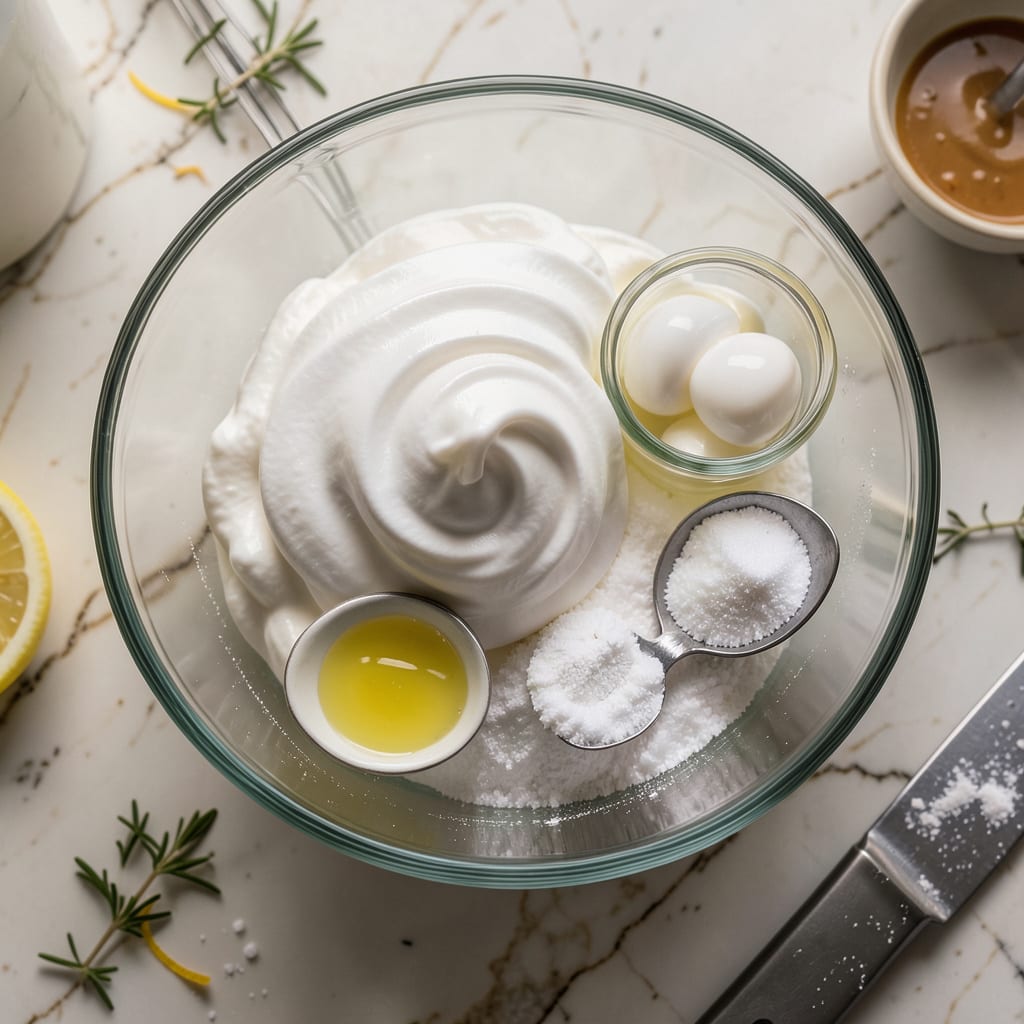
Perfect meringue doesn’t require cream of tartar—just the right technique and a few clever substitutions. This recipe delivers stable, glossy peaks every time using simple pantry ingredients. After testing multiple stabilizers, I’ve found that lemon juice or white vinegar works just as effectively to prevent weeping and create that signature light-as-air texture.
The key lies in gradual sugar incorporation and precise whipping times. You’ll achieve meringue that holds its shape for pies, cookies, or pavlovas without any specialty ingredients. Baked properly, these meringues develop a crisp exterior with a marshmallow-soft center—ideal for both classic desserts and modern flavor variations.
Ingredients for Meringue Recipe No Cream of Tartar
Seven pantry staples yield professional-grade meringue with perfect stability and texture—no specialty ingredients required.
| Ingredient | Amount | Notes |
|---|---|---|
| Large Egg Whites 🥚 | 4 whole | Room temperature, 60-65g total |
| Granulated Sugar 🍬 | 1 cup | Superfine preferred for faster dissolution |
| Fresh Lemon Juice 🍋 | ½ tsp | Or white vinegar as stabilizer |
| Vanilla Extract 🌿 | ½ tsp | Pure extract for optimal flavor |
| Salt 🧂 | 0.125 tsp | Fine sea salt preferred |
| Cornstarch 🌾 | ½ tsp | Optional for extra stability |
| Distilled White Vinegar 💧 | ½ tsp | Alternative to lemon juice |
Optimal quality requires precise ingredient selection. Egg whites must be completely free of yolk traces—separate them when cold, then bring to room temperature for maximum volume. Superfine sugar dissolves faster than granulated, creating a smoother texture; process regular sugar in a food processor for 30 seconds if unavailable. Fresh lemon juice provides both acidity and flavor, while distilled white vinegar offers a neutral alternative. For the vanilla extract, Nielsen-Massey or Rodelle brands deliver superior purity and potency compared to imitation products.
Substitutions must maintain the acidity balance crucial for stability. Replace lemon juice with equal parts white vinegar or cream of tartar substitute (1/4 tsp per egg white). Cornstarch (1/2 tsp) can replace 1/4 tsp cream of tartar for structural support. For sugar alternatives, caster sugar works identically to superfine, while powdered sugar (1 3/4 cups sifted) may be used with adjusted whipping times. Avoid liquid sweeteners like honey or maple syrup, as they introduce moisture that destabilizes the foam structure.
Storage demands careful handling to preserve texture. Unbaked meringue holds at room temperature for 2 hours maximum before piping. Baked meringues keep in an airtight container for 1 week at room temperature or 3 months frozen. Humidity is the primary enemy—store with silica gel packets in tropical climates. For flavor variations, fold in extracts or citrus zests after achieving stiff peaks to prevent deflation. Pipe meringues onto parchment-lined sheets for clean removal post-baking.
Why You’ll Love This Recipe
- I’ll be real: forgetting cream of tartar used to stop me from making meringue. But this version? Just egg whites, sugar, and a splash of lemon juice—stuff I already have in my pantry.
- No Specialty Ingredients: I’ll be real: forgetting cream of tartar used to stop me from making meringue. But this version? Just egg whites, sugar, and a splash of lemon juice—stuff I already have in my pantry.
- That Perfect Crunch: Honestly, the texture is what sold me. The outside cracks like delicate glass, then melts into a marshmallow-soft center, all thanks to the lemon juice balancing the sweetness.
- Dessert or Decor: I’ve piped these into nests for berries, dolloped them onto pies, even broken them into chunks over ice cream. One recipe, endless ways to show off.
Step-by-Step Instructions for Meringue Without Cream of Tartar
This method ensures stable, glossy meringue with perfect stiff peaks using simple acid substitutes.
Step 1: Prepare the Egg Whites and Equipment
Begin by ensuring your mixing bowl and beaters are completely grease-free. I recommend wiping them down with a paper towel dampened with distilled white vinegar to remove any residual fat. Even trace amounts of grease can prevent proper egg white expansion.
Separate the 4 whole Large Egg Whites into your prepared bowl, taking care that no yolk contaminates the whites. Room temperature whites (about 65°F) will whip to greater volume than cold ones, so if yours are refrigerated, place the bowl in warm water for 5 minutes before beginning.
Step 2: Whip the Egg Whites with Stabilizers
Using a stand mixer fitted with the whisk attachment, beat the egg whites on medium speed until they become foamy, about 1-2 minutes. This initial stage is critical for establishing the protein matrix that will hold air.
Add the 0.5 tsp Fresh Lemon Juice and 0.125 tsp Salt. The lemon juice’s acidity mimics cream of tartar’s stabilizing properties by denaturing the egg proteins at the optimal rate. Increase speed to medium-high and continue whipping until soft peaks form when the whisk is lifted.
Step 3: Gradually Incorporate the Sugar
With the mixer running at medium speed, begin adding the 1 cup Granulated Sugar in a slow, steady stream down the side of the bowl. This gradual incorporation prevents deflation and allows the sugar to fully dissolve, which is essential for a stable, glossy meringue.
After all sugar is added, increase speed to high and whip for 5-7 minutes until the meringue holds stiff, glossy peaks. The bowl should feel cool to the touch, indicating the sugar has fully dissolved. Test by rubbing a bit between your fingers—it should feel completely smooth, not gritty.
Step 4: Add Final Stabilizers and Flavor
Reduce mixer speed to medium and add the 0.5 tsp Vanilla Extract, 0.5 tsp Cornstarch, and 0.5 tsp Distilled White Vinegar. The cornstarch absorbs excess moisture while the vinegar provides additional stability through its acidity.
Whip for an additional 30-60 seconds just until uniformly incorporated. Be careful not to overmix at this stage, as the meringue can become grainy. The finished product should hold its shape when the whisk is inverted, with peaks that stand straight up without drooping.
Step 5: Use or Store Immediately
Use the meringue immediately for piping or spreading onto pies. For baking, pipe onto parchment-lined sheets and create a small indentation in the center of each to prevent cracking during baking. The meringue will hold its shape for up to 2 hours at room temperature before baking.
For longer storage, transfer to an airtight container and refrigerate for up to 24 hours. The acid substitutes in this recipe maintain stability remarkably well, though you may need to rewhip briefly before using refrigerated meringue. Avoid freezing, as this will cause weeping and texture degradation.
Pro Cooking Tips for Great meringue recipe no cream of tartar
Perfect Whipping Technique
Start with a completely clean, grease-free bowl—I wipe mine with white vinegar to ensure no residue. Use a stand mixer with the whisk attachment and begin on medium speed until foamy. The gradual speed increase prevents overworking the proteins too early, which can cause graininess. 💡
Sugar Incorporation Timing
Add the 1 cup Granulated Sugar in a thin, steady stream while the mixer runs on medium speed. This slow addition gives the sugar time to dissolve completely, which is crucial for that signature glossy finish. I count to 10 between each tablespoon to maintain the right pace.
Stiff Peak Testing
Stop the mixer and lift the whisk—proper stiff peaks should stand straight up with the very tip slightly curling. If the peaks droop, whip for another 30-60 seconds. The meringue should feel cool and smooth between your fingers, with no sugar granules detectable.
Baking Temperature Control
For crisp shells with soft centers, bake at 200°F for 1.5 hours, then turn off the oven and let them dry for another 1 hour. This slow drying prevents cracking. I always use parchment paper to ensure easy removal and even browning.
Humidity Management
On rainy days, add an extra 1/4 tsp cornstarch to combat moisture absorption. Store baked meringues with silica gel packets if your kitchen is humid. I learned this the hard way after a batch turned sticky overnight during summer monsoons. ❄️
Flavor Infusion Tips
Fold in extracts or citrus zests after achieving stiff peaks to avoid deflation. For chocolate meringues, sift 2 tbsp cocoa powder with the sugar before adding. My favorite twist is adding 1/2 tsp espresso powder for depth without bitterness.
Nutrition Facts
Frequently Asked Questions
What can I use instead of cream of tartar?
Lemon juice or white vinegar work perfectly as 1:1 substitutes. Use 0.5 tsp of either for every 4 egg whites. The acidity helps stabilize the egg proteins just like cream of tartar would.
Why did my meringue turn grainy?
Graininess usually means the sugar didn’t dissolve completely. Always add sugar gradually (about 1 tablespoon every 10 seconds) while whipping. The meringue should feel smooth between your fingers when done.
How long can I store unbaked meringue?
Unbaked meringue holds its shape for 2 hours at room temperature. For longer storage, refrigerate in an airtight container for up to 24 hours. Rewhip briefly before using if it separates slightly.
Can I make meringue with cold egg whites?
Room temperature whites (65°F) whip to greater volume. If using cold whites, place the bowl in warm water for 5 minutes first. Cold whites may take 2-3 times longer to reach stiff peaks.
What’s the best way to prevent cracked meringues?
Bake at 200°F for 1.5 hours, then turn off the oven and let them dry for another 1 hour. This slow drying prevents cracking. Piping a small indentation in the center also helps.

- 6 Egg Cake Recipe with Oil: Light as Air With Buttery Moisture - October 4, 2026
- 4 Bean Casserole Recipe: One-Pan Heartiness With Smoky Paprika Depth - October 4, 2026
- 3-Ingredient Keto Mug Cake Recipe: Microwave Magic in 2 Minutes - October 4, 2026