
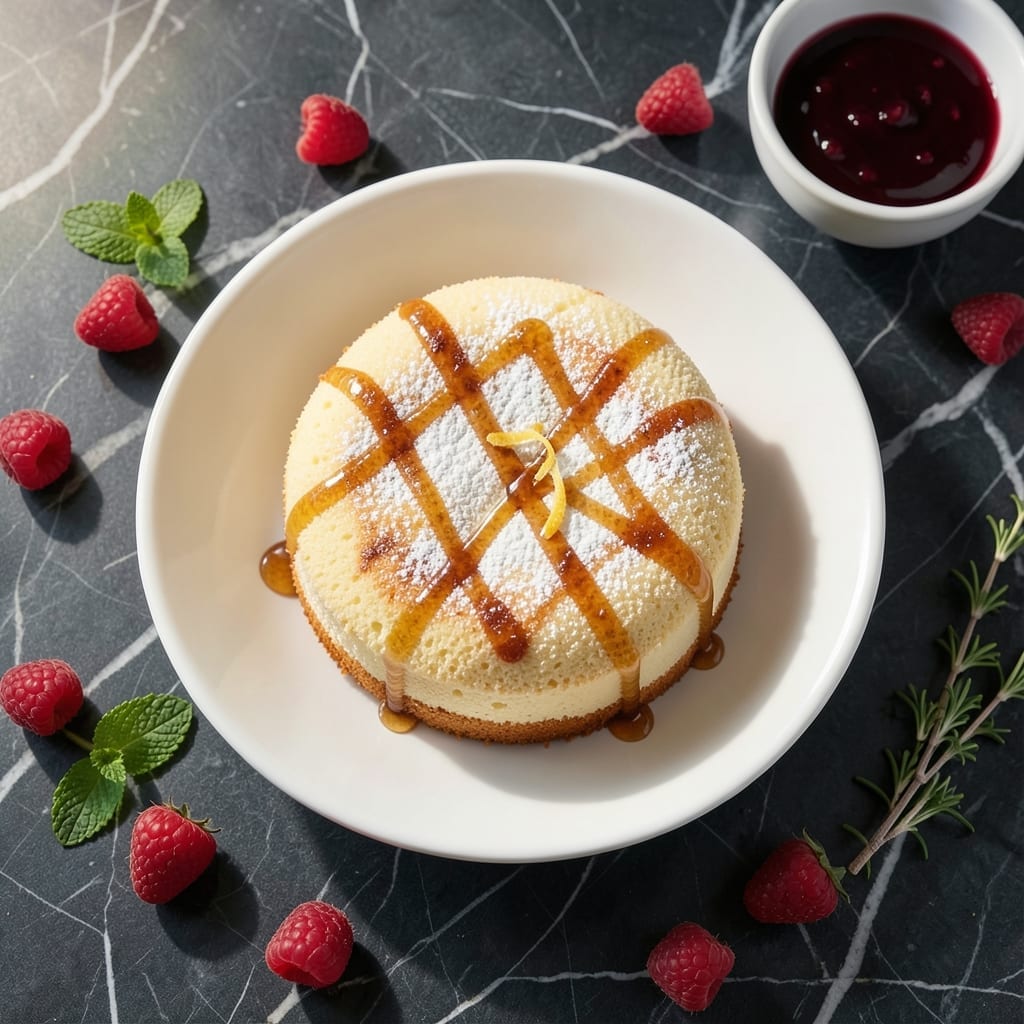
I’ve perfected a foolproof method for making a light and fluffy sponge cake in the microwave. It’s a game-changer for those craving dessert without the fuss.
This approach uses basic pantry staples and requires just 5 minutes of cooking time. The result is a soft, airy cake with a delicate crumb that’s hard to believe came from a microwave.
No special equipment is needed—just a microwave-safe bowl and a whisk. The batter comes together quickly, and the cake rises beautifully as it cooks.
Perfect for last-minute cravings or unexpected guests. Here’s how to make it.
Ingredients for Microwave Sponge Cake
Basic pantry staples transform into a delicate, airy dessert in minutes.
| Ingredient | Amount | Notes |
|---|---|---|
| All-Purpose Flour 🌾 | 1 cup | Sifted for lighter texture |
| Granulated Sugar 🍚 | ¾ cup | Fine grain for even distribution |
| Large Eggs 🥚 | 3 whole | Room temperature for maximum volume |
| Baking Powder 🧂 | 1 tsp | Ensures proper rise in microwave |
| Vanilla Extract 🌿 | 1 tsp | Pure extract for best flavor |
| Salt 🧂 | ¼ tsp | Balances sweetness |
| Vegetable Oil 🫒 | ¼ cup | Neutral flavor for cake base |
| Whole Milk 🥛 | ¼ cup | Adds moisture without density |
| Lemon Zest 🍋 | 1 tsp | Optional for brightness |
| Confectioners Sugar ✨ | 2 tbsp | For dusting finished cake |
The eggs are critical here. Room temperature eggs whip up to maximum volume—cold eggs won’t give you that light, fluffy texture. King Arthur Flour is my go-to for all-purpose, but any unbleached variety works. The baking powder should be fresh (check the expiration date); old leaveners lose potency. For the milk, whole milk gives the richest result, though 2% works in a pinch.
No whole milk? Oat milk or soy milk at the same quantity maintains the structure. Out of vanilla extract? Almond extract at half the amount adds a different but lovely flavor. If you’re avoiding eggs, this recipe won’t work as a standard sponge relies on them for structure. The oil can be swapped for melted butter (cool it first) if you prefer a richer taste.
The cake is best eaten the same day—it’s at peak fluffiness fresh from the microwave. Store leftovers in an airtight container at room temperature for up to 2 days. The confectioners sugar is purely optional but adds a nice finish.
Why You’ll Love This Recipe
- 5-Minute Magic: I mix the eggs, sugar, and vanilla in a mug, microwave it, and boom—warm cake in minutes.
- Vanilla Cloud: The real vanilla extract gives it that cozy, sweet aroma that fills my kitchen.
- Dessert in a Mug: I’ve served this at picnics, packed it for lunchboxes, even eaten it straight from the mug.
- Pantry Hero: All-purpose flour, sugar, eggs—stuff I always have, so I can make this anytime a craving hits.
Step-by-Step Instructions for Microwave Sponge Cake
This accelerated method delivers the classic texture you expect without the oven wait.
Step 1: Combine Wet Ingredients Thoroughly
In a large microwave-safe bowl, whisk together the 3 whole Large Eggs and 0.75 cup Granulated Sugar until pale and slightly thickened, about 2-3 minutes by hand. The mixture should ribbon off the whisk and hold its shape briefly on the surface.
Add the 0.25 cup Vegetable Oil, 0.25 cup Whole Milk, 1 tsp Vanilla Extract, and 0.25 tsp Salt. Whisk for another 1 minute until fully emulsified. Real talk: this step determines your cake’s tenderness—don’t rush it.
Step 2: Incorporate Dry Ingredients Gently
Sift in the 1 cup All-Purpose Flour and 1 tsp Baking Powder together directly into the wet mixture. Using a silicone spatula, fold gently until just combined—about 15-20 strokes. Overmixing develops gluten, which would make your cake dense rather than light.
If using, fold in the 1 tsp Lemon Zest at this stage. The zest adds a bright note that cuts through the sweetness. The batter should be smooth with no visible flour streaks, but still slightly thick.
Step 3: Microwave in Controlled Intervals
Pour the batter into a lightly greased microwave-safe dish (an 8-inch round works well). Microwave on medium power (50%) for 4 minutes. This lower power setting prevents the edges from cooking too quickly while the center remains raw.
After 4 minutes, check the center—it should still be slightly wet. Rotate the dish and microwave at full power in 30-second bursts until the center springs back when touched, usually 1-2 additional minutes. Total cooking time will vary based on your microwave’s wattage.
Step 4: Cool and Finish Properly
Let the cake rest in the dish for 5 minutes before turning it out onto a wire rack. This brief rest allows the structure to set, preventing collapse. The top should be golden brown with a slightly domed center, and a toothpick inserted should come out clean.
Cool completely to room temperature, about 20-30 minutes. Once cool, dust with 2 tbsp Confectioners Sugar using a fine-mesh sieve. The sugar should melt slightly on contact with the warm cake, creating a delicate finish. Slice and serve immediately for the best texture.
Pro Tips For Making Microwave Sponge Cake
- Beat Eggs Longer: Whip the eggs and sugar for at least 5 minutes until pale and tripled in volume—I learned this the hard way after my first few cakes came out dense instead of airy.
- Sift Dry Ingredients: Always sift the flour and baking powder together first; it prevents lumps and guarantees an even rise, which is crucial in the microwave’s uneven heat.
- Use a Wide Bowl: Pick a microwave-safe bowl that’s at least twice as wide as your batter’s height—this stops the cake from doming too much and cooking unevenly.
- Check at 2 Minutes: Microwaves vary wildly, so start checking for doneness at the 2-minute mark with a toothpick—overcooking turns it rubbery in seconds.
Common Mistakes When Making microwave sponge cake
Overmixing the Batter
Fold your dry ingredients just until combined—about 15-20 strokes. Overmixing develops gluten, turning your light cake dense. I use a silicone spatula for gentle folding.
Skipping Room Temperature Eggs
Cold eggs won’t whip to maximum volume. Let your 3 Large Eggs sit at room temperature for 30 minutes before starting. This small step makes a huge difference in texture. 💡
Wrong Microwave Power
Always start on medium power (50%) for the first 4 minutes. High power cooks the edges too fast, leaving the center raw. My 1200W microwave needs this adjustment.
Insufficient Resting Time
Let the cake rest in the dish for 5 minutes after microwaving. This prevents collapse when turning out. I learned this the hard way with my first sunken cake.
Using the Wrong Dish
An 8-inch round microwave-safe dish works best. Too large a dish makes a flat cake; too small causes overflow. I grease mine lightly with Vegetable Oil.
Checking Doneness Incorrectly
The center should spring back when touched. Use 30-second bursts at full power after the initial 4 minutes. A toothpick test should come out clean. ✨
Nutrition Facts
Frequently Asked Questions
Can I use a different dish size?
An 8-inch round works best, but a 9-inch is fine—just reduce cook time by 30 seconds. Avoid smaller dishes to prevent overflow.
Why start on medium power?
Medium power (50%) cooks evenly, preventing burnt edges while the center finishes. Full power can overcook the outside before the inside sets.
How do I know when it’s done?
The top should spring back when touched, and a toothpick should come out clean. Check at 4 minutes, then use 30-second bursts as needed.
Can I make this eggless?
No—eggs provide structure for sponge cake. Without them, the texture won’t be light and fluffy. Stick to the original recipe for best results.

- 6 Egg Cake Recipe with Oil: Light as Air With Buttery Moisture - October 4, 2026
- 4 Bean Casserole Recipe: One-Pan Heartiness With Smoky Paprika Depth - October 4, 2026
- 3-Ingredient Keto Mug Cake Recipe: Microwave Magic in 2 Minutes - October 4, 2026