
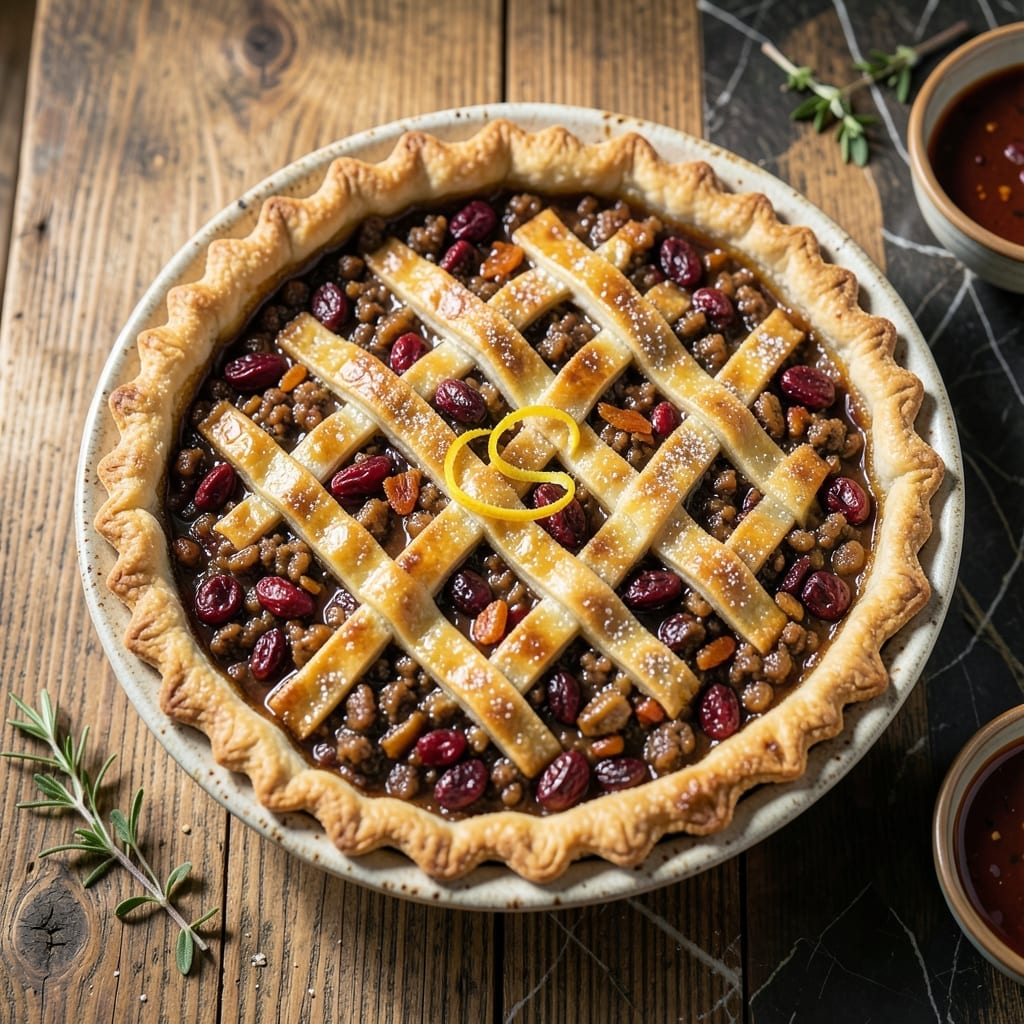
There’s something nostalgic about a mincemeat pie that instantly evokes holiday warmth. This version simplifies tradition without sacrificing flavor.
Using jarred mincemeat cuts prep time while delivering the same flaky crust and rich, spiced filling that makes this dessert a seasonal favorite.
Ingredients for Mincemeat Pie Recipe Using Jarred Mincemeat
Jarred mincemeat and a few pantry spices make this holiday classic effortless yet impressive.
| Ingredient | Amount | Notes |
|---|---|---|
| Store-Bought Pie Crust 🥧 | 2 sheets | Refrigerated, for top and bottom |
| Jarred Mincemeat 🍯 | 27 oz | About 1 jar, undrained |
| Granulated Sugar 🍚 | ¼ cup | For sweetening filling |
| Unsalted Butter 🧈 | 2 tbsp | Cold, cubed for topping |
| All-Purpose Flour 🌾 | 1 tbsp | For thickening filling |
| Ground Cinnamon 🌿 | ½ tsp | Freshly ground preferred |
| Ground Nutmeg 🌰 | ¼ tsp | Freshly grated for best flavor |
| Ground Cloves 🌶️ | ¼ tsp | Strong flavor, use sparingly |
| Large Egg 🥚 | 1 whole | For egg wash finish |
| Coarse Sugar 🍚 | 1 tbsp | For sprinkling on crust |
| Orange Zest 🍊 | 1 tsp | Freshly grated for brightness |
| Brandy 🥃 | 2 tbsp | Optional, for depth of flavor |
The crust is the foundation here. Pillsbury refrigerated pie crust saves time without sacrificing flakiness—just let it warm up slightly before rolling (about 15 minutes). For a homemade touch, use all-butter puff pastry from Trader Joe’s. The mincemeat? B&W or None Such are the most common brands, found in the baking aisle near the pie fillings.
No brandy on hand? Rum or bourbon works just as well. Skip the alcohol entirely and use apple juice or cider for a non-alcoholic version. The spices can be adjusted to taste—if you love cinnamon, add an extra quarter teaspoon. Fresh nutmeg (grated from a whole nut) has a brightness that pre-ground can’t match (worth the extra minute).
Assembled pie keeps in the fridge for 1 day before baking, or freeze the unbaked pie for up to 3 months. Baked pie stays fresh at room temperature for 2 days—if it lasts that long. Warm slices briefly in the oven for that just-baked feel.
Why You’ll Love This Recipe
- No-Fuss Assembly: I just roll out the store-bought crust, dump in the jarred mincemeat, and fold it shut—no chopping, no pre-cooking, just pure simplicity.
- Rich Spiced Warmth: That first bite hits you with cinnamon, clove, and brandied fruit from the jarred mincemeat, all wrapped in buttery crust. It’s like Christmas in pie form.
- Holiday Ready: I pull this out for Thanksgiving dessert or a cozy Sunday supper—it feels fancy but takes less effort than a casserole.
- Budget Stretcher: A jar of mincemeat and a cheap crust feeds six for under ten bucks. Honestly, it’s my go-to when I need to impress without overspending.
Step-by-Step Instructions for Mincemeat Pie
This method delivers that nostalgic holiday flavor with minimal effort and maximum flaky crust satisfaction.
Step 1: Prepare the Pie Crust Base
Unroll one sheet of the store-bought pie crust and fit it into a standard 9-inch pie dish. Press it gently against the bottom and sides, being careful not to stretch the dough. Trim any overhang to about ½ inch beyond the rim—this gives you enough to crimp later.
I like to dock the crust by pricking the bottom all over with a fork. This prevents air pockets from forming during baking and keeps your bottom crust flat. Place the crust in the refrigerator while you prepare the filling—cold dough stays flaky.
Step 2: Enhance and Thicken the Filling
In a large bowl, combine the 27 oz jarred mincemeat with the 0.25 cup granulated sugar, 1 tbsp all-purpose flour, 0.5 tsp ground cinnamon, 0.25 tsp ground nutmeg, 0.25 tsp ground cloves, and 1 tsp orange zest. Stir well to distribute the spices evenly through the mincemeat.
The flour acts as a thickener, preventing the filling from becoming too runny as it bakes. If you’re using the 2 tbsp brandy, add it now—it deepens the flavor beautifully. The mixture should look glossy and smell incredibly fragrant, with visible flecks of spice.
Step 3: Assemble the Pie with Butter Topping
Pour the spiced mincemeat filling into the chilled pie crust, spreading it evenly. Dot the top with the 2 tbsp unsalted butter, cubed and spaced evenly across the filling. This melts into the filling as it bakes, adding richness and helping to create a glossy finish.
Unroll the second sheet of store-bought pie crust and place it over the filling. Trim the overhang to match the bottom crust, then crimp the edges together with your fingers or a fork. Cut four 1-inch slits in the top crust to allow steam to escape during baking—this prevents a soggy bottom.
Step 4: Add Egg Wash and Bake to Golden Perfection
In a small bowl, beat the 1 whole large egg lightly with a fork. Brush this egg wash evenly over the top crust, making sure to get into all the crimped edges. This creates that beautiful, professional golden-brown finish and adds a subtle sheen.
Sprinkle the 1 tbsp coarse sugar evenly over the egg wash. This adds a delightful crunch and extra sweetness to each bite. Bake in a preheated 375°F oven for 45-50 minutes, until the crust is deep golden brown and the filling is bubbling through the vents.
Step 5: Cool and Serve Warm
Remove the pie from the oven and transfer it to a wire rack. Let it cool for at least 2 hours before slicing—this allows the filling to set properly. If you cut into it too soon, the filling will be runny and won’t hold its shape.
Serve warm, ideally with a scoop of vanilla ice cream or a dollop of whipped cream. The crust should be crisp and flaky, the filling rich and spiced, with just the right amount of sweetness. Each slice should hold together beautifully, showcasing that perfect holiday balance of texture and flavor.
Pro Tips For Making Mincemeat Pie Recipe Using Jarred Mincemeat
- Pre-Bake the Crust: Blind-bake your store-bought pie crust for 8-10 minutes at 375°F before adding the filling. I learned this the hard way—without it, the bottom gets soggy under the moist mincemeat.
- Drain the Mincemeat: Drain the jarred mincemeat well and pat it dry with a paper towel. After my first pie turned out watery, I realized how much extra liquid hides in those jars.
- Vent the Top Crust: Cut 4-5 small slits in the top crust before baking. Sounds obvious, but I skipped this once and ended up with a burst seam and filling everywhere.
- Brush with Butter: Melt 1 tablespoon of that unsalted butter and brush it over the top crust before baking. My grandmother swore by this, and it gives the crust that golden, flaky finish.
Essential Equipment for This Dish
Must-Have Tools 🥘
To bake your mincemeat pie using jarred mincemeat, you’ll need a few key items. Start with a 9-inch pie dish—glass or ceramic works best for even baking. A rolling pin is essential for smoothing out your crust, and a sharp paring knife helps trim excess dough.
A mixing bowl and wooden spoon are handy for prepping any additional fillings or toppings. Don’t forget a pastry brush for egg washes or butter glazes to give your pie that golden finish.
Nice-to-Have
For extra precision, a pie crust shield prevents over-browning on the edges. A food processor can make quick work of homemade crusts if you’re not using store-bought. A kitchen scale ensures accurate measurements for consistent results.
If you love decorating, cookie cutters or a lattice roller add a festive touch. A thermometer ensures your filling reaches the perfect temperature.
Budget Alternatives
No rolling pin? Use a wine bottle or clean, flat glass instead. Skip the pie dish and opt for a muffin tin for mini pies. A fork can stand in for a pastry brush, and a butter knife works for trimming dough.
For mixing, any large bowl and spoon will do. Creativity in the kitchen saves money without sacrificing flavor!
Nutrition Facts

- 6 Egg Cake Recipe with Oil: Light as Air With Buttery Moisture - October 4, 2026
- 4 Bean Casserole Recipe: One-Pan Heartiness With Smoky Paprika Depth - October 4, 2026
- 3-Ingredient Keto Mug Cake Recipe: Microwave Magic in 2 Minutes - October 4, 2026