
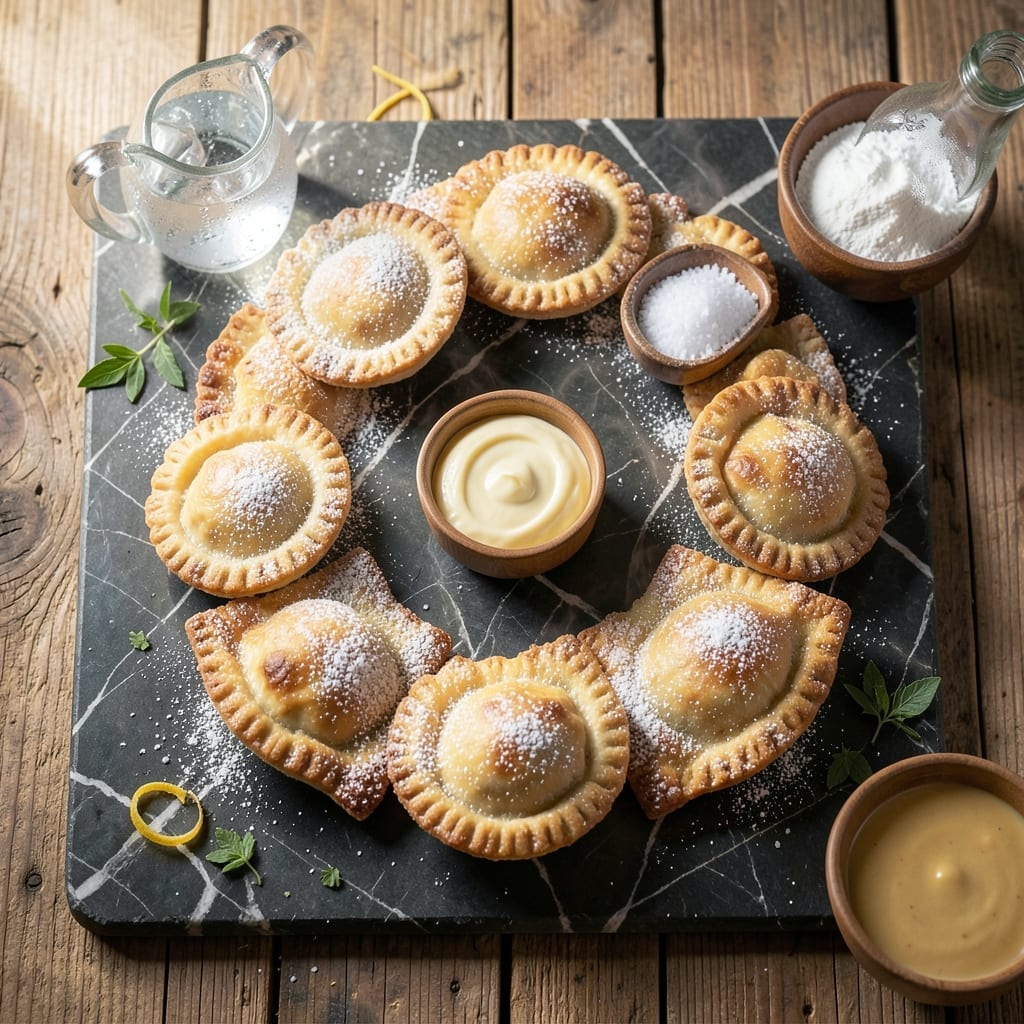
I’ve perfected a foolproof mini pie crust recipe that delivers flaky, buttery layers every time. These individual crusts are ideal for both sweet and savory fillings, making them versatile for any occasion.
The key is using cold ingredients and minimal handling to prevent toughness. With just a few basic pantry staples, you can create a tender, golden crust that holds its shape beautifully.
Each bite offers a delicate crunch followed by a melt-in-your-mouth finish. The small size ensures even baking and a perfect crust-to-filling ratio in every portion.
Whether you’re making appetizers or desserts, this recipe provides a reliable base for endless creative possibilities.
Ingredients for Mini Pie Crust Recipe Ideas
Cold butter, minimal handling, and pantry staples create this foolproof flaky crust.
| Ingredient | Amount | Notes |
|---|---|---|
| All-Purpose Flour 🌾 | 2 ½ cups | Spoon and level, not packed |
| Unsalted Butter 🧈 | 1 cup | Very cold, cubed into 1/2-inch pieces |
| Ice Water 💧 | ¼ cup | Plus 1 tbsp as needed |
| Granulated Sugar 🍚 | 1 tbsp | For sweet fillings only |
| Kosher Salt 🧂 | ½ tsp | Diamond Crystal preferred |
| White Vinegar 🍶 | 1 tsp | Or apple cider vinegar |
| Shortening 🧈 | ¼ cup | Cold, for extra flakiness |
| Large Egg Yolk 🥚 | 1 whole | Optional, for richer flavor |
| Vanilla Extract 🌿 | ½ tsp | For sweet crusts only |
| Baking Powder 🧂 | ¼ tsp | For extra tenderness |
The butter is non-negotiable here. Use high-quality unsalted—I grab Plugrá or Kerrygold from Whole Foods. Shortening adds flakiness but isn’t mandatory (though I always keep Crisco on hand). Weigh your flour if you’ve got a scale—10 ounces is the sweet spot for accuracy. Vinegar might seem odd, but it tenderizes the gluten (don’t skip it).
No shortening? All-butter works fine, though the texture changes slightly. Swap granulated sugar for powdered if that’s what’s in the cupboard. For savory crusts, omit sugar and add 1/4 tsp black pepper. The egg yolk is optional but gives a richer color—use 1 tbsp extra ice water if skipping. Vinegar can be lemon juice in a pinch.
Dough keeps in the fridge for 2 days or freezes for 3 months. Wrap tightly in plastic (the good stuff, not the flimsy kind). Baked crusts? Cool completely before storing—5 days at room temp in an airtight container.
Why You’ll Love This Recipe
- 5-Minute Mix: I can have the dough ready before the oven finishes preheating—just pulse flour, cold butter, sugar, salt, and ice water in the food processor.
- Buttery Crisp: That flaky, golden crust from the butter and a pinch of sugar gives every mini pie a bakery-worthy finish.
- Endless Fillings: Honestly, I’ve stuffed these with jam, custard, even leftover pot pie filling, and they disappear every time.
- Pantry Staples: All-purpose flour, butter, sugar, salt—stuff I already keep on hand, so no extra grocery runs for a batch of cute little pies.
Step-by-Step Instructions for Mini Pie Crusts
This method delivers flaky, golden crusts every time—perfect for any filling you choose.
Step 1: Combine Dry Ingredients and Cold Fats
In a large bowl, whisk together the 2.5 cups All-Purpose Flour, 0.5 tsp Kosher Salt, and 0.25 tsp Baking Powder until evenly distributed. This ensures your crust has consistent seasoning and lift in every bite.
Add the 1 cup Unsalted Butter (cubed into ½-inch pieces) and 0.25 cup Shortening to the flour mixture. Using a pastry cutter or your fingers, work the fats into the flour until the mixture resembles coarse crumbs with pea-sized pieces of fat remaining. Keep everything cold—this is what creates those desirable flaky layers.
Step 2: Incorporate Wet Ingredients Gradually
Create a well in the center of your flour-fat mixture. Add the 1 whole Large Egg Yolk, 1 tbsp Granulated Sugar, 1 tsp White Vinegar, and 0.5 tsp Vanilla Extract to the well. For sweet crusts, these add richness and depth; for savory, omit the sugar and vanilla.
Pour in 0.25 cup Ice Water and, using a fork, gently stir the mixture from the center outward. Stop as soon as the dough begins to come together—it will look shaggy, but don’t overwork it. If the dough seems too dry, add 1 tbsp more ice water, but be conservative.
Step 3: Chill and Rest the Dough
Turn the dough out onto a lightly floured surface and gently knead it just until it forms a cohesive ball. Divide the dough into 4 equal portions (for 4 servings), flatten each into a disk, and wrap them tightly in plastic wrap.
Refrigerate the dough for at least 1 hour, or up to 2 days. This resting period allows the gluten to relax and the fats to firm up, which makes the dough easier to roll out and prevents shrinking during baking. Chilling also enhances the flakiness—don’t skip this step.
Step 4: Roll, Cut, and Shape for Mini Pies
On a lightly floured surface, roll out one disk of dough to about ⅛-inch thickness. Use a round cutter (or a glass) to cut out circles slightly larger than your mini pie molds. For a standard muffin tin, 4-inch circles work well.
Press the dough circles gently into the molds, ensuring they fit snugly against the bottom and sides. Avoid stretching the dough, as this can cause it to shrink during baking. Use a fork to dock (poke holes in) the bottoms if you’re pre-baking the crusts (blind baking).
Step 5: Pre-Bake or Fill and Bake
For pre-baking, freeze the shaped crusts for 15 minutes to firm up, then line them with parchment paper and fill with pie weights or dried beans. Bake at 375°F for 12-15 minutes until the edges are light golden brown.
For filled pies, add your filling to the unbaked crusts and bake according to your filling recipe. The crust is done when it’s golden brown and pulls slightly away from the edges of the mold. Let the pies cool in the pan for 5 minutes before transferring to a wire rack to cool completely.
Pro Tips For Making Mini Pie Crust Recipe Ideas
- Chill the Butter: Keep your butter ice-cold until the very last moment—warm butter blends into the flour and kills the flaky texture you want.
- Use Ice Water: I learned this the hard way—warm water makes the dough tough, so always use ice water, about 1 tablespoon at a time, until the dough just comes together.
- Don’t Overwork It: Mix just until the dough forms a shaggy ball; overworking it develops gluten, and your mini pie crusts will turn out chewy instead of tender.
- Rest the Dough: Give it a solid 30 minutes in the fridge before rolling—this relaxes the gluten and makes the crust easier to handle when shaping into mini pies.
Serving Suggestions for This Recipe
Sweet Presentation Ideas
Dust the crusts with powdered sugar and serve with a dollop of whipped cream or a scoop of vanilla ice cream. Fresh berries like raspberries or strawberries add a pop of color and tartness that balances the richness. 💫
Savory Serving Styles
For savory mini pies, pair with a drizzle of balsamic glaze or a side of herbed sour cream. A sprinkle of crumbled feta or goat cheese on top elevates the flavors beautifully.
Party Platter Tips
Arrange the pies on a tiered stand for visual impact. Offer a selection of dipping sauces like caramel, chocolate ganache, or sriracha mayo to let guests customize their bites.
Beverage Pairings
Serve sweet mini pies with coffee or dessert wine like Moscato. For savory versions, a crisp Sauvignon Blanc or sparkling water with citrus complements the buttery crust perfectly. 🍷
Hot chai tea or spiced cider also pairs wonderfully with the warm, flaky texture.
Final Touches
A light brush of egg wash before baking gives a glossy finish. Sprinkle coarse sugar or sesame seeds on top for added texture and visual appeal.
Nutrition Facts
Frequently Asked Questions
Can I make the dough ahead of time?
Yes! The dough keeps in the fridge for 2 days or freezes for 3 months. Wrap tightly in plastic to prevent drying. Thaw overnight in the fridge before using.
What if my crust shrinks while baking?
This happens when the dough isn’t chilled enough or is stretched during shaping. Always rest the dough for 1 hour and avoid pulling it to fit the mold.
Can I use this for savory fillings?
Just omit the sugar and vanilla, and add 1/4 tsp black pepper for a savory twist. It pairs well with quiche or pot pie fillings.
How do I prevent soggy bottoms?
Pre-bake the crust (blind bake) at 375°F for 12-15 minutes before adding wet fillings. This creates a barrier to keep the crust crisp.

- 6 Egg Cake Recipe with Oil: Light as Air With Buttery Moisture - October 4, 2026
- 4 Bean Casserole Recipe: One-Pan Heartiness With Smoky Paprika Depth - October 4, 2026
- 3-Ingredient Keto Mug Cake Recipe: Microwave Magic in 2 Minutes - October 4, 2026