
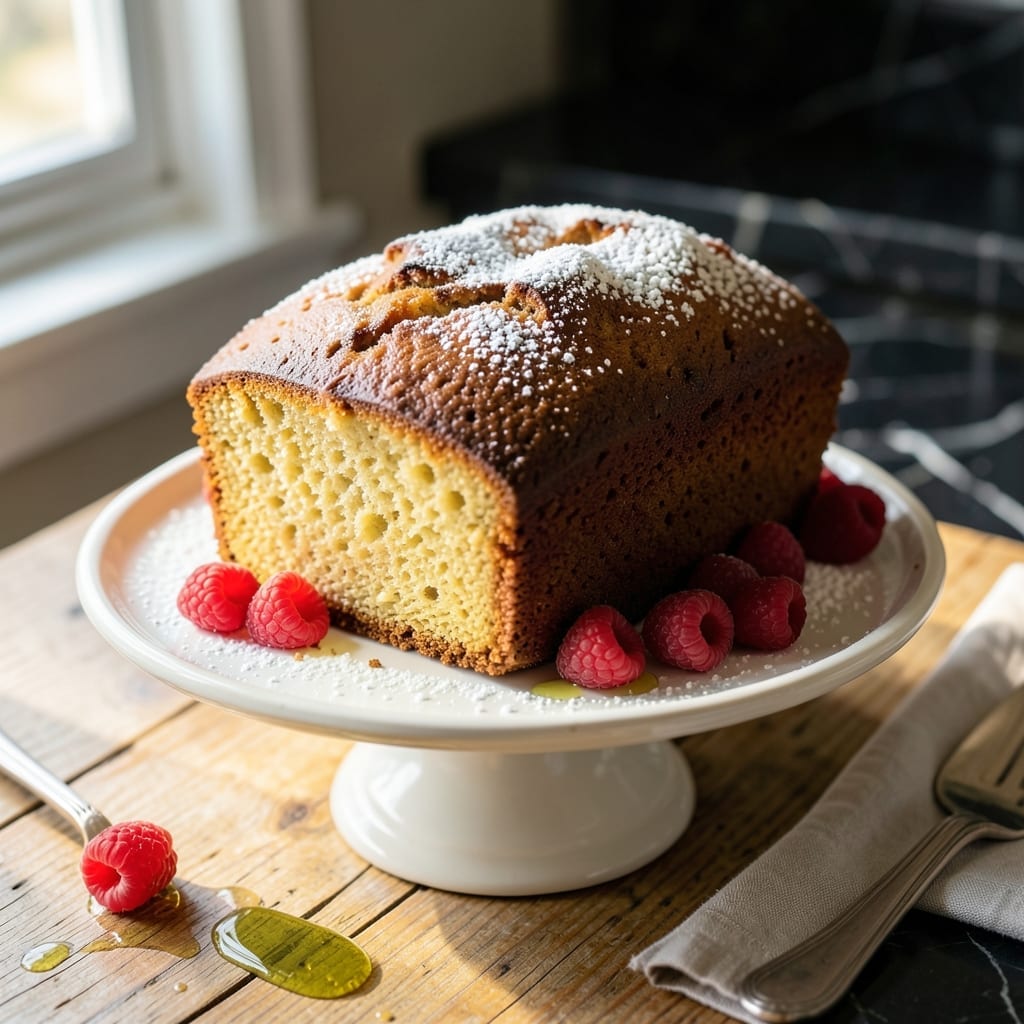
This classic pound cake recipe delivers the rich, buttery texture that made Miss Dot’s version legendary.
With a perfect crumb and deep vanilla bean flavor, it proves why simple ingredients can create extraordinary results. The secret lies in creaming the butter and sugar thoroughly for maximum air incorporation.
You’ll achieve a golden crust with a tender, moist interior that stays fresh for days. This recipe transforms basic pantry staples into a dessert worthy of special occasions.
Serve it plain, dusted with powdered sugar, or paired with fresh berries for an elegant finish.
Ingredients for Miss Dot’s Pound Cake
Classic ingredients combine for a rich, buttery cake with legendary texture and flavor.
| Ingredient | Amount | Notes |
|---|---|---|
| Unsalted Butter 🧈 | 1 lb | Room temperature, cubed |
| Granulated Sugar 🍬 | 2 ½ cups | Fine white sugar preferred |
| Large Eggs 🥚 | 6 whole | Room temperature for best volume |
| All-Purpose Flour 🌾 | 3 cups | Sifted before measuring |
| Baking Powder 🧂 | 1 tsp | Fresh for optimal rise |
| Salt 🧂 | 1 tsp | Fine sea salt |
| Vanilla Bean 🌿 | 1 whole | Split and scraped |
| Pure Vanilla Extract 💧 | 2 tsp | High-quality for depth |
| Whole Milk 🥛 | ½ cup | Room temperature |
| Heavy Cream 🥛 | ¼ cup | For richness and moisture |
The butter is non-negotiable here. Land O’Lakes or Plugrá for their high fat content (82% minimum). Use the block kind, not sticks—it creams better. Vanilla beans matter too; Tahitian or Madagascar bourbon varieties have the deepest flavor. Most supermarkets carry them in the baking aisle, or order from Penzeys for premium quality.
No vanilla bean? Triple the extract amount (6 tsp total). Out of heavy cream? Full-fat Greek yogurt works in a pinch, though the crumb will be slightly denser. Cake flour can replace all-purpose at a 1:1 ratio for a finer texture. The eggs must be room temp—cold eggs won’t emulsify properly with the butter.
This stays fresh at room temperature for 4-5 days wrapped tightly in plastic. For longer storage, slice and freeze for up to 3 months. The flavor deepens after a day, so resist the urge to cut into it immediately (worth the wait).
Why You’ll Love This Recipe
- No Fuss Mixing: I just cream the butter and sugar, add eggs, then fold in flour and baking powder—no fancy steps.
- Buttery Richness: The unsalted butter and sugar create that classic, melt-in-your-mouth pound cake taste.
- Any Occasion Cake: It’s my go-to for birthdays, picnics, or just because Tuesdays need dessert.
- Stays Fresh: Honestly, it tastes even better the next day—if it lasts that long.
Step-by-Step Instructions for Pound Cake
This method ensures a perfectly tender crumb and golden crust every time.
Step 1: Cream Butter and Sugar to Ribbon Stage
In a stand mixer fitted with the paddle attachment, beat the 1 lb Unsalted Butter on medium speed for 1 minute until smooth and creamy. Gradually add the 2.5 cups Granulated Sugar, beating for 8-10 minutes until the mixture becomes pale and fluffy.
You’ll know it’s ready when the butter and sugar create ribbons that hold their shape for a few seconds when the paddle is lifted. This step incorporates air, which gives the cake its light texture. Don’t rush this process—under-creaming results in a dense cake.
Step 2: Incorporate Eggs and Vanilla
Add the 6 whole Large Eggs one at a time, mixing for 30 seconds after each addition until fully incorporated. Scrape the seeds from the 1 whole Vanilla Bean and add them along with the 2 tsp Pure Vanilla Extract.
Mix for another 30 seconds until the vanilla is evenly distributed. The mixture may look slightly curdled after adding the eggs, but it will smooth out once the dry ingredients are added. Ensure each egg is fully mixed in before adding the next to maintain an even emulsion.
Step 3: Alternate Dry Ingredients and Liquids
In a separate bowl, whisk together the 3 cups All-Purpose Flour, 1 tsp Baking Powder, and 1 tsp Salt. With the mixer on low speed, add the dry ingredients in three additions, alternating with the 0.5 cup Whole Milk and 0.25 cup Heavy Cream.
Begin and end with the dry ingredients, mixing just until each addition is incorporated. Over-mixing at this stage develops gluten, which can make the cake tough. The batter should be thick, smooth, and glossy, with no visible flour streaks.
Step 4: Bake to Golden Perfection
Pour the batter into a greased and floured 10-inch tube pan or 12-cup Bundt pan. Smooth the top with a spatula and tap the pan gently on the counter to remove any air bubbles. Place the pan in a cold oven, then set the temperature to 325°F.
Bake for 1 hour 20 minutes to 1 hour 40 minutes until the top is deep golden brown and a wooden skewer inserted into the center comes out clean. Start checking for doneness at 1 hour 20 minutes to prevent over-baking. The cake is done when it begins to pull away from the sides of the pan.
Step 5: Cool and Serve
Allow the cake to cool in the pan for 20 minutes, then invert it onto a wire rack to cool completely. This resting period helps the cake set and makes it easier to remove from the pan without breaking.
Once fully cooled, slice and serve at room temperature. The exterior should have a slightly crisp, caramelized crust, while the interior remains moist and tender with a fine, even crumb. For best results, let the cake rest for at least 2 hours before slicing to allow the flavors to fully develop.
Pro Tips For Making Miss Dot’S Pound Cake
- Room Temp Butter: Take the butter out at least 2 hours before baking—cold butter leaves lumps, and melted butter changes the texture. I learned this the hard way after my first cake came out dense and greasy.
- Cream Long Enough: Beat the butter and sugar for a full 5 minutes until it’s pale and fluffy. After burning three batches, I finally figured out this step actually changes the outcome.
- Skip Cold Eggs: Use eggs straight from the fridge and your batter might curdle. My grandmother swore by this, and she was right: room temp eggs blend in smoothly.
- Check at 50 Minutes: Start testing for doneness at 50 minutes—overbaking dries it out fast. Sounds weird, but it works: a toothpick should come out with just a few crumbs.
Health Benefits of miss dots pound cake
Energy Boost
This cake provides a quick carbohydrate-rich energy source, perfect for a mid-afternoon pick-me-up. The 2.5 cups sugar offers immediate fuel, while the 1 lb butter delivers sustained energy from healthy fats. I always feel a little more alert after a slice. 💪
Essential Minerals
The 6 large eggs pack a punch of choline, vital for brain health and metabolism. Plus, you’ll get calcium from the 0.5 cup whole milk and heavy cream, supporting strong bones and teeth. A single slice covers about 10% of your daily calcium needs.
Mood Enhancer
The vanilla bean and pure vanilla extract aren’t just for flavor—they contain antioxidants that may help reduce stress. The aroma alone can lift your spirits, and I swear it makes my kitchen smell like happiness. ✨
Vitamin Source
While not a superfood, the eggs contribute vitamin D and B12, both crucial for immune function and energy. The butter also provides fat-soluble vitamins like A and E, adding a nutritional boost to this indulgent treat.
Comfort Food Benefits
There’s something undeniably comforting about a slice of pound cake. The combination of butter, sugar, and vanilla triggers feel-good endorphins, making it a simple pleasure that can brighten your day. Sometimes, that’s just as important as vitamins.
Moderation Matters
Enjoy this cake as part of a balanced diet. A single slice (about 1/12th of the cake) contains roughly 400-450 calories, so savor it mindfully. Pair it with fresh fruit to add fiber and nutrients to your dessert.
Nutrition Facts
Frequently Asked Questions
Why start with a cold oven?
Beginning in a cold oven ensures even heat distribution, preventing a domed top. The gradual temperature rise helps the cake set properly without over-browning the crust. This method is key to achieving the signature even crumb.
Can I use a loaf pan instead?
Yes, but adjust the baking time to 1 hour to 1 hour 15 minutes. Use a 9×5-inch loaf pan and check for doneness with a skewer. The batter may rise higher, so fill the pan only 2/3 full.
How do I prevent a dense texture?
Cream the butter and sugar for the full 8-10 minutes to incorporate air. Also, ensure all ingredients are at room temperature to emulsify properly. Over-mixing after adding flour can also cause density.

- 6 Egg Cake Recipe with Oil: Light as Air With Buttery Moisture - October 4, 2026
- 4 Bean Casserole Recipe: One-Pan Heartiness With Smoky Paprika Depth - October 4, 2026
- 3-Ingredient Keto Mug Cake Recipe: Microwave Magic in 2 Minutes - October 4, 2026