
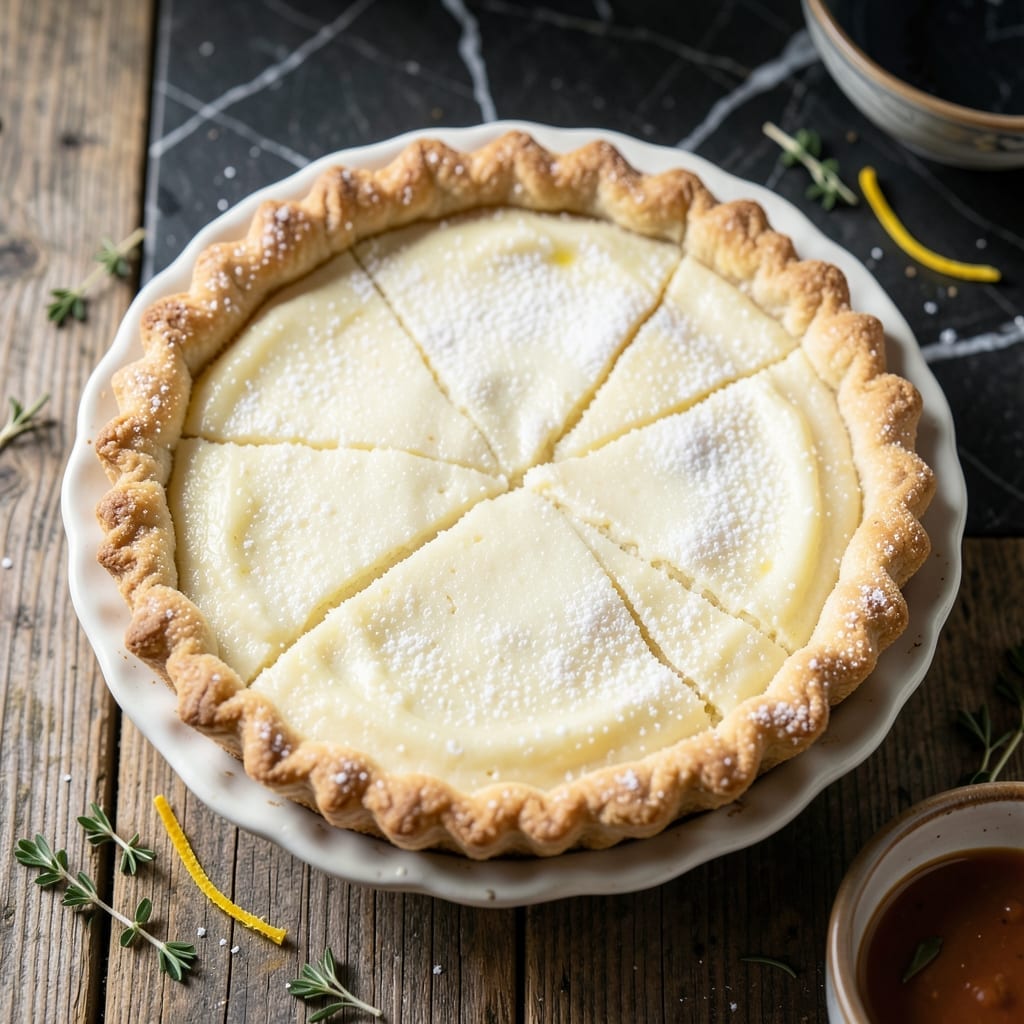
This Hoosier classic delivers a slice of Indiana tradition with every bite. A simple custard pie with a rich, creamy filling that’s been beloved for generations.
The beauty lies in its simplicity—just a handful of pantry staples come together to create something extraordinary. The filling sets into a velvety texture that’s neither too firm nor too runny.
What you get is a dessert that’s humble yet unforgettable, with a buttery crust and a filling so smooth it nearly melts on the tongue.
Perfect for family gatherings or a quiet evening treat. This recipe stays true to its Midwestern roots.
Ingredients for Mrs Wicks Sugar Cream Pie
A handful of simple ingredients create this Midwestern custard classic with velvety texture.
| Ingredient | Amount | Notes |
|---|---|---|
| Granulated Sugar 🍚 | 2 cups | Fine white sugar preferred |
| All-Purpose Flour 🌾 | ½ cup | For thickening the filling |
| Whole Milk 🥛 | 2 cups | Full-fat for creaminess |
| Heavy Cream 🥛 | 1 cup | Rich, high-fat content |
| Unsalted Butter 🧈 | ½ cup | Melted and cooled slightly |
| Large Eggs 🥚 | 2 whole | Room temperature preferred |
| Vanilla Extract 🌿 | 1 tsp | Pure vanilla for best flavor |
| Salt 🧂 | ¼ tsp | Balances sweetness |
| Unbaked Pie Crust 🥧 | 1 whole | 9-inch standard crust |
| Ground Nutmeg 🌰 | ¼ tsp | Freshly grated if possible |
The milk and cream are the soul of this pie—use full-fat dairy for that signature richness. Most grocery stores carry the ingredients, but local Indiana dairies might offer fresher options. The butter should be high-quality (I prefer Land O’Lakes), and don’t skimp on the vanilla—Nielsen-Massey is worth the splurge for its deep, pure flavor.
No heavy cream? Whole milk plus extra butter works in a pinch (use 1.5 cups milk and 0.5 cup melted butter). Out of nutmeg? Cinnamon at half the amount gives a different but pleasant warmth. The crust can be homemade or store-bought—Pillsbury makes a reliable ready-to-bake option. Eggs should be fresh, but room temperature is more about ease of mixing than necessity.
The filling thickens as it cools, so don’t overbake—just until the center jiggles slightly. Leftovers keep 3-4 days in the fridge (cover tightly). For best texture, serve at room temperature. Freezing isn’t ideal (the custard can separate), but if needed, wrap slices well and thaw overnight.
Why You’ll Love This Recipe
- One Bowl Wonder: I just dump sugar, flour, milk, cream, and butter into a bowl—no fancy steps, no fuss.
- Pure Indiana Comfort: That creamy, custardy filling with a hint of vanilla? It’s like a warm hug from my grandma’s kitchen.
- Feeds a Crowd: One pie serves eight, so it’s my go-to for potlucks, Sunday suppers, or just because.
- Leftovers? Please.: Honestly, it tastes even better the next day—if there’s any left.
Step-by-Step Instructions for Hoosier-Style Sugar Cream Pie
This classic method delivers a silky custard filling with a perfect balance of sweetness and spice.
Step 1: Prepare the Pie Crust
Begin by preheating your oven to 350°F. Fit the unbaked pie crust into a 9-inch pie dish, pressing it gently into the bottom and up the sides. Crimp the edges decoratively, then use a fork to dock the bottom all over.
This prevents air bubbles from forming during baking. Blind-bake the crust for 8-10 minutes until it just begins to set but hasn’t browned. Remove from the oven and set aside. The partial bake ensures a crisp base without over-browning before the filling goes in.
Step 2: Create the Custard Base
In a large bowl, whisk together the 2 cups Granulated Sugar and 0.5 cup All-Purpose Flour until no lumps remain. This dry mixture will thicken the filling as it bakes.
In a separate bowl, beat the 2 whole Large Eggs lightly, then whisk in the 2 cups Whole Milk, 1 cup Heavy Cream, and 1 tsp Vanilla Extract. Gradually pour the wet mixture into the dry ingredients while whisking constantly to prevent clumping.
The result should be a smooth, pourable batter. Stir in the 0.5 cup Unsalted Butter (melted and cooled slightly) and 0.25 tsp Salt until fully incorporated.
Step 3: Fill and Bake the Pie
Pour the custard mixture into the prepared pie crust. Sprinkle the top evenly with 0.25 tsp Ground Nutmeg. This amount provides a subtle warmth without overpowering the sweet filling.
Bake at 350°F for 45-55 minutes, or until the center is just set with a slight jiggle when gently shaken. The edges should be golden brown and the top should have a matte finish. If the crust begins to brown too quickly, tent the edges with foil.
Step 4: Cool and Set
Remove the pie from the oven and transfer it to a wire rack. Allow it to cool completely at room temperature, which takes about 2-3 hours. This cooling time is crucial—the custard continues to set as it cools.
Refrigerate for at least 4 hours (overnight is ideal) before slicing. The chilled pie will slice cleanly and hold its shape. Serve each piece with a dusting of additional nutmeg if desired, though the initial amount provides perfect seasoning.
Pro Tips For Making Mrs Wicks Sugar Cream Pie
- Whisk Vigorously: Beat the sugar, flour, milk, and cream until completely smooth—I learned this the hard way after my first pie came out grainy from under-mixing.
- Use Room Temp Dairy: Pull your milk, cream, and butter out 30 minutes before starting; cold dairy makes the filling lumpy no matter how hard you whisk.
- Skip Boiling: Cook the filling just until it thickens enough to coat the back of a spoon—boiling it will curdle the dairy and ruin the texture.
- Blind Bake Crust: Par-bake your pie crust for 8-10 minutes before adding the filling to prevent that dreaded soggy bottom.
Essential Equipment for Perfect Results
Mixing Bowls
A good set of nested mixing bowls is essential for this recipe. I use my Pyrex glass bowls—they’re sturdy, non-reactive, and let me see the custard mixture clearly as I whisk. Look for a set with 1.5 quart and 2.5 quart sizes for best versatility.
Whisk
Don’t underestimate the importance of a quality whisk. A balloon whisk with a comfortable handle makes combining the wet and dry ingredients effortless. I prefer the OXO Good Grips 11-inch—it reaches the bottom of my largest bowl perfectly.
Pie Dish
A standard 9-inch pie dish is a must for this recipe. I use a stoneware dish from Le Creuset—it distributes heat evenly and looks beautiful on the table. Avoid dark metal pans, which can cause the crust to overbrown. 💛
Measuring Cups
Accurate measurements are crucial for the perfect custard texture. I rely on my stainless steel measuring cups from Cuisinox. They nest together neatly and have clear markings for both dry and liquid ingredients.
Cooling Rack
Proper cooling prevents a soggy crust. A simple wire cooling rack elevates the pie, allowing air to circulate underneath. I’ve had my Wilton rack for years—it’s durable and doesn’t take up much storage space.
Oven Thermometer
For consistent results, an oven thermometer is invaluable. I check mine with a Taylor Precision model. Many home ovens run hot or cool, and this pie needs that steady 350°F temperature for even baking. 🔥
Nutrition Facts
Frequently Asked Questions
Can I use a pre-made crust?
Yes, a store-bought 9-inch pie crust works perfectly. Just ensure it’s unbaked and follow the same blind-baking instructions to prevent sogginess.
Why does my pie crack on top?
Overbaking is the usual culprit. Remove it when the center still has a slight jiggle. The custard will finish setting as it cools completely at room temperature.
Can I make this ahead?
It actually improves after 24 hours in the fridge. Just cover tightly and bring to room temperature before serving for the creamiest texture.
What if I don’t have heavy cream?
Use 1.5 cups whole milk plus 0.5 cup melted butter. This substitution maintains richness without sacrificing texture.

- 6 Egg Cake Recipe with Oil: Light as Air With Buttery Moisture - October 4, 2026
- 4 Bean Casserole Recipe: One-Pan Heartiness With Smoky Paprika Depth - October 4, 2026
- 3-Ingredient Keto Mug Cake Recipe: Microwave Magic in 2 Minutes - October 4, 2026