
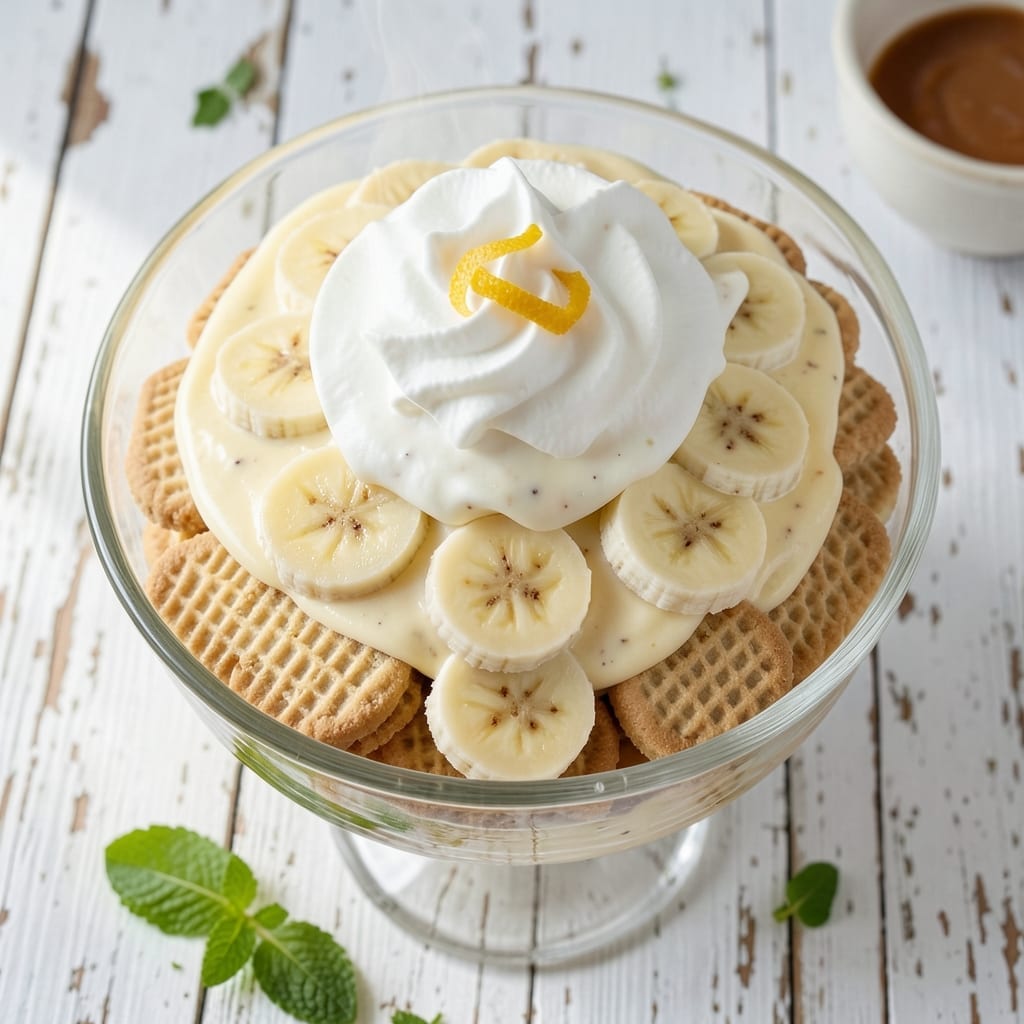
There’s a reason this banana pudding has remained a beloved classic for generations. The combination of creamy vanilla custard, fresh banana slices, and crisp vanilla wafers creates a dessert that’s both nostalgic and irresistibly delicious.
This traditional recipe follows the time-tested method found on the box, layering simple ingredients to build a dessert that’s greater than the sum of its parts. The key is in the layering order and giving it enough time to set properly.
You’ll end up with a classic pudding featuring soft vanilla wafers that absorb the custard’s flavor, fresh bananas that stay firm, and a creamy texture that’s impossible to resist. It’s the kind of dessert that disappears quickly at any gathering.
Perfect for potlucks, family dinners, or when you need a make-ahead treat that always impresses.
Ingredients for Nilla Wafer Banana Pudding Recipe on Box
Classic layers start with vanilla wafers, fresh bananas, and creamy custard ingredients ready to assemble.
| Ingredient | Amount | Notes |
|---|---|---|
| Vanilla Wafers 🍪 | 50 pieces | Nilla brand preferred for authenticity |
| Ripe Bananas 🍌 | 6 whole | Firm but speckled, sliced just before layering |
| Instant Vanilla Pudding Mix 🥣 | 1 box | 3.4 oz size, Jell-O brand recommended |
| Whole Milk 🥛 | 2 cups | Cold, for best pudding texture |
| Sweetened Condensed Milk 🥛 | 1 can | 14 oz size, do not substitute evaporated milk |
| Heavy Whipping Cream 🥛 | 1 cup | Cold, whipped to stiff peaks |
| Vanilla Extract 💧 | 1 tsp | Pure extract for best flavor |
| Granulated Sugar 🧂 | 2 tbsp | Optional for sweetening whipped cream |
| Unsalted Butter 🧈 | 1 tbsp | Melted, for optional topping |
| Ground Cinnamon 🌿 | ¼ tsp | Optional garnish for served portions |
The vanilla wafers are non-negotiable for authenticity. Nilla brand is what the original box recipe calls for, and their consistent size and vanilla flavor make a difference. Look for them in the cookie aisle at Walmart or Target. The instant pudding mix should be Jell-O brand vanilla—it sets reliably and has the right sweetness level. For the condensed milk, Eagle Brand is the standard most bakers reach for.
No instant pudding? Cook-and-serve vanilla pudding works but requires cooling completely first, which adds time. Want to lighten it up? 2% milk instead of whole works fine, though the custard won’t be quite as rich. The whipped cream can be replaced with Cool Whip if you’re short on time (one 8 oz tub equals about 2 cups whipped). Bananas must be ripe but firm—overripe ones turn mushy in the layers.
Assemble at least 4 hours ahead so the wafers soften properly. Keeps covered in the fridge for 2-3 days, though the wafers get softer the longer it sits. Best served the next day when flavors fully meld (worth the wait).
Why You’ll Love This Recipe
- No-Bake Bliss: I just dump the pudding mix, milk, and condensed milk together—no oven, no fuss, and it thickens while I slice bananas.
- Layered Luxe: That first bite with the soft wafers, creamy pudding, and fresh banana slices? Ridiculously good.
- Potluck MVP: I’ve brought this to picnics, showers, even my kid’s classroom party—always the first dish to disappear.
- Leftovers? Please: Honestly, it tastes even better the next day after the wafers soak up all that vanilla goodness.
Step-by-Step Instructions for Nilla Wafer Banana Pudding
This classic method delivers perfect layers every time with minimal effort.
Step 1: Prepare the Pudding Base
In a large mixing bowl, whisk together the 1 box Instant Vanilla Pudding Mix with 2 cups Whole Milk and 1 can Sweetened Condensed Milk for 2 minutes until completely smooth and slightly thickened. The mixture should coat the back of a spoon with a velvety texture.
Add 1 tsp Vanilla Extract and whisk for another 30 seconds to distribute evenly. I’ve found that using cold milk creates the best texture for the pudding layer, as it thickens more efficiently. Let the mixture rest for 5 minutes to reach full thickness before assembling.
Step 2: Whip the Cream
In a chilled bowl, combine the 1 cup Heavy Whipping Cream with 2 tbsp Granulated Sugar. Using an electric mixer on high speed, whip until stiff peaks form—this takes 2-3 minutes depending on your equipment.
Watch for the cream to hold its shape when the beaters are lifted, with the tip of the peak standing straight up. Be careful not to over-whip, as this will cause the cream to become grainy. The sugar stabilizes the cream and adds just the right amount of sweetness to balance the pudding.
Step 3: Slice Bananas and Begin Layering
Peel and slice all 6 whole Ripe Bananas into ¼-inch thick rounds just before assembling. I always slice them fresh to prevent browning—bananas sliced too far in advance develop an unappealing texture and color.
Arrange a layer of 50 pieces Vanilla Wafers in the bottom of a 9×13-inch dish, slightly overlapping if needed. Top with half of the sliced bananas, then spread half of the pudding mixture evenly over the bananas. This creates the first of your classic layers.
Step 4: Complete Assembly and Chill
Repeat the layering process: remaining vanilla wafers, remaining bananas, remaining pudding. Then spread the whipped cream evenly over the top, creating a smooth, white finish. The contrast between the creamy layers and crisp wafers is key to this dish’s appeal.
For an optional touch, melt 1 tbsp Unsalted Butter and drizzle it over the whipped cream layer. This adds a subtle richness. Sprinkle with 0.25 tsp Ground Cinnamon for a warm, aromatic finish if desired. Cover with plastic wrap and refrigerate for at least 4 hours, or overnight for best results.
Step 5: Serve Chilled
Remove from the refrigerator 10 minutes before serving to allow the pudding to soften slightly. Use a sharp knife to cut clean squares, ensuring each serving contains all the layers. The vanilla wafers will have softened to a cake-like texture while absorbing the pudding flavors.
The bananas should remain intact but tender, and the whipped cream topping should hold its shape. This classic presentation never fails to impress, with every bite offering the perfect balance of creamy pudding, sweet bananas, and vanilla wafer texture.
Pro Tips For Making Nilla Wafer Banana Pudding Recipe On Box
- Chill the pudding: Whisk the pudding mix with cold milk and condensed milk, then refrigerate for at least 30 minutes before layering—this prevents soggy wafers and a runny mess.
- Slice bananas last: Cut the bananas right before assembling to keep them from browning; tossing them in a little lemon juice helps too if they’ll sit more than 5 minutes.
- Layer wafers strategically: Place the vanilla wafers flat side down in the dish so they soak up the pudding evenly; I learned this the hard way after digging into a bowl of half-dry cookies.
- Use very ripe bananas: The sweeter and spottier the bananas, the better—they’ll add natural sweetness and a creamier texture without overpowering the vanilla flavor.
Common Mistakes When Making nilla wafer banana pudding recipe on box
Skipping the Chill
One of the most common mistakes is not giving this dessert enough time to set in the fridge. I’ve seen people try to serve it after just 1-2 hours, but you need at least 4 hours for the vanilla wafers to properly soften and absorb the custard flavors.
Overripe Bananas
Using bananas that are too ripe will result in a mushy texture that ruins the layers. Choose bananas that are firm with some speckling. Slice them just before assembling to prevent browning. I learned this the hard way when my first attempt turned into a banana mush pudding. 🥴
Improper Layering Order
The order matters: vanilla wafers first, then bananas, then pudding. If you reverse this, the wafers won’t soften evenly. Also, don’t skimp on the layers—use all 50 vanilla wafers for the authentic texture that makes this dessert special.
Under-whipped Cream
Your whipped cream needs to reach stiff peaks to hold its shape. Stop too early and it will weep into the pudding. Use cold cream and a chilled bowl, and whip for 2-3 minutes on high speed. The sugar helps stabilize it, so don’t skip that either.
Wrong Pudding Mix
Only use instant vanilla pudding mix (like Jell-O brand). The cook-and-serve version won’t set properly in the layers and requires cooling time you don’t have. I made this mistake once and ended up with a soupy mess instead of that perfect creamy texture.
Skipping the Vanilla
That 1 tsp Vanilla Extract might seem small, but it makes a noticeable difference in flavor depth. Don’t omit it thinking the pudding mix is enough. The extract enhances the vanilla notes and ties all the layers together beautifully.
Nutrition Facts
Frequently Asked Questions
Can I use cook-and-serve pudding instead of instant?
No, instant pudding sets quickly and works best for layering. Cook-and-serve requires cooling time and may not set properly, resulting in a soupy texture.
How long does it need to chill?
At least 4 hours is required for the wafers to soften. Overnight chilling yields the best flavor and texture.
Why do my bananas turn brown in the pudding?
Slice bananas just before layering to prevent browning. Overripe bananas also turn mushy—use firm, speckled ones.
Can I make this ahead of time?
Yes! It keeps well covered in the fridge for 2-3 days. The wafers soften more the longer it sits.

- 6 Egg Cake Recipe with Oil: Light as Air With Buttery Moisture - October 4, 2026
- 4 Bean Casserole Recipe: One-Pan Heartiness With Smoky Paprika Depth - October 4, 2026
- 3-Ingredient Keto Mug Cake Recipe: Microwave Magic in 2 Minutes - October 4, 2026