
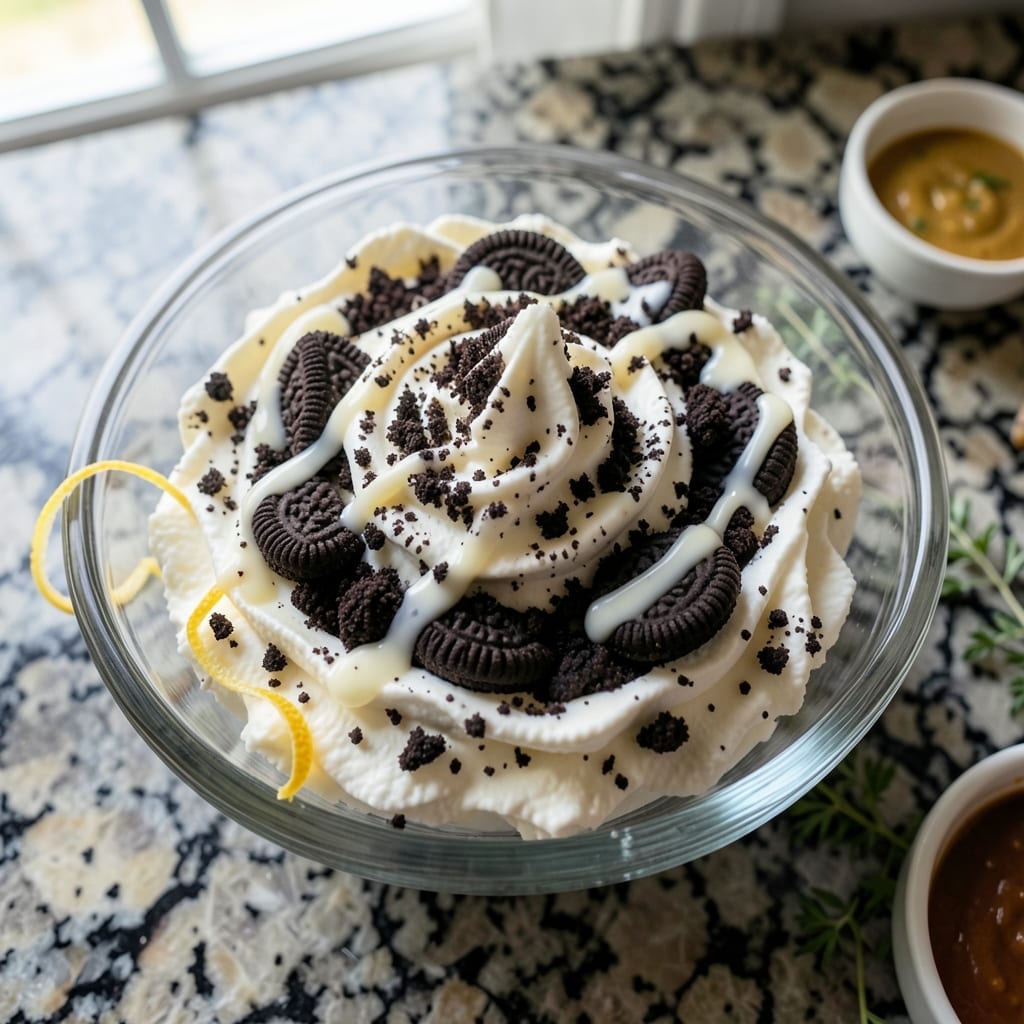
This three-ingredient Oreo fluff is the easiest no-bake dessert you’ll ever make. The secret lies in folding crushed cookies into whipped topping for a light, airy texture that melts in your mouth.
Unlike traditional desserts, this recipe requires no baking, no fancy equipment, and just 5 minutes of active prep time. The crushed Oreos add rich chocolate flavor and satisfying crunch to the creamy base.
What you get is a fluffy, dreamy dessert that’s perfect for potlucks, parties, or when you need a sweet treat in a hurry. It stays fresh in the fridge for days, though it rarely lasts that long.
Serve chilled in cups or as a dip with graham crackers for extra texture. This treat proves that simple ingredients can create extraordinary results.
Ingredients for Oreo Fluff Recipe 3 Ingredients
Three ingredients. Five minutes. Dessert magic in a bowl.
| Ingredient | Amount | Notes |
|---|---|---|
| Oreo Cookies 🍪 | 20 whole | Crushed into fine crumbs |
| Frozen Whipped Topping 🥛 | 8 oz | Thawed in refrigerator |
| Milk 🥛 | ¼ cup | Any variety works fine |
The Oreos are the star here—regular, Double Stuf, or even the mint variety all work. I grab mine from Target or Walmart since they always have the best selection. Make sure they’re crushed fine (a food processor makes this effortless) so they fold perfectly into the whipped topping. The whipped topping needs to be fully thawed, so pull it out the night before or use the defrost setting on your microwave.
No whipped topping on hand? Homemade whipped cream (heavy cream + powdered sugar) works in a pinch. Out of Oreos? Any chocolate sandwich cookie will do—just adjust the quantity to match the weight. The milk is just to loosen things up, so any dairy milk or plant-based milk works equally well here.
This keeps beautifully in the fridge for 3-4 days, though good luck making it last that long. Store it covered to prevent it from absorbing fridge odors. It doesn’t freeze well, so enjoy it fresh.
Why You’ll Love This Recipe
- 5-Minute Magic: I crush the Oreos while the whipped topping thaws—no mixer, no fuss, just a bowl and a spoon.
- Addictive Crunch: That first bite of creamy fluff with crushed Oreo bits? Honestly, I’ve caught myself sneaking “just one more” spoonful.
- Potluck Hero: I bring this to every summer BBQ and leave with an empty dish and at least three recipe requests.
- Pocketbook Friendly: A sleeve of store-brand Oreos and a tub of topping feeds eight for under five bucks.
Step-by-Step Instructions for Oreo Fluff
Here’s how I make this airy, dreamy dessert with just three simple ingredients.
Step 1: Crush the Oreo Cookies into Fine Crumbs
Place all 20 whole Oreo Cookies in a large resealable plastic bag or food processor. I prefer the bag method for this—it’s less cleanup and gives you great control. Seal the bag tightly, removing as much air as possible.
Using a rolling pin, crush the cookies into fine crumbs. You want the texture to be almost like sand, with no large chunks remaining. This ensures every bite of your fluff has that perfect Oreo flavor distributed evenly. If using a food processor, pulse in 5-second bursts until you achieve the same consistency.
Step 2: Fold in the Thawed Whipped Topping
Transfer the crushed Oreo crumbs to a large mixing bowl. Add all 8 oz Frozen Whipped Topping, which should be fully thawed in the refrigerator. If it’s still partially frozen, let it sit at room temperature for 10-15 minutes until soft and spreadable.
Using a silicone spatula or wooden spoon, gently fold the whipped topping into the cookie crumbs. Be careful not to overmix—just combine until no streaks of white remain. The mixture should look like a thick, creamy mousse with tiny Oreo specks throughout.
Step 3: Gradually Add Milk for Perfect Consistency
Pour in the 0.25 cup Milk a little at a time, starting with about 1 tablespoon. Fold it in completely before adding more. The milk helps loosen the mixture to that signature fluff texture, but you don’t want it too runny.
Continue adding milk until the mixture is light and fluffy but still holds its shape when scooped. It should look like a soft, spreadable dip. If you accidentally add too much milk, don’t panic—just fold in a few more crushed Oreo crumbs to thicken it back up.
Step 4: Chill and Let the Flavors Meld
Cover the bowl with plastic wrap and refrigerate for at least 30 minutes. This chilling time lets the flavors come together and gives the fluff that perfect, dreamy texture. I like to let mine sit for 1 hour if I have the time—it makes a noticeable difference.
When you’re ready to serve, give it a quick stir. The texture should be light, airy, and slightly mousse-like. If it seems too thick after chilling, fold in another splash of milk to loosen it to your desired consistency.
Step 5: Serve and Enjoy Your Light, Dreamy Creation
Scoop the Oreo fluff into small serving bowls or glasses. For an extra touch, garnish with a sprinkle of reserved Oreo crumbs or a few whole cookies crumbled on top. The contrast of the creamy fluff and crunchy cookie bits is irresistible.
Serve immediately for the best texture. This dessert is best enjoyed fresh but can be stored in the refrigerator for up to 2 days in an airtight container. Just give it a stir before serving to restore its fluffy consistency.
Pro Tips For Making Oreo Fluff Recipe 3 Ingredients
- Crush Finely: Pulse the Oreos into fine crumbs—big chunks make the texture uneven and harder to mix evenly into the whipped topping.
- Thaw the Topping: Let the frozen whipped topping sit at room temperature for 10-15 minutes so it folds smoothly with the crushed Oreos without deflating.
- Skip the Overmixing: Fold just until combined—overmixing turns the fluff dense and gummy instead of light and airy.
- Chill Before Serving: Pop it in the fridge for at least 30 minutes so the flavors meld and the texture firms up just enough to hold its shape.
Storing and Reheating This Dish
Refrigerator Storage
Transfer your fluff to an airtight container immediately after making it. I use glass Pyrex with snap-on lids to keep it fresh. It’ll stay perfect in the fridge for up to 3 days at 40°F or below. 🥛
Freezer Considerations
This dessert doesn’t freeze well—the whipped topping separates and becomes grainy. If you must freeze it, portion into small containers and thaw in the fridge overnight. Expect some texture changes, as the fluff may weep slightly after thawing.
Reviving Chilled Fluff
After refrigeration, give your fluff a quick stir before serving. If it’s too thick, fold in 1-2 tbsp milk to restore its creamy texture. I always keep a little extra crushed Oreos on hand to adjust thickness if needed.
Serving After Storage
For best results, let the fluff sit at room temperature for 10-15 minutes before serving. This takes the chill off and makes it easier to scoop. Garnish with fresh Oreo crumbs right before serving for maximum crunch.
Portioning for Later
I like to divide my fluff into individual serving cups before refrigerating. This makes grab-and-go treats perfect for lunchboxes or quick snacks. Cover each cup tightly with plastic wrap to prevent fridge odors from seeping in. ❄️
Storage Tips
Avoid storing near strong-smelling foods like onions or garlic. The whipped topping can absorb odors easily. If making ahead, prepare the Oreo crumbs separately and mix with whipped topping just before serving for absolute freshness.
Nutrition Facts
Frequently Asked Questions
Can I use a different type of cookie?
Yes! Any chocolate sandwich cookie works. Try mint or golden varieties for a flavor twist, but adjust quantities to match the original weight.
What if my mixture is too runny?
Add more crushed cookies, 1 tablespoon at a time, until it thickens. The milk should be added gradually to avoid this issue.
Can I make this ahead of time?
Store in an airtight container for up to 3 days in the fridge. Stir before serving and add extra crumbs for texture.
Is there a dairy-free version?
Use dairy-free whipped topping and plant-based milk. The texture and taste remain nearly identical to the original.

- 6 Egg Cake Recipe with Oil: Light as Air With Buttery Moisture - October 4, 2026
- 4 Bean Casserole Recipe: One-Pan Heartiness With Smoky Paprika Depth - October 4, 2026
- 3-Ingredient Keto Mug Cake Recipe: Microwave Magic in 2 Minutes - October 4, 2026