
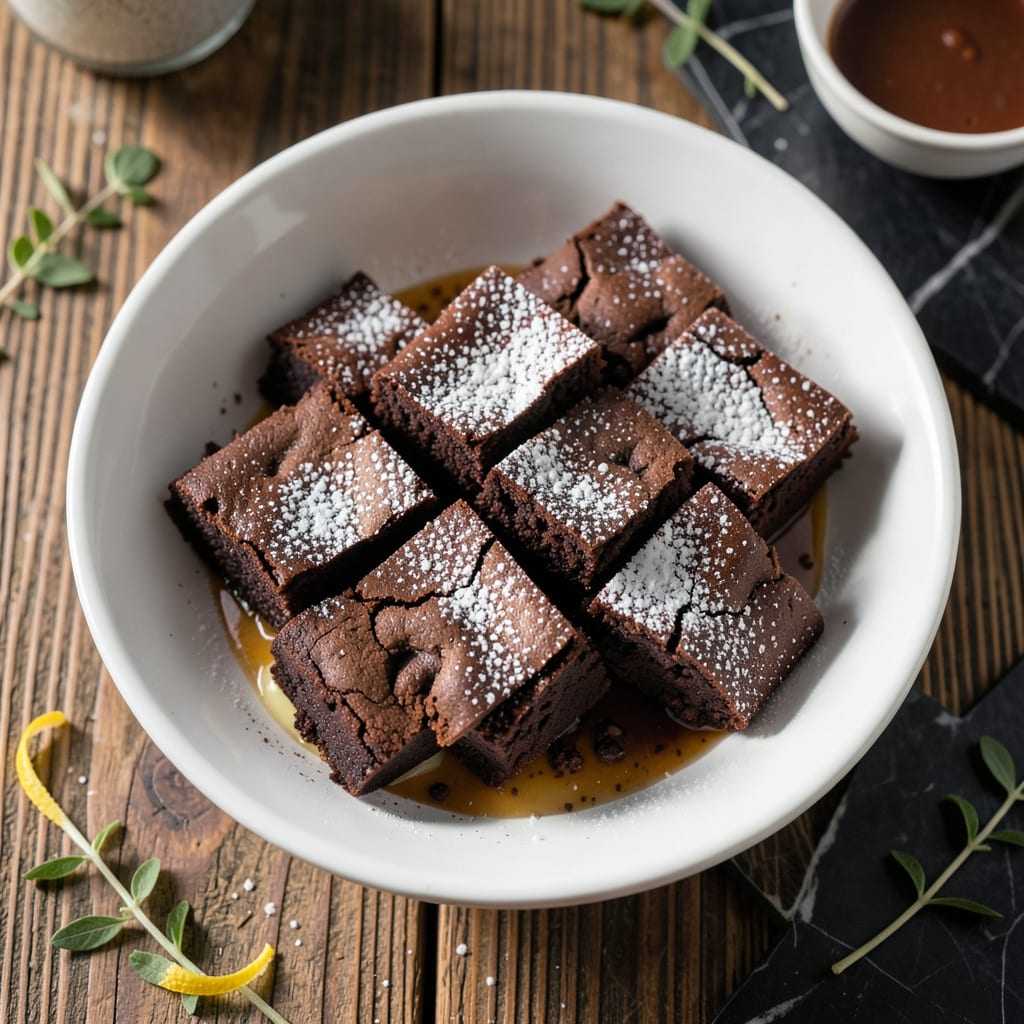
There’s a reason this classic cocoa brownie recipe has stood the test of time. It delivers rich, fudgy perfection with just a handful of pantry staples.
This foolproof method ensures dense, chocolatey squares with crackly tops. The secret lies in the precise balance of cocoa powder and melted butter for that signature Hershey’s flavor.
Ingredients for Original Hershey Brownie
A handful of pantry staples come together for rich, fudgy, crackly-topped perfection in every bite.
| Ingredient | Amount | Notes |
|---|---|---|
| Unsalted Butter 🧈 | ½ cup | Melted and cooled slightly |
| Granulated Sugar 🍚 | 1 cup | Fine white sugar preferred |
| Large Eggs 🥚 | 2 whole | Room temperature for best texture |
| Vanilla Extract 🌿 | 1 tsp | Pure vanilla, not imitation |
| All-Purpose Flour 🌾 | ½ cup | Sifted for lighter texture |
| Unsweetened Cocoa Powder 🍫 | ½ cup | Hershey's brand recommended |
| Salt 🧂 | ¼ tsp | Fine table salt |
| Baking Powder 🥄 | ¼ tsp | Ensures proper rise |
| Chopped Walnuts 🌰 | ½ cup | Optional, for added crunch |
The cocoa powder is non-negotiable here—Hershey’s Natural Unsweetened delivers that nostalgic flavor. Butter quality matters too: Land O’Lakes or Kerrygold for the win. Use the real vanilla extract (not imitation) and don’t skimp on the sugar; it creates that signature crackly top. Most supermarkets carry everything you need, but bulk bins are great for refilling cocoa powder if you bake often.
No walnuts? Pecans or chocolate chips work just as well (or skip them entirely). Need to go gluten-free? King Arthur’s 1:1 flour swaps cup-for-cup. The eggs can’t be substituted without changing the texture, but if you must, flax eggs at a 1:1 ratio will get you close. And if all you’ve got is sweetened cocoa mix, reduce the sugar by half to balance the sweetness.
These keep beautifully at room temperature in an airtight container for 3-4 days. For longer storage, freeze for up to 3 months—just thaw overnight before serving. The flavors actually deepen over time, so they’re even better the next day.
Why You’ll Love This Recipe
- One Bowl Wonder: I love that I can mix everything—melted butter, sugar, eggs, and vanilla—in a single bowl and still get that classic fudgy texture.
- Cocoa Richness: The deep chocolate flavor from the cocoa powder makes these taste like they came from a bakery, not my kitchen.
- Feeds a Crowd: Honestly, one batch gives me 16 perfect squares, which means I can take them to potlucks or freeze half for later.
- Budget Friendly: Between us, the ingredients are all pantry staples, and it costs me pennies compared to store-bought brownies.
Step-by-Step Instructions for Classic Cocoa Brownies
This method delivers the rich, fudgy texture that made the original famous.
Step 1: Melt and Combine Wet Ingredients
Begin by melting the 0.5 cup unsalted butter in a medium saucepan over low heat. Remove from heat as soon as it’s fully melted to prevent browning. I always let it cool slightly for 5 minutes—this prevents it from cooking the eggs when we combine them.
Stir in the 1 cup granulated sugar until fully dissolved. The mixture should look slightly grainy at first but will smooth out. Add the 2 whole large eggs one at a time, whisking vigorously after each addition until the mixture is glossy and well combined.
Finally, stir in the 1 tsp vanilla extract. This creates the base for our brownie batter with that signature rich flavor.
Step 2: Incorporate Dry Ingredients
In a separate bowl, sift together the 0.5 cup all-purpose flour, 0.5 cup unsweetened cocoa powder, 0.25 tsp salt, and 0.25 tsp baking powder. Sifting is crucial here—it breaks up any lumps in the cocoa and aerates the flour for lighter brownies.
Gradually add the dry ingredients to the wet mixture, folding gently with a spatula until just combined. Don’t overmix—this can make the brownies tough. The batter will be thick and glossy, almost like a thick pudding.
Step 3: Fold in Nuts and Prepare Pan
Gently fold in the 0.5 cup chopped walnuts if using, distributing them evenly throughout the batter. I prefer to reserve a few for sprinkling on top right before baking for added texture.
Line an 8×8-inch baking pan with parchment paper, leaving an overhang on two sides for easy removal. Lightly grease the paper or use nonstick spray—this ensures the brownies won’t stick. Pour the batter into the prepared pan and spread it evenly with a spatula.
Step 4: Bake to Fudgy Perfection
Preheat your oven to 350°F. Bake the brownies for 20-25 minutes, or until a toothpick inserted into the center comes out with a few moist crumbs clinging to it. The edges should be set, but the center should still look slightly soft.
Don’t overbake—this is the secret to that dense, fudgy texture. The brownies will continue to set as they cool in the pan. If you’re unsure, it’s better to pull them out a minute early than to leave them in too long.
Step 5: Cool and Slice
Let the brownies cool completely in the pan on a wire rack—this takes about 1 hour. I know it’s tempting to cut into them while warm, but they’ll be too soft and crumbly. The cooling process allows them to set properly.
Once cooled, use the parchment paper overhang to lift the brownies out of the pan. Transfer to a cutting board and slice into 16 squares for serving. Each piece will have that classic crackly top and rich, chocolatey interior that made this recipe a household favorite.
Pro Tips For Making Original Hershey Brownie
- Melt Butter Slowly: Use low heat when melting the butter to prevent it from separating or burning—this keeps the fat and milk solids emulsified for a richer texture.
- Room Temp Eggs: Pull your eggs out 30 minutes before baking; they whip up fluffier and blend more evenly into the sugar, giving you that classic crackly top.
- Don’t Overmix Flour: Add the flour just until it disappears—overworking it develops gluten, and nobody wants a tough, cakey brownie when the original Hershey recipe should be dense and fudgy.
- Test with a Toothpick: Pull them out when a toothpick comes out with a few moist crumbs, not wet batter—this is the sweet spot for gooey but fully set brownies.
Pro Cooking Tips for This Dish
Butter Temperature Control
Let the melted butter cool for exactly 5 minutes before mixing with eggs. Too hot and it’ll scramble them; too cool and it won’t emulsify properly. I use a kitchen thermometer to check it’s around 110°F before proceeding. 🌡️
Sifting for Success
Always sift the cocoa powder and flour together. This breaks up cocoa clumps and aerates the flour for a lighter texture. I use a fine-mesh sieve for best results, pressing any stubborn lumps through with a spoon.
Mixing Technique
Fold dry ingredients into wet just until combined—about 15-20 strokes. Overmixing develops gluten, creating cakey instead of fudgy brownies. The batter should look slightly streaky when you stop.
Pan Preparation
Line your 8×8-inch pan with parchment, leaving overhang on two sides. Grease the paper lightly with baking spray. This ensures easy removal and clean edges for perfect squares.
Doneness Test
A toothpick should come out with moist crumbs, not wet batter. The center will look slightly underdone when you pull them out—that’s perfect. I check at 20 minutes and add time in 2-minute increments if needed.
Cooling Patience
Resist cutting for at least 1 hour. The brownies continue setting as they cool, and cutting too soon results in a crumbly mess. I often make these in the morning to enjoy in the afternoon. 💪
Nutrition Facts
Frequently Asked Questions
Can I use Dutch-process cocoa instead of natural?
Yes, but it may alter the flavor slightly. Dutch-process cocoa is less acidic and has a smoother taste. Stick to natural unsweetened for the authentic flavor profile.
Why do my brownies turn out cakey?
Overmixing or using too much flour can cause this. Fold dry ingredients just until combined (15-20 strokes) and measure flour accurately.
Can I double the recipe?
Use a 9×13-inch pan and bake for 25-30 minutes. Check for doneness with a toothpick as usual.
How do I get a crackly top?
The sugar creates that signature crust. Whisk eggs and sugar vigorously until glossy before adding dry ingredients. This ensures a perfect crackly finish.

- 6 Egg Cake Recipe with Oil: Light as Air With Buttery Moisture - October 4, 2026
- 4 Bean Casserole Recipe: One-Pan Heartiness With Smoky Paprika Depth - October 4, 2026
- 3-Ingredient Keto Mug Cake Recipe: Microwave Magic in 2 Minutes - October 4, 2026