
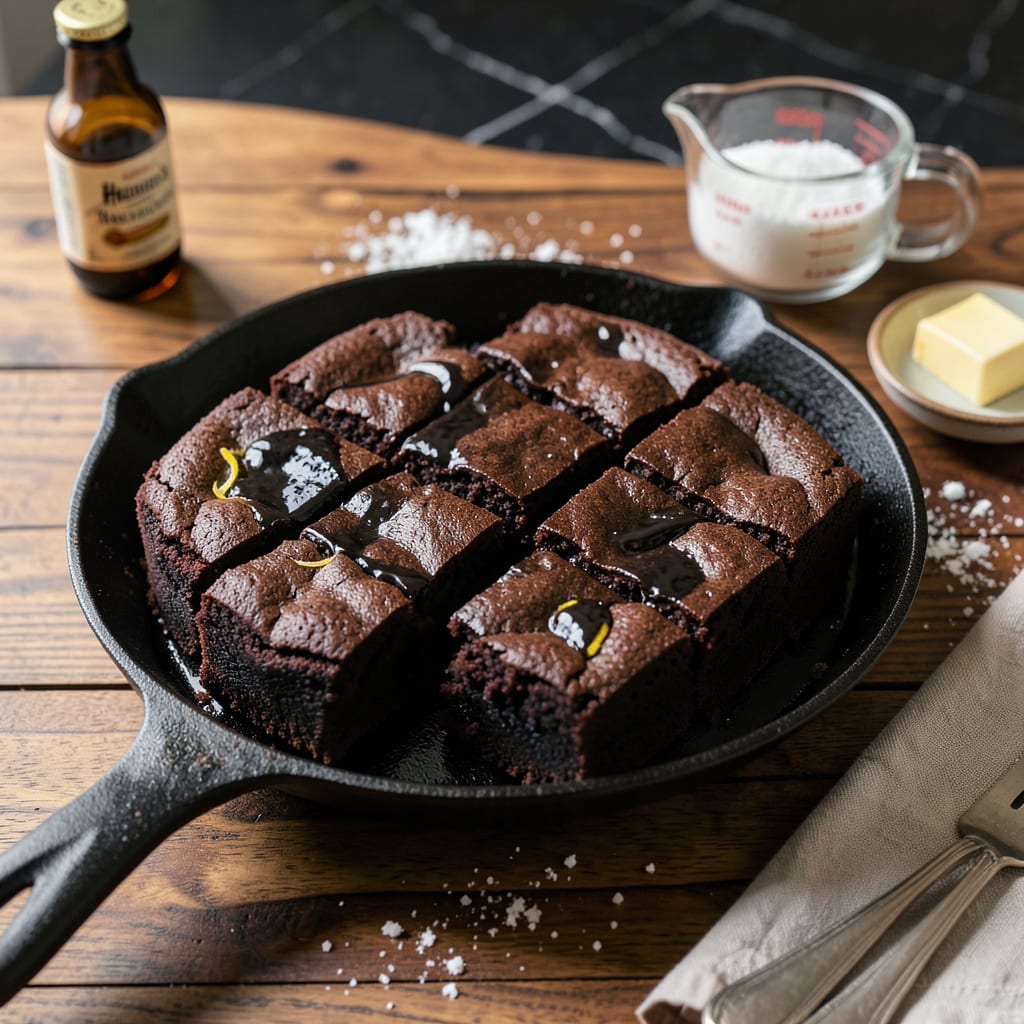
Few desserts evoke nostalgia like a pan of classic cocoa brownies, straight from the Hershey’s tradition. This recipe delivers the signature fudgy interior and crackly top that made the original famous, using simple pantry staples and a method perfected over generations. The secret lies in the precise balance of cocoa powder and melted butter—a technique that creates unmatched depth of flavor without complicated ingredients.
Developed in the early 1900s as a clever way to promote Hershey’s cocoa powder, this recipe has stood the test of time for good reason. With just 30 minutes of prep and baking, you’ll achieve professional results: dense, moist brownies with that coveted shiny crust. Whether you prefer them plain or studded with walnuts, this version captures the essence of what makes a brownie truly exceptional.
Ingredients for Original Hershey’s Cocoa Brownie
Nine classic ingredients deliver the iconic fudgy texture and crackly top that defined Hershey’s legendary brownies for generations.
| Ingredient | Amount | Notes |
|---|---|---|
| Hershey's Cocoa Powder 🍫 | ½ cup | Unsweetened, natural variety |
| Unsalted Butter 🧈 | ½ cup | Melted and slightly cooled |
| Granulated Sugar 🍚 | 1 cup | Fine white sugar preferred |
| Large Eggs 🥚 | 2 whole | Room temperature recommended |
| Vanilla Extract 🌿 | 1 tsp | Pure extract, not imitation |
| All-Purpose Flour 🌾 | ½ cup | Spoon and level method |
| Chopped Walnuts 🌰 | ½ cup | Optional, lightly toasted |
| Salt 🧂 | ¼ tsp | Fine sea salt preferred |
| Baking Powder 🧂 | ¼ tsp | Fresh, aluminum-free |
[recipeingredientscaler]
The cocoa powder is non-negotiable—Hershey’s Natural Unsweetened is the gold standard for this recipe, available at any supermarket. Optimal results require precise measurement: use the spoon-and-level method for both flour and cocoa to avoid compacted dry ingredients. The butter must be unsalted to control sodium levels; European-style with higher fat content yields superior texture. For professional-quality brownies, select fine granulated sugar—organic varieties often have larger crystals that affect dissolution.
Substitutions require careful balance. Dutch-process cocoa alters the pH and may prevent proper crust formation. For nut-free versions, omit walnuts entirely rather than substituting seeds, which can overpower the chocolate. The vanilla extract must be pure—imitation contains artificial compounds that persist in the final flavor profile. If reducing sugar, increase cocoa by 1 tbsp to maintain structure, but expect a denser texture. Egg replacements (like flax eggs) fundamentally change the brownie’s signature fudginess and are not recommended for authentic results.
Store dry ingredients (cocoa, flour, baking powder) in airtight containers away from light and heat for up to 12 months. The baked brownies maintain peak quality for 3 days at room temperature in sealed containers, though they develop enhanced flavor after 24 hours. For longer storage, refrigerate up to 1 week or freeze (individually wrapped) for 3 months. Always bring to room temperature before serving to restore proper texture.
Why You’ll Love This Recipe
- One-Bowl Magic: I’m not kidding—this comes together in a single bowl with just a whisk and a spatula. Melt the butter, stir in the cocoa and sugar, crack in the eggs, and you’re basically done. No mixer, no fuss, no stack of dishes waiting for you afterward.
- That Cocoa Punch: Here’s what sold me—the Hershey’s cocoa gives these brownies a deep, almost fudgy intensity without being cloying. The vanilla rounds it out so it’s rich but balanced, with that slightly crackly top hiding a center so moist it’s almost pudding-like. (Yes, I’ve eaten three in one sitting.)
- Bakes While You Multitask: Pop them in the oven, set a timer for 20 minutes, and walk away. I’ve made these while folding laundry, helping with homework, and even mid-Zoom call (muted, obviously). They’re the kind of recipe that fits into real life, not just Pinterest fantasies.
- Budget-Friendly Crowd Pleaser: A box of Hershey’s cocoa costs less than fancy chocolate bars, and this recipe stretches it into 16 solid squares. I’ve taken them to potlucks, packed them in lunchboxes, and stashed extras in the freezer for up to a month—they taste just as good thawed. Between us, they’re my secret weapon for last-minute hostess gifts.
Step-by-Step Instructions for Original Hershey’s Cocoa Brownies
This method delivers the classic fudgy texture and signature crackly top that made this recipe legendary.
Step 1: Melt Butter and Incorporate Cocoa
Begin by melting the 0.5 cup unsalted butter in a medium saucepan over low heat. Watch carefully to prevent browning—you want the butter fully liquid but not hot. Immediately remove from heat once melted and stir in the 0.5 cup Hershey’s Cocoa Powder until completely smooth.
The mixture will transform into a thick, glossy paste. This step develops the deep chocolate flavor foundation. Let it cool for 5 minutes before proceeding—adding eggs to hot chocolate can cause them to cook prematurely, resulting in a grainy texture.
Step 2: Create the Sugar-Egg Base
In a separate mixing bowl, whisk together the 1 cup granulated sugar and 2 whole large eggs until the mixture becomes pale and slightly thickened, about 2 minutes of vigorous whisking. The sugar should be mostly dissolved and the eggs should create ribbons when the whisk is lifted.
Add the 1 tsp vanilla extract and continue whisking for another 30 seconds. This aeration step is crucial for developing the characteristic crackly top. The vanilla enhances the chocolate’s complexity without overpowering it.
Step 3: Combine Wet and Dry Ingredients
Gradually pour the cooled chocolate-butter mixture into the egg-sugar base while whisking constantly. The batter will thicken and become uniformly dark. Switch to a silicone spatula and gently fold in the 0.5 cup all-purpose flour, 0.25 tsp salt, and 0.25 tsp baking powder until just combined.
Be careful not to overmix—stop as soon as you see no visible flour streaks. Overworking the batter develops gluten, which would compromise the fudgy texture. The batter should be thick but pourable, with a glossy sheen.
Step 4: Add Walnuts and Prepare for Baking
Gently fold in the 0.5 cup chopped walnuts (if using), distributing them evenly throughout the batter. The walnuts add textural contrast and their natural oils complement the chocolate. Pour the batter into a greased 8-inch square baking pan, spreading it evenly with an offset spatula.
The batter will be thick—use the spatula to create a smooth, even surface. This ensures uniform baking and prevents thick edges. Tap the pan firmly on the counter 3 times to eliminate any air pockets that could create tunnels in the finished brownies.
Step 5: Bake to Fudgy Perfection
Bake in a preheated 350°F oven for 20-25 minutes. The brownies are done when the edges are set but the center still appears slightly underdone—a toothpick inserted 1 inch from the edge should come out with moist crumbs, not wet batter.
Cool completely in the pan on a wire rack for at least 1 hour before cutting. This resting period allows the structure to set properly. Cut into 9 equal squares using a sharp knife wiped clean between cuts for neat edges. The interior should be dense and fudgy, with a thin, papery crust on top.
Make-Ahead Tips for This Dish
Prep Ahead Strategy
You can mix the dry ingredients (0.5 cup flour, 0.5 cup cocoa, 0.25 tsp salt, and 0.25 tsp baking powder) up to 3 days in advance. Store them in an airtight container at room temperature. This saves precious time when you’re ready to bake, and I find it actually improves the flavor as the ingredients meld together. 💡
Batter Pre-Mixing
The entire batter can be prepared 24 hours ahead and refrigerated in a sealed container. When ready to bake, let it sit at room temperature for 30 minutes before pouring into your pan. The flavors deepen during this resting period, and you’ll still get that perfect crackly top. Just add 1-2 extra minutes to the baking time since the batter starts colder.
Freeze for Later
For true make-ahead convenience, bake the brownies completely, cool, then wrap the whole pan tightly in plastic wrap followed by aluminum foil. Freeze for up to 3 months. Thaw overnight in the fridge before bringing to room temperature. I always cut them after thawing for the cleanest slices. ❄️
Portion Control
Bake as directed, then cut into squares and wrap individual portions in parchment paper before freezing. This lets you grab just what you need—perfect for lunchbox treats or unexpected guests. They’ll keep beautifully for 3 months, and you can microwave a single square for 15 seconds to restore that just-baked warmth.
Double Batch Tip
When making a double batch, prepare both pans simultaneously but stagger their baking by 5 minutes. This prevents overcrowding your oven and ensures even heat distribution. I use this trick when baking for parties—it’s amazing how many people think you slaved away all day when you’ve actually just been smart about timing!
Pan Prep Shortcut
Line your 8-inch pan with parchment paper, leaving overhang on all sides, up to 2 days before baking. Store the prepared pan covered at room temperature. When ready to bake, just pour in your batter—no last-minute fussing with paper. The overhang makes removal effortless, and you’ll get perfectly clean edges every time. ✨
Nutrition Facts

- 6 Egg Cake Recipe with Oil: Light as Air With Buttery Moisture - October 4, 2026
- 4 Bean Casserole Recipe: One-Pan Heartiness With Smoky Paprika Depth - October 4, 2026
- 3-Ingredient Keto Mug Cake Recipe: Microwave Magic in 2 Minutes - October 4, 2026