
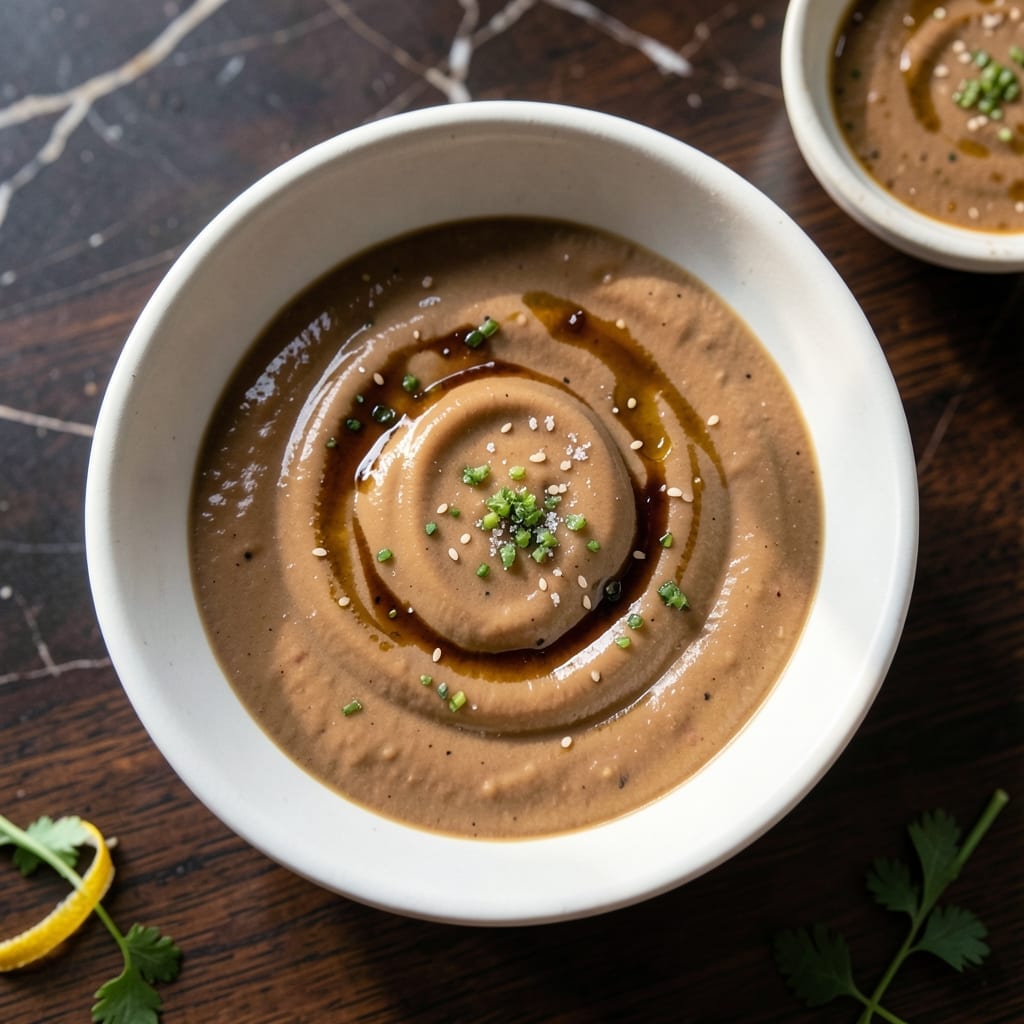
This restaurant-quality dipping sauce brings the bold flavors of Outback’s signature ahi tuna to your home kitchen. The perfect balance of creamy and tangy makes it irresistible.
With just a handful of ingredients like soy sauce, sesame oil, and a touch of wasabi, this sauce comes together in minutes. No cooking required—just whisk and serve.
What sets this apart is the smooth, velvety texture that clings perfectly to every bite. It elevates raw fish, grilled proteins, or even crisp vegetables.
Make a batch for your next sushi night or seafood platter. Its bold, umami-rich taste keeps everyone coming back for more.
Ingredients for Outback Ahi Tuna Dipping Sauce
Eight ingredients. Ten minutes. Restaurant-quality dipping sauce at home.
| Ingredient | Amount | Notes |
|---|---|---|
| Mayonnaise 🥚 | ¾ cup | Full-fat for creaminess |
| Soy Sauce 🫙 | ¼ cup | Low-sodium preferred |
| Sesame Oil 🫒 | 1 tbsp | Toasted for depth |
| Wasabi Paste 🌿 | 1 tsp | Adjust to spice preference |
| Rice Vinegar 🍚 | 1 tbsp | Balances sweetness |
| Granulated Sugar 🧂 | 1 tsp | Dissolves easily in liquid |
| Fresh Ginger 🌱 | 1 tsp | Finely grated |
| Garlic Clove 🧄 | 1 clove | Minced finely |
The mayonnaise is the base, so Duke’s or Hellmann’s for that perfect creamy texture (none of that sweet salad dressing stuff). Kikkoman soy sauce is my go-to—consistent flavor, easy to find at any grocery store. Sesame oil is a game-changer here; Kadoya brand has the best toasted aroma. Wasabi paste from a tube works fine, but fresh grated wasabi root takes it next level if you’re feeling fancy.
No wasabi? Prepared horseradish at half the amount gets you close. Out of rice vinegar? Apple cider vinegar in a pinch, but it’s slightly fruitier. Skip the fresh ginger if needed, but add an extra quarter teaspoon of ground ginger to keep that zing. The garlic can be powdered at one-eighth teaspoon if fresh isn’t handy.
This keeps 5-7 days in the fridge—stir before using since it thickens up. Doesn’t freeze well (mayonnaise separates), so make small batches. Perfect for sushi nights or drizzling over grilled ahi.
Why You’ll Love This Recipe
- Mix and Go: I just stir together mayo, soy sauce, and a few other pantry staples—no cooking, no fuss.
- Umami Bomb: The sesame oil and wasabi paste hit that perfect balance of nutty heat and tang I crave every time.
- Party Ready: I’ve served this at game nights and weeknight dinners alike, and it disappears faster than the tuna.
- Keeps Well: Honestly, it tastes even better the next day, so I always make extra for leftovers.
Step-by-Step Instructions for Outback Ahi Tuna Dipping Sauce
Here’s how I make this creamy sauce with perfect balance every single time.
Step 1: Combine Mayonnaise and Soy Sauce Base
In a medium bowl, whisk together the 0.75 cup Mayonnaise and 0.25 cup Soy Sauce until smooth. I like to use full-fat mayonnaise here—it gives that rich, velvety texture that defines this sauce.
The mixture will look slightly separated at first, but keep whisking until it becomes uniform. You’ll notice the color deepen as the soy sauce incorporates completely. This base provides the creamy foundation and salty backbone for the entire sauce.
Step 2: Add Aromatics and Sweetness
To the same bowl, add the 1 tbsp Sesame Oil, 1 tbsp Rice Vinegar, and 1 tsp Granulated Sugar. The sesame oil adds that toasty depth, while the rice vinegar brings a subtle tang that brightens everything up.
Whisk vigorously for 30 seconds until the sugar completely dissolves. You’ll see the sauce take on a glossy sheen as the ingredients fully emulsify. The sugar balances the saltiness from the soy sauce, creating that signature sweet-savory profile.
Real talk: If your sugar isn’t dissolving, let the mixture sit for 1-2 minutes before whisking again—it’ll incorporate perfectly.
Step 3: Incorporate Fresh Flavors
Now add the 1 tsp Fresh Ginger (finely grated) and 1 clove Garlic Clove (minced finely). I’ve found that fresh ginger and garlic make a huge difference here—they add a bright, zesty kick that dried versions just can’t match.
Whisk for another 20-30 seconds until these fresh flavors are evenly distributed. The sauce should now have visible specks of ginger and garlic throughout. Don’t worry if it looks a bit thin at this point—the wasabi will thicken it slightly.
Step 4: Add Wasabi and Finish
Finally, stir in the 1 tsp Wasabi Paste. Here’s the thing—start with this amount, then taste. The wasabi will mellow slightly as the sauce rests, so I recommend letting it sit for 5 minutes before adjusting the spice level.
The wasabi should create a subtle green speckling throughout the sauce. Whisk one last time to ensure it’s fully incorporated. The sauce will thicken slightly as it sits, achieving that perfect creamy consistency.
If you prefer more heat, add additional wasabi paste ½ teaspoon at a time, tasting as you go. This ensures you get the perfect balance of creamy, tangy, and spicy without overpowering the other flavors.
Pro Tips For Making Outback Ahi Tuna Dipping Sauce
- Chill Before Serving: I learned this the hard way—let the sauce sit in the fridge for at least 30 minutes before serving so the flavors meld properly.
- Use Fresh Wasabi: Skip the powdered stuff; fresh wasabi paste actually changes the outcome and gives that sharp, clean kick the recipe needs.
- Whisk, Don’t Stir: After burning three batches of separated sauce, I finally figured out—whisk the mayo and soy sauce together first until smooth, then fold in the rest.
- Toast the Sesame Oil: Sounds weird, but it works: warm the sesame oil slightly in a spoon over a flame for 10 seconds before mixing—it deepens the nutty flavor.
Storing and Reheating This outback ahi tuna dipping sauce
Fridge Storage
Transfer your sauce to an airtight container and refrigerate within 2 hours of making. I use 8-ounce mason jars for easy pouring and storage. It stays fresh for 5-7 days at 40°F or below. ❄️
Before Using
Give it a good stir before serving, as the sauce may thicken slightly in the fridge. If it’s too thick, whisk in 1-2 tsp cold water to restore the creamy consistency. The flavors actually deepen after 24 hours as everything melds together.
Freezing Not Recommended
Avoid freezing this sauce—the mayonnaise base will separate and become grainy when thawed. If you must freeze, use within 1 month and whisk vigorously after thawing, but expect some texture changes.
Quick Chill Tip
If serving immediately, place the container in an ice bath for 10-15 minutes to chill quickly. This helps the flavors set and thickens the sauce slightly for the perfect dipping consistency.
Reusing Leftovers
Use leftover sauce as a salad dressing by thinning with 1 tbsp rice vinegar, or drizzle over grilled fish or steamed veggies. I love it on cold soba noodles for a quick lunch. 💡
Nutrition Facts
Frequently Asked Questions
Can I make this sauce ahead of time?
Prepare it up to 2 days in advance for best flavor. Store in an airtight container in the fridge and stir before serving. The flavors meld beautifully overnight.
What if I don’t have wasabi paste?
Substitute with ½ tsp prepared horseradish for similar heat. For a milder option, use ¼ tsp ground mustard instead. Adjust to taste as you go.
How spicy is this sauce?
With 1 tsp wasabi, it has a gentle kick. Reduce to ½ tsp for mild heat or increase to 1½ tsp for extra spice. The heat mellows slightly after 30 minutes.
Can I use this sauce for other dishes?
Yes! It’s great as a salad dressing (thin with vinegar) or drizzled over grilled fish. Try it with cold noodles or as a sushi topping.

- 6 Egg Cake Recipe with Oil: Light as Air With Buttery Moisture - October 4, 2026
- 4 Bean Casserole Recipe: One-Pan Heartiness With Smoky Paprika Depth - October 4, 2026
- 3-Ingredient Keto Mug Cake Recipe: Microwave Magic in 2 Minutes - October 4, 2026