
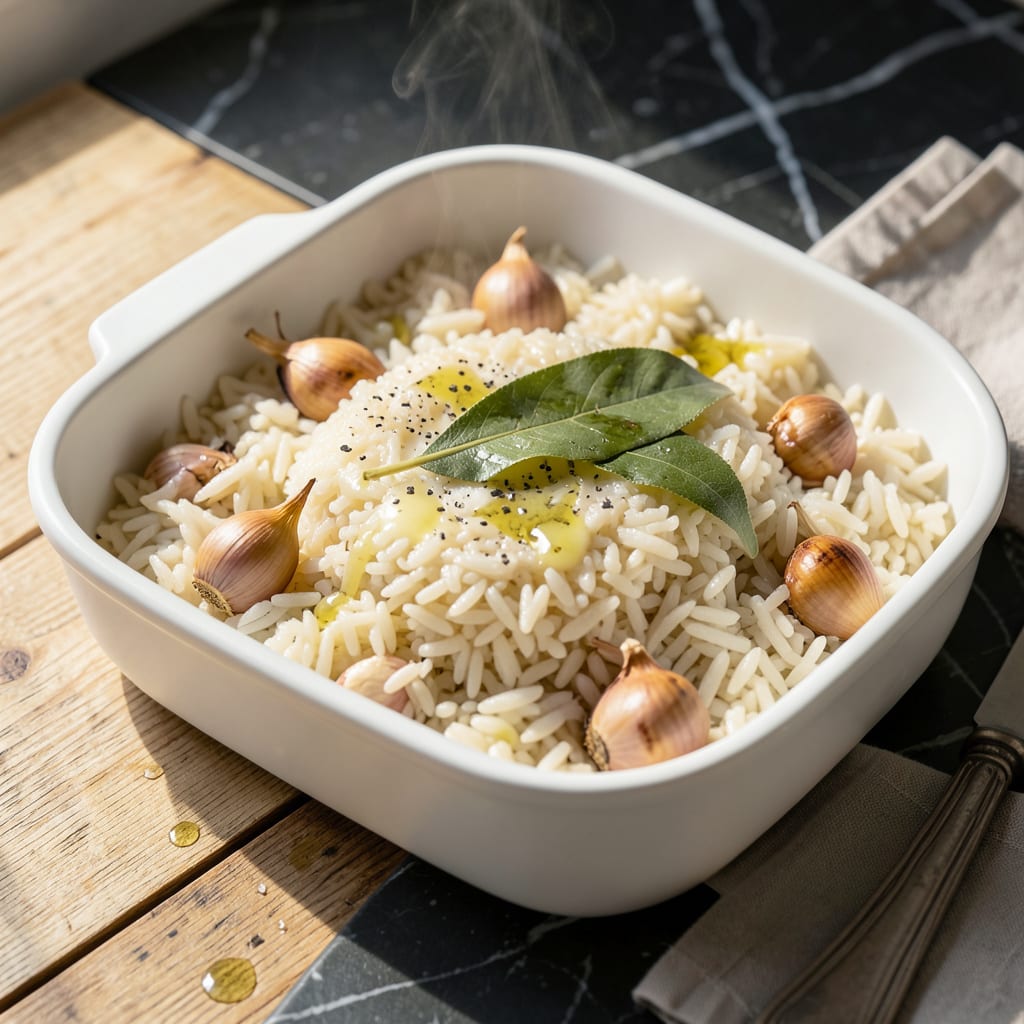
There’s a better way to make perfectly fluffy rice without babysitting a pot. This oven method delivers consistent results with zero risk of burning or sticking.
Using a precise water-to-rice ratio and a sealed environment, the oven steams the grains evenly. No pre-soaking or special equipment is required—just set the timer and walk away.
Ingredients for Oven Steamed Rice
Simple ingredients transform into perfectly steamed rice with this hands-off oven method.
| Ingredient | Amount | Notes |
|---|---|---|
| Jasmine Rice 🌾 | 2 cups | Long-grain, rinsed thoroughly |
| Water 💧 | 4 cups | Filtered or bottled preferred |
| Unsalted Vegan Butter 🧈 | 1 tbsp | Or substitute olive oil |
| Fine Sea Salt 🧂 | 1 tsp | Adjust to taste after cooking |
| Garlic Cloves 🧄 | 2 cloves | Minced, optional for flavor |
| Bay Leaf 🍃 | 1 whole | Optional for aroma |
| Fresh Cilantro 🌿 | ¼ cup | Chopped, for garnish |
| Lemon Juice 🍋 | 1 tsp | Freshly squeezed, optional |
| Green Onions 🧅 | 3 whole | Thinly sliced for garnish |
| Vegetable Broth 🥫 | ½ cup | Low-sodium, optional for depth |
The rice quality matters here. Jasmine or basmati yield the fluffiest results—avoid short-grain varieties which turn sticky. Trader Joe’s and Whole Foods carry high-quality bulk options. Rinse the grains thoroughly until the water runs clear to remove excess starch (worth the extra minute). For the water, filtered or bottled ensures no off-flavors from tap additives.
No jasmine? Basmati or long-grain white work well at a 1:2 rice-to-water ratio. Want more flavor? Swap half the water for vegetable broth. Skip the vegan butter? Olive oil or coconut oil add richness. Fresh herbs can be swapped for dried—use one-third the amount. The optional aromatics (garlic, bay leaf) can be omitted without issue.
Cooked rice keeps 4-5 days refrigerated in an airtight container. Reheat in the microwave with a splash of water to restore moisture. For longer storage, freeze for up to 3 months (portion first for easy use).
Why You’ll Love This Recipe
- Hands-Off Cooking: I just mix everything in one oven-safe pot and let the oven do the work—no stirring, no watching.
- Garlicky Comfort: The roasted garlic and vegan butter turn plain jasmine rice into something rich and aromatic.
- Meal Prep Hero: I make a big batch on Sunday and it pairs perfectly with stir-fries, curries, or roasted veggies all week.
- Budget Stretch: Between us, a pound of jasmine rice and a few cloves of garlic feed my family for days without breaking the bank.
Step-by-Step Instructions for Oven Steamed Rice
This method ensures perfectly fluffy grains with minimal effort and maximum consistency.
Step 1: Prepare and Rinse the Jasmine Rice
Begin by thoroughly rinsing the 2 cups Jasmine Rice under cold water until the water runs clear. This removes excess starch that could make the rice gummy. I recommend using a fine-mesh strainer for this process.
Draining the rice well is crucial—any residual water will throw off your liquid ratio. The grains should appear separate and slightly opaque after rinsing, not clumped together.
Step 2: Combine Ingredients in Oven-Safe Dish
In a 9×13-inch baking dish or similar oven-safe container, combine the rinsed rice, 4 cups Water, 1 tbsp Unsalted Vegan Butter, and 1 tsp Fine Sea Salt. For enhanced flavor, add the 2 cloves Garlic Cloves (minced) and 1 whole Bay Leaf at this stage.
Stir gently to distribute the ingredients evenly, ensuring the rice is fully submerged. The liquid should cover the rice by about ½ inch—this is your visual cue that the ratio is correct.
Step 3: Cover and Bake Until Tender
Cover the dish tightly with aluminum foil, sealing the edges completely to trap steam. Bake in a preheated 375°F oven for 30 minutes. This initial cooking time allows the rice to absorb most of the liquid.
After 30 minutes, check for doneness by fluffing a small section with a fork. If the rice is still firm or water remains, return it to the oven for 5-10 minutes more. The grains should be tender with no chalky center.
Step 4: Rest and Optional Enhancements
Once tender, remove the dish from the oven and let it rest, covered, for 10 minutes. This allows the steam to finish cooking the rice and redistribute moisture for even texture.
For additional depth, stir in the 0.5 cup Vegetable Broth before serving. This step is optional but adds a subtle richness to the dish.
Step 5: Garnish and Serve
Fluff the rice gently with a fork to separate the grains. Remove the bay leaf if used. Garnish with 0.25 cup Fresh Cilantro (chopped), 3 whole Green Onions (thinly sliced), and a drizzle of 1 tsp Lemon Juice for brightness.
Serve immediately while hot. The rice should be light, separate, and fragrant, with each grain distinct yet tender. If it sits too long, cover it loosely to prevent drying.
Pro Tips For Making Oven Steamed Rice
- Preheat the Oven: Always start with a fully preheated oven at 375°F—I learned this the hard way after my first few batches came out unevenly cooked.
- Rinse the Rice: Give the jasmine rice a quick rinse until the water runs clear to remove excess starch, or you’ll end up with a gummy texture instead of fluffy grains.
- Seal Tightly: Use a heavy-duty aluminum foil seal over the baking dish to trap steam, or your rice will dry out before it’s done.
- Add Garlic Last: Toss in the minced garlic cloves just before sealing the dish—adding it too early can make it bitter, and nobody wants that.
Regional Styles of This oven steamed rice
Chinese Clay Pot Style
This method mimics clay pot rice by layering rice with aromatics. I add 2 cloves minced garlic and 1 bay leaf directly to the baking dish. The oven’s dry heat caramelizes the bottom slightly for that signature crispness. 🔥
Middle Eastern Fragrant
Swap half the water for vegetable broth and add 1 tsp ground cumin to the rice before baking. This creates a warm, earthy profile perfect with grilled meats. The 375°F oven temperature enhances the spice’s aroma.
Latin American Cilantro-Lime
After baking, stir in ¼ cup chopped cilantro and 1 tsp lemon juice. This bright, citrusy version pairs wonderfully with black beans or tacos. I love this for casual weeknight dinners.
Japanese Onigiri Base
Use short-grain rice with a 1:1.25 rice-to-water ratio for stickier results. The oven method still works, though the texture will be slightly different. Shape into triangles while warm.
Indian Biryani-Inspired
Add 1 tsp garam masala and ½ cup peas to the dish before baking. The spices infuse beautifully during the 30-minute cook time. This simplified version captures biryani’s essence without the layers. 💛
Mediterranean Herb
Stir in 1 tbsp olive oil and 1 tsp dried oregano before baking. The result is fragrant and pairs well with roasted vegetables. I often use this as a base for grain bowls.
Nutrition Facts
Frequently Asked Questions
Do I need to preheat the oven first?
Yes, always preheat to 375°F before baking. This ensures even cooking from the start and prevents soggy rice. The consistent temperature is key for perfect texture.
Can I use brown rice with this method?
Yes, but increase water to 2.5 cups per 1 cup rice and bake for 50-60 minutes. Brown rice needs more liquid and time to soften.
Why is my rice coming out mushy?
Mushy rice usually means too much water or not draining it well after rinsing. Stick to the 1:2 rice-to-water ratio and measure carefully.
What size dish works best?
A 9×13-inch baking dish is ideal for 2 cups rice. The rice should spread in an even layer about ½ inch thick for best results.

- 6 Egg Cake Recipe with Oil: Light as Air With Buttery Moisture - October 4, 2026
- 4 Bean Casserole Recipe: One-Pan Heartiness With Smoky Paprika Depth - October 4, 2026
- 3-Ingredient Keto Mug Cake Recipe: Microwave Magic in 2 Minutes - October 4, 2026