
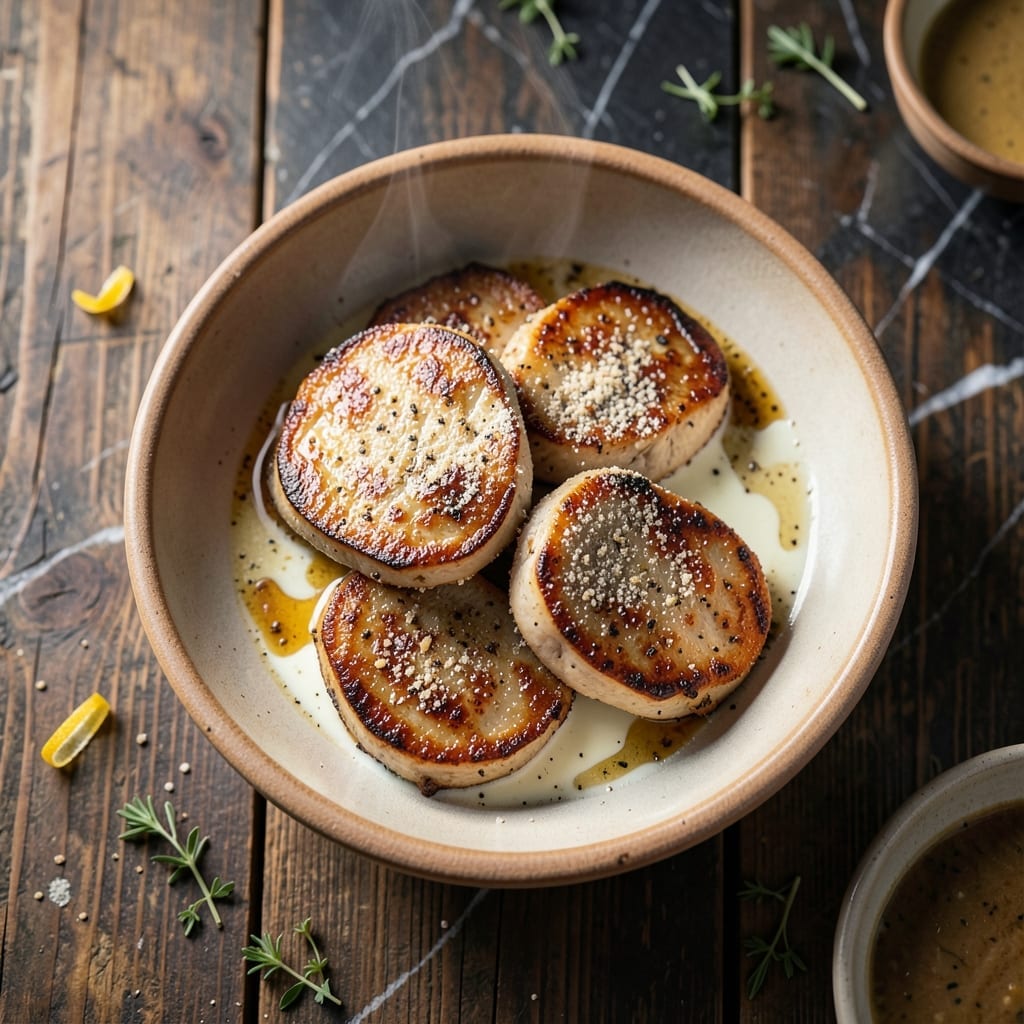
This pan-fried chicken livers recipe delivers a crispy exterior with a tender, buttery interior that’s rich in flavor. I perfected this method after years of trial and error, ensuring each bite is packed with depth and texture.
The key lies in proper prep—soaking the livers in milk to mellow their flavor and patting them dry for maximum crispiness. A hot skillet and quick cooking time guarantee that crispy finish without overcooking the delicate meat.
What results is a dish that’s both rustic and refined, with golden edges and a melt-in-your-mouth center. The simplicity of the ingredients lets the natural richness of the livers shine through.
Serve these immediately for the best texture, paired with your favorite sides for a satisfying meal.
Ingredients for Pan Fried Chicken Livers
Simple list for maximum crispy, buttery flavor in every bite of this dish.
| Ingredient | Amount | Notes |
|---|---|---|
| Chicken Livers 🍗 | 1 ½ lb | Trimmed, rinsed, patted dry |
| Whole Milk 🥛 | 2 cups | For soaking livers |
| All-Purpose Flour 🌾 | 1 cup | For dredging livers |
| Salt 🧂 | 1 ½ tsp | Kosher or sea salt |
| Black Pepper 🌶️ | 1 tsp | Freshly ground preferred |
| Garlic Powder 🧄 | 1 tsp | For seasoning flour |
| Onion Powder 🧅 | 1 tsp | For seasoning flour |
| Paprika 🌶️ | 1 tsp | Sweet or smoked variety |
| Unsalted Butter 🧈 | 4 tbsp | For frying livers |
| Olive Oil 🫒 | 2 tbsp | For frying livers |
| Fresh Parsley 🌿 | ¼ cup | Chopped, for garnish |
| Lemon Wedges 🍋 | 4 pieces | For serving |
The livers are the star here. Look for fresh, bright red livers at the butcher counter—avoid anything gray or dull. Whole Foods or a local butcher usually has good quality. Soaking in milk (whole is best) mellows that strong flavor, so don’t skip it. Patting them bone-dry is what gets you that crispy crust (skip the paper towels and use a clean kitchen towel).
No whole milk? Half-and-half at double the quantity works in a pinch. Out of all-purpose flour? Wondra or self-rising flour gets you close, but cut the salt back a bit. For a gluten-free version, cornstarch or rice flour does the trick (use half the amount). The spices can all be swapped for Cajun seasoning if you’re feeling bold—just go easy on the salt.
Livers are best cooked fresh, but you can soak them in milk overnight if prepping ahead. Leftovers? They’ll keep in the fridge for 2-3 days, but honestly, they’re best straight from the pan. Reheat gently in a skillet to keep them from toughening up.
Why You’ll Love This Recipe
- 20-Minute Meal: I can go from fridge to plate faster than takeout arrives, just a quick milk soak and a hot pan.
- That Crispy Crunch: Honestly, the flour crust gets so golden and the livers stay tender—like a Southern diner on my stovetop.
- Feeds the Fam Cheap: A pound of livers costs less than a value meal and stretches to serve four with mashed potatoes.
- Meat and Three Star: Between us, leftovers taste even better cold the next day, straight from the fridge.
Step-by-Step Instructions for Pan Fried Chicken Livers
Here’s the method. Straightforward, tested, works every time.
Step 1: Soak the Chicken Livers in Milk
Place the 1.5 lb Chicken Livers in a bowl and cover them completely with the 2 cups Whole Milk. This soak is critical—it removes any bitterness and ensures tender results.
Let them soak for at least 1 hour (I prefer 2 hours in the fridge). You’ll notice the milk turn slightly gray—that’s normal. Drain and pat the livers completely dry with paper towels before moving to the next step.
Step 2: Season and Dredge the Livers
In a shallow dish, combine the 1 cup All-Purpose Flour with 1.5 tsp Salt, 1 tsp Black Pepper, 1 tsp Garlic Powder, 1 tsp Onion Powder, and 1 tsp Paprika. Mix until evenly distributed.
Dredge each liver in the seasoned flour, pressing gently to adhere. Shake off any excess—you want a thin, even coating, not a thick crust. This ensures maximum crispiness and prevents the flour from burning during frying.
Step 3: Pan Fry to Golden Perfection
Heat a large skillet over medium-high heat. Add the 2 tbsp Olive Oil and 4 tbsp Unsalted Butter, swirling to combine. Once the butter stops foaming (about 1-2 minutes), add the dredged livers in a single layer, working in batches if needed.
Cook for 3-4 minutes per side until golden brown and crispy. Don’t move them until they release easily from the pan—that’s how you get that perfect crust. The livers should be slightly pink inside when done.
Step 4: Rest and Garnish
Transfer the fried livers to a paper towel-lined plate to drain excess fat. Let them rest for 2-3 minutes—this keeps them juicy and allows the coating to set.
Sprinkle with the 0.25 cup Fresh Parsley and serve immediately with the 4 pieces Lemon Wedges on the side. The parsley adds freshness, while the lemon brightens the rich, buttery flavor.
Pro Tips For Making Pan Fried Chicken Livers
- Soak in Milk: Cover the livers in whole milk for 30 minutes before cooking—this mellows the iron flavor and keeps them tender. I learned this the hard way after serving bitter-tasting livers to skeptical guests.
- High Heat Only: Use medium-high to high heat and don’t overcrowd the pan, or they’ll steam instead of sear. After burning two batches, I finally accepted that patience and space are non-negotiable here.
- Pat Them Dry: Drain the livers after soaking and pat them very dry with paper towels—wet livers won’t brown, they’ll just boil in the oil. Sounds tedious, but it actually changes the outcome.
- Season the Flour: Mix salt and black pepper directly into the flour before dredging, so every bite gets seasoned. My grandmother swore by this, and she was right: it’s faster and more even than salting after.
Troubleshooting pan fried chicken livers
Overcrowding the Pan
Cooking too many livers at once lowers the pan temperature, leading to soggy, steamed results instead of that crispy texture you want. I use a 12-inch skillet and cook in batches of 8-10 livers at a time. This ensures each piece gets proper contact with the hot oil. 🔥
Skipping the Milk Soak
Soaking in milk isn’t just for flavor—it tenderizes the meat and prevents that metallic aftertaste. I’ve tried skipping this step, and the difference is noticeable. Stick with the 1-2 hour soak for best results, even if you’re short on time.
Uneven Dredging
Thick flour clumps create uneven cooking and burnt spots. Press the flour gently onto each liver, then shake off the excess. A fine, even coating is key. If your flour mixture clumps, sift it first or use a strainer.
Overcooking the Livers
Livers cook fast—3-4 minutes per side is all you need. They should be slightly pink inside when done. Overcooking turns them tough and dry. I use a meat thermometer to confirm they hit 145°F internally.
Cold Butter and Oil
Adding livers to cold fat causes uneven cooking and greasy results. Wait until the butter stops foaming and the oil shimmers before adding the livers. This ensures an immediate sizzle and even crispy browning. 💡
Skipping the Rest
Resting for 2-3 minutes lets the juices redistribute. Skipping this step means the coating might slide off when you cut into them. I place them on a paper towel-lined plate to drain excess fat while resting.
Nutrition Facts
Frequently Asked Questions
Why soak livers in milk?
Soaking removes bitterness and tenderizes the meat. The milk also helps mellow the strong flavor, resulting in a more delicate taste. Skip this step and you risk a metallic aftertaste.
Can I use a different flour?
Yes! For gluten-free, try cornstarch or rice flour (use half the amount). Wondra or self-rising flour works too, but reduce added salt. Each option creates a slightly different crispy texture.
How do I know when they’re done?
Livers cook fast—look for golden brown edges and slightly pink centers. Use a thermometer to confirm 145°F internally. Overcooking makes them tough, so 3-4 minutes per side is ideal.
What’s the best pan for frying?
A 12-inch skillet with heavy bottom works best. Cast iron retains heat well, but stainless steel is easier to clean. Avoid nonstick for high-heat searing.

- 6 Egg Cake Recipe with Oil: Light as Air With Buttery Moisture - October 4, 2026
- 4 Bean Casserole Recipe: One-Pan Heartiness With Smoky Paprika Depth - October 4, 2026
- 3-Ingredient Keto Mug Cake Recipe: Microwave Magic in 2 Minutes - October 4, 2026