
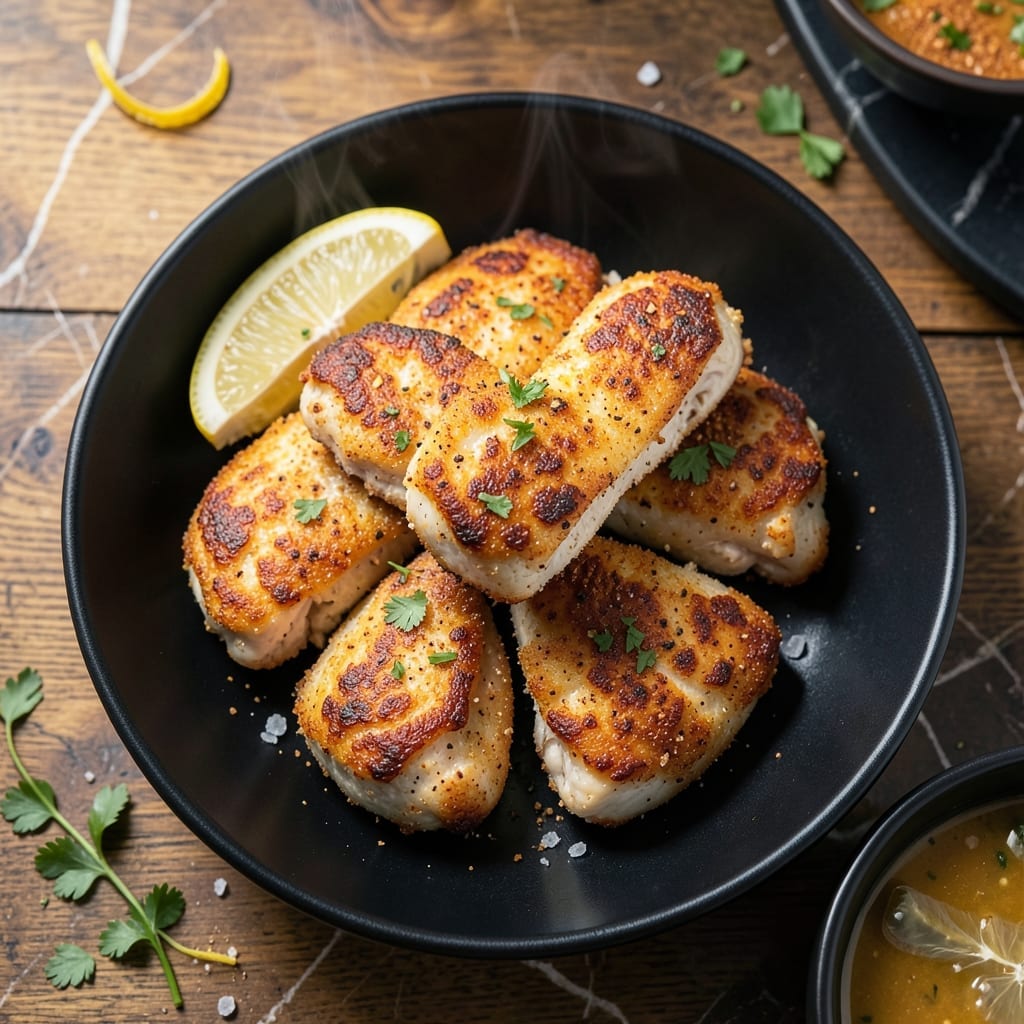
There’s an art to achieving perfectly golden chicken tenders with a crispy crust and juicy centers every time. This method relies on precise temperature control and a few simple but critical steps to lock in moisture while creating that irresistible sear.
The key is using a hot pan and not overcrowding the tenders, allowing each piece to develop a deep golden brown exterior. A light coating of seasoned flour ensures a crispy finish without overwhelming the natural flavor of the chicken.
What you’ll get is tender, juicy chicken with a shatteringly crisp crust that stays intact from pan to plate. The contrast between the crunchy exterior and the moist interior makes this dish a standout.
Serve with your favorite dipping sauces or alongside fresh vegetables for a well-rounded meal. Here’s how to master it.
Ingredients for Pan Seared Chicken Tenders
Simple pantry staples plus chicken. Crispy, juicy, and ready in minutes.
| Ingredient | Amount | Notes |
|---|---|---|
| Chicken Tenders 🍗 | 1 ½ lb | Boneless, skinless, uniformly sized |
| All-Purpose Flour 🌾 | 1 cup | For light crispy coating |
| Kosher Salt 🧂 | 1 ½ tsp | Divided for seasoning |
| Black Pepper 🌶️ | 1 tsp | Freshly ground preferred |
| Garlic Powder 🧄 | 1 tsp | For enhanced flavor |
| Paprika 🌶️ | 1 tsp | Sweet or smoked variety |
| Large Eggs 🥚 | 2 whole | Beaten for egg wash |
| Panko Breadcrumbs 🍞 | 1 ½ cups | For extra-crispy coating |
| Vegetable Oil 🫒 | ½ cup | High smoke point for frying |
| Buttermilk 🥛 | ½ cup | For tenderizing chicken |
| Onion Powder 🧅 | 1 tsp | Balances seasoning blend |
| Cayenne Pepper 🔥 | ¼ tsp | Optional for heat |
The chicken is the star here. Look for uniform-sized tenders—they cook evenly and save prep time. I grab mine from Costco when I’m feeding a crowd, but any supermarket will do. For the breading, panko gives that shatteringly crisp crust the intro promises. The buttermilk (or regular milk in a pinch) keeps the chicken impossibly juicy.
No buttermilk? Milk plus a splash of vinegar works just as well. Swap panko for regular breadcrumbs if needed, but the texture won’t be quite as crunchy. Fresh out of eggs? Mayo or Greek yogurt can bind the coating—use about 3 tablespoons per pound of chicken. The paprika adds color, so don’t skip it (unless you’re using smoked—then you’re golden).
Prep the chicken just before cooking to keep it moist. Leftovers? They reheat surprisingly well—5-7 minutes in a 375°F oven brings the crust back to life. Store in the fridge for up to 3 days.
Why You’ll Love This Recipe
- 20-Minute Meal: I can go from fridge to plate faster than my kids can argue over who gets the last one. Honestly, just flour, seasoning, and a hot pan—no fuss.
- Garlicky Crisp: That first bite with the golden crust and the punch of garlic powder? Spot-on every time.
- Weeknight MVP: Between us, it’s my Tuesday night hero—equally good in sandwiches, salads, or straight off the pan.
- Budget Stretcher: One pound of tenders feeds us all for less than takeout, and leftovers (if there are any) reheat like a dream.
Step-by-Step Instructions for Pan Seared Chicken Tenders
Here’s my method for achieving that perfect golden crust while keeping the inside tender and juicy.
Step 1: Season and Coat the Chicken
Pat the 1.5 lb Chicken Tenders dry with paper towels—this ensures the coating sticks properly. In a shallow bowl, combine the 1 cup All-Purpose Flour, 1.5 tsp Kosher Salt, 1 tsp Black Pepper, 1 tsp Garlic Powder, 1 tsp Paprika, 1 tsp Onion Powder, and 0.25 tsp Cayenne Pepper. Mix well so every bite has balanced flavor.
Dredge each tender in the flour mixture, pressing lightly to adhere. Shake off any excess—too much flour leads to a thick, gummy coating instead of a crispy one. This step creates the base layer that helps the egg wash cling.
Step 2: Dip in Egg Wash and Panko
In another bowl, whisk the 2 whole Large Eggs with the 0.5 cup Buttermilk until smooth. Dip each floured tender into the egg mixture, letting any excess drip off. The buttermilk adds tang and helps tenderize the chicken while the egg ensures the breadcrumbs stick.
Immediately press each tender into the 1.5 cups Panko Breadcrumbs, turning to coat completely. I like to use one hand for wet ingredients and one for dry to keep things clean. Press firmly so the panko adheres well—this is what gives you that extra-crispy texture.
Step 3: Pan Sear to Golden Perfection
Heat the 0.5 cup Vegetable Oil in a large skillet over medium-high heat until shimmering. Carefully add the breaded tenders in a single layer, without crowding the pan. Cook for 3-4 minutes per side until golden brown and the internal temperature reaches 165°F.
Don’t flip too early—wait until the edges look crispy and the bottom releases easily from the pan. If the oil starts smoking, reduce the heat slightly. The tenders should sizzle steadily but not burn. Use a meat thermometer to check for doneness—this ensures juicy, fully cooked chicken every time.
Step 4: Drain and Rest Before Serving
Transfer the cooked tenders to a paper towel-lined plate to drain excess oil. This step keeps them crispy instead of greasy. Let them rest for 2-3 minutes before serving—this allows the juices to redistribute so the first bite isn’t dry.
Serve immediately while hot and crispy. The coating should have a satisfying crunch that gives way to tender, juicy chicken inside. If you need to keep them warm, place on a wire rack in a 200°F oven for up to 10 minutes—any longer and they’ll lose their crispness.
Pro Tips For Making Pan Seared Chicken Tenders
- Pat Them Dry: Sounds weird, but it works: blot the chicken tenders with a paper towel before seasoning. I learned this the hard way—wet tenders steam instead of sear, and you lose that golden crust.
- Hot Pan, Fast Sear: Crank the heat to medium-high and let the pan get screaming hot before adding the tenders. After burning three batches, I finally figured out that a lukewarm pan just makes sad, pale chicken.
- Season the Flour: Mix the kosher salt, black pepper, and garlic powder right into the flour before dredging. My grandmother swore by this, and she was right: it sticks better and every bite is evenly seasoned.
- Don’t Crowd the Pan: Resist the urge to dump all the tenders in at once—give them space or they’ll boil in their own juices. I skip this when I’m lazy, but the crust is noticeably better when I don’t.
Storing and Reheating This Dish
Refrigerator Storage
Let tenders cool completely before storing—about 30 minutes at room temperature. Place in airtight containers with parchment between layers to prevent sticking. They’ll stay fresh at 40°F or below for up to 3 days without losing texture. ❄️
Freezer Storage
For longer storage, freeze in a single layer on a tray first, then transfer to freezer bags. Squeeze out excess air to prevent freezer burn. They’ll keep for up to 2 months. Label with the date—I use Ziploc freezer bags for this.
Oven Reheating
Preheat oven to 375°F and place tenders on a wire rack over a baking sheet. Heat for 5-7 minutes until crispy and warmed through. This method restores the crust better than any other. 🔥
Air Fryer Reheating
Arrange tenders in a single layer in the basket. Reheat at 350°F for 3-4 minutes, shaking halfway. The circulating air revives the crispiness beautifully. No need to preheat for this method.
Microwave Reheating
Place tenders on a microwave-safe plate with a damp paper towel. Heat on 50% power for 1-2 minutes, checking frequently. This prevents the coating from getting soggy. Best for quick meals when crispiness isn’t critical.
Nutrition Facts
Frequently Asked Questions
What oil works best for searing?
Use oils with a high smoke point like vegetable, canola, or peanut oil. Avoid olive oil as it can burn at medium-high heat. About 0.5 cup is enough for a standard skillet.
Why did my coating fall off?
This usually happens if the chicken wasn’t dry before coating or the oil wasn’t hot enough. Pat tenders thoroughly and ensure oil shimmers before adding. Press breading on firmly too.
Can I bake instead of pan-fry?
Yes! Bake at 400°F for 15-20 minutes on a wire rack. Spray with oil first for crispiness. The texture won’t be identical but still delicious.
How do I know when they’re done?
Use a meat thermometer—165°F internally means they’re safe. The crust should be golden brown and the juices should run clear when pierced.

- 6 Egg Cake Recipe with Oil: Light as Air With Buttery Moisture - October 4, 2026
- 4 Bean Casserole Recipe: One-Pan Heartiness With Smoky Paprika Depth - October 4, 2026
- 3-Ingredient Keto Mug Cake Recipe: Microwave Magic in 2 Minutes - October 4, 2026