
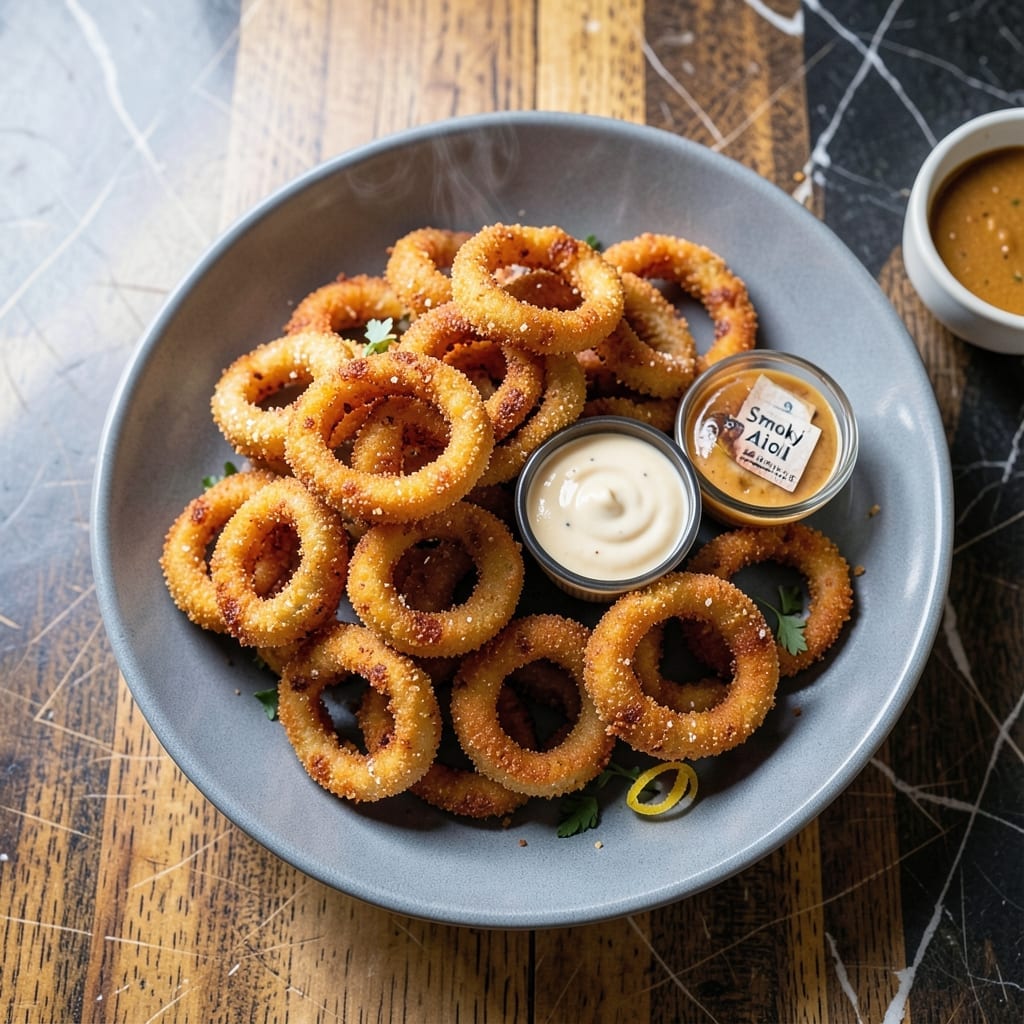
This panko onion ring recipe delivers the crispy texture you crave without the restaurant price. The beer batter creates a light, airy coating that stays perfectly crunchy even after cooling.
I developed this method after years of testing to achieve that ideal balance between tender onions and shatteringly crispy breading. The panko flakes add extra texture that standard breadcrumbs can’t match.
The secret is double-dredging the rings in flour and batter before coating with panko. This ensures maximum adhesion and that signature golden crunch with every bite.
Serve these hot with your favorite dipping sauce for a crowd-pleasing appetizer or satisfying side dish.
Ingredients for Panko Onion Rings
Crispy, golden perfection starts with these simple pantry staples and fresh onions.
| Ingredient | Amount | Notes |
|---|---|---|
| Large Yellow Onions 🧅 | 2 whole | Sliced into 1/2-inch rings |
| All-Purpose Flour 🌾 | 1 ½ cups | Divided for dredging and batter |
| Beer 🍺 | 1 cup | Light lager or pilsner preferred |
| Large Egg 🥚 | 1 whole | For binding the batter |
| Baking Powder 🧂 | 1 tsp | For extra crispiness |
| Salt 🧂 | 1 tsp | Plus extra for seasoning |
| Black Pepper 🌶️ | ½ tsp | Freshly ground preferred |
| Panko Breadcrumbs 🍞 | 2 cups | For maximum crunch |
| Paprika 🌶️ | 1 tsp | Sweet or smoked variety |
| Garlic Powder 🧄 | ½ tsp | For savory depth |
| Vegetable Oil 🫒 | 4 cups | For deep frying |
The onions are the star here. Look for firm, dry yellow onions—they hold up best to frying. Sweet onions work too but lack that sharp bite. For the panko, Kikkoman is my go-to brand; it’s consistently crispy. The beer? Any light lager will do (Bud Light or Coors are safe bets). Don’t waste the good craft stuff here.
No beer? Sparkling water or club soda gets you that same light, airy batter. Out of panko? Crushed cornflakes make a surprisingly good substitute. If you’re avoiding gluten, swap the all-purpose flour for rice flour—it’s lighter and crispier. The egg can be replaced with a flax egg (1 tbsp ground flaxseed + 3 tbsp water) if needed.
Fry in batches to avoid crowding the pot—that’s how you get soggy rings. Keep finished rings warm in a 200°F oven on a wire rack (not paper towels, which steam them). Leftovers? Reheat in a 375°F oven for 10 minutes to revive the crunch. Best eaten same day, honestly.
Why You’ll Love This Recipe
- I’ll be real: they reheat surprisingly well in the oven, so I make extra for lunch the next day.
- Minimal Chopping Required: I just slice the onions into rings—no fancy knife skills needed, and the beer batter does the rest.
- Beer-Battered Crunch: That panko coating with the crisp beer batter makes every bite ridiculously good, hot and golden right out of the oil.
- Crowd-Pleasing Staple: Honestly, I serve these at backyard BBQs, movie nights, even as a sneaky snack for my picky nephew.
Step-by-Step Instructions for Beer-Battered Onion Rings
Here’s my foolproof method for achieving that coveted extra-crispy crunch with every bite.
Step 1: Prepare and Season the Onion Rings
Start by slicing the 2 whole Large Yellow Onions into ½-inch thick rings. Separate the rings and discard the small inner pieces. This uniform thickness ensures even cooking and that perfect crunch.
In a shallow bowl, whisk together 1 cup All-Purpose Flour, 1 tsp Salt, 0.5 tsp Black Pepper, 1 tsp Paprika, and 0.5 tsp Garlic Powder. This seasoned flour will be your first coating layer, so make sure it’s well combined.
Step 2: Create the Beer Batter
In a separate bowl, combine the remaining 0.5 cup All-Purpose Flour, 1 tsp Baking Powder, 1 cup Beer, and 1 whole Large Egg. Whisk vigorously until the batter is smooth and lump-free. The beer adds lightness and a subtle flavor, while the baking powder ensures extra crispiness.
The batter should be thin enough to coat the back of a spoon but thick enough to cling to the onion rings. If it’s too thick, add a splash more beer; if too thin, whisk in a bit more flour.
Step 3: Coat and Bread the Onion Rings
Set up a breading station with three bowls: the seasoned flour, the beer batter, and the 2 cups Panko Breadcrumbs. Working one at a time, dredge each onion ring in the seasoned flour, shaking off any excess.
Dip the floured ring into the beer batter, letting any excess drip off for a moment. Then press it into the panko breadcrumbs, turning to coat evenly and pressing gently to ensure the breadcrumbs adhere. Place the breaded rings on a wire rack set over a baking sheet.
Step 4: Fry to Golden Perfection
In a deep, heavy pot or Dutch oven, heat the 4 cups Vegetable Oil to 350°F. Use a deep-fry or candy thermometer to monitor the temperature—this is crucial for achieving that crispy exterior without burning.
Working in batches to avoid crowding, carefully lower 4-5 breaded onion rings into the hot oil. Fry for 2-3 minutes per side or until they’re golden brown and crispy. The rings will cook quickly, so keep an eye on them.
Step 5: Drain and Serve Immediately
Using a slotted spoon or tongs, transfer the fried onion rings to a paper towel-lined plate to drain any excess oil. Season lightly with additional salt while they’re still hot—the heat helps the salt adhere better.
Serve immediately while they’re at their crispiest. The contrast between the crunchy panko exterior and the tender, sweet onion inside is at its peak right out of the fryer. These are best enjoyed fresh, so gather your dipping sauces and dig in!
Pro Tips For Making Panko Onion Rings
- Chill the Onions: Soak the sliced yellow onions in ice water for 15-20 minutes before dredging—this mellows the harsh bite and helps the panko stick better.
- Beer Temp Matters: Use cold beer straight from the fridge for the batter; warm beer makes the coating slide right off the onions.
- Skip the Overcrowding: Fry in small batches—too many rings at once drops the oil temp and gives you soggy, greasy results instead of crispy ones.
- Bake for Crisp: After frying, pop them on a wire rack in a 400°F oven for 2-3 minutes to set the crust extra crispy without over-browning.
Best Sauces and Condiments for This panko onion rings
Classic Dipping Sauces
You can’t go wrong with ketchup and mayonnaise for that traditional diner experience. I mix them 1:1 ratio with a dash of Worcestershire sauce for my perfect fry sauce. The tanginess cuts through the richness beautifully. 💛
Spicy Kick Options
For heat lovers, sriracha mayo is my go-to—2 tbsp mayo with 1 tsp sriracha creates the perfect balance. Or try chipotle ranch by mixing ¼ cup ranch with 1 tbsp adobo sauce from canned chipotles.
Gourmet Upgrades
Truffle aioli elevates these to restaurant status. Whisk ½ cup mayo with 1 tsp truffle oil and 1 minced garlic clove. The earthy truffle notes complement the crispy panko perfectly.
Cheesy Indulgence
A warm cheddar cheese sauce is pure comfort. Melt 1 cup shredded cheddar with ½ cup milk and 1 tbsp butter over low heat. Add ½ tsp mustard powder for that classic ballpark flavor. 🧀
Fresh and Light
Balance the richness with a cool dill sauce. Mix ½ cup Greek yogurt with 1 tbsp fresh dill, 1 tsp lemon juice, and a pinch of salt. It’s refreshing against the hot, crispy rings.
Nutrition Facts
Frequently Asked Questions
What makes panko breadcrumbs different for this recipe?
Panko creates a lighter, crispier texture than regular breadcrumbs. Their larger flakes stay crunchier longer, even after frying at 350°F.
Can I bake these instead of frying?
Yes! Bake at 400°F for 15-20 minutes, flipping halfway. Use a wire rack over a baking sheet for air circulation to maximize crispiness.
Why does the batter need beer?
The carbonation in beer makes the batter lighter and airier. It also adds subtle flavor complexity that complements the onions.
How do I keep them crispy after cooking?
Place finished rings on a wire rack in a 200°F oven. Never cover or stack them, as this creates steam that makes them soggy.

- 6 Egg Cake Recipe with Oil: Light as Air With Buttery Moisture - October 4, 2026
- 4 Bean Casserole Recipe: One-Pan Heartiness With Smoky Paprika Depth - October 4, 2026
- 3-Ingredient Keto Mug Cake Recipe: Microwave Magic in 2 Minutes - October 4, 2026