
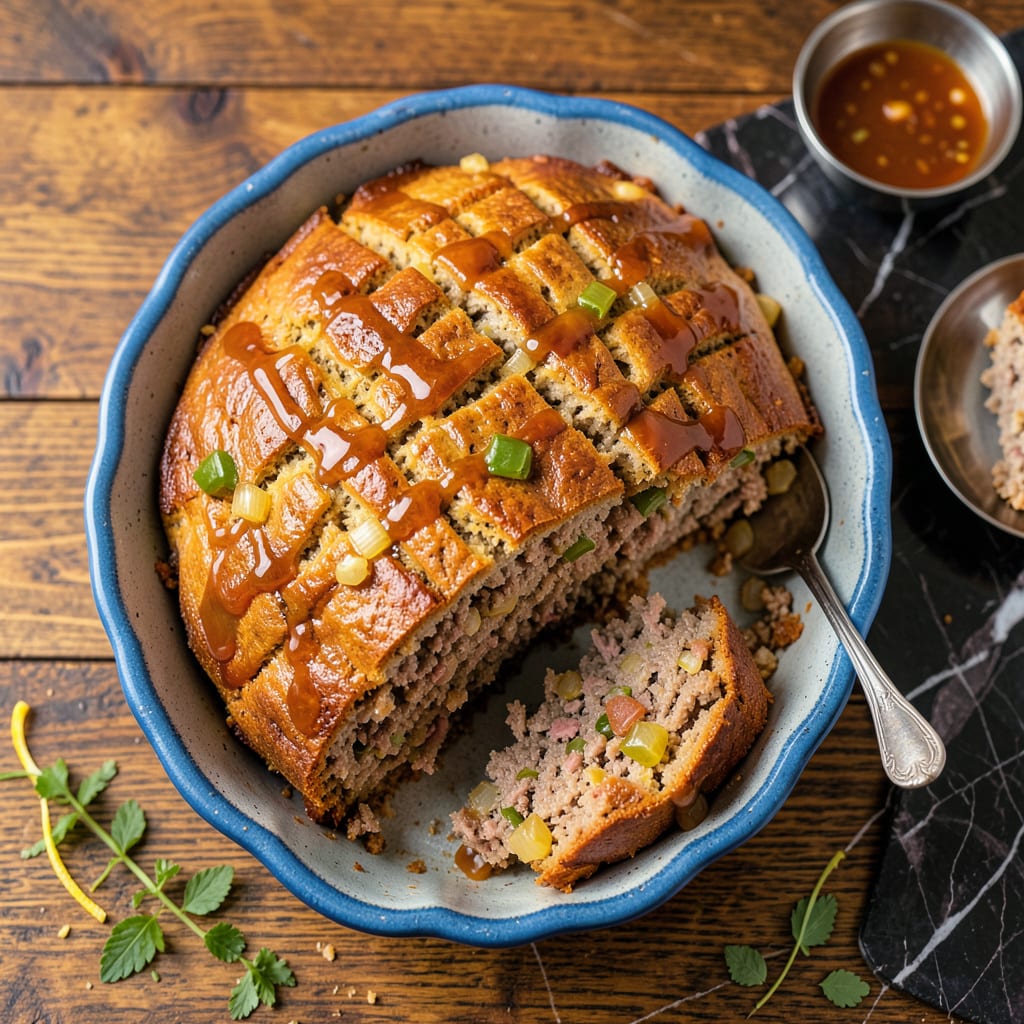
There’s something deeply comforting about a classic meatloaf, and Paula Deen’s Aunt Peggy version captures that old-school Southern charm perfectly. This isn’t just any meatloaf—it’s the kind that brings back memories of Sunday suppers and family gatherings, with rich flavors and a tender texture that melts in your mouth.
The secret lies in the perfect balance of ground beef, breadcrumbs, and just the right mix of seasonings. Baked until golden and glazed with a tangy-sweet topping, this meatloaf delivers that nostalgic comfort you crave. Serve it with mashed potatoes and green beans for a meal that feels like home.
Ingredients for Paula Deen Meatloaf Recipe Aunt Peggy
This is Southern comfort in ingredient form—ground beef, breadcrumbs, and that secret tangy glaze.
| Ingredient | Amount | Notes |
|---|---|---|
| Ground Beef 🥩 | 2 lb | 80/20 fat ratio preferred |
| Plain Breadcrumbs 🍞 | 1 ½ cups | Or crushed saltine crackers |
| Large Eggs 🥚 | 2 whole | Lightly beaten |
| Yellow Onion 🧅 | 1 whole | Finely diced |
| Green Bell Pepper 🌶️ | 1 whole | Finely diced |
| Garlic Cloves 🧄 | 3 cloves | Minced |
| Ketchup 🍅 | ½ cup | Plus extra for glaze |
| Worcestershire Sauce 💧 | 2 tbsp | Lea & Perrins preferred |
| Dried Thyme 🌿 | 1 tsp | Or 1 tbsp fresh |
| Dried Oregano 🌿 | 1 tsp | Or 1 tbsp fresh |
| Salt 🧂 | 1 ½ tsp | Kosher or sea salt |
| Black Pepper 🌶️ | 1 tsp | Freshly ground preferred |
| Brown Sugar 🍚 | 2 tbsp | Light or dark |
| Dijon Mustard 🧂 | 1 tbsp | Or yellow mustard |
| Milk 🥛 | ¼ cup | Whole or 2% preferred |
The beef makes this dish. 80/20 ground chuck gives you that rich flavor and moist texture—sirloin will dry out. I grab mine from Publix or Walmart when it’s on sale. For the breadcrumbs, Progresso works great, but crushed saltines add that old-school Southern touch (Aunt Peggy’s trick). The onion and bell pepper should be fresh—no pre-diced stuff from a bag (it’s worth the 5 minutes to chop).
No Worcestershire? Soy sauce with a dash of vinegar gets you close. Out of fresh garlic? Garlic powder at half the amount works, but fresh is better. The ketchup glaze is non-negotiable—Heinz is classic, but any quality brand works. If you’re watching sugar, swap the brown sugar for coconut sugar (same amount). The milk can be whole or 2%—don’t use skim, it won’t bind as well.
This meatloaf reheats like a dream—tastes even better the next day. Store leftovers in the fridge for 4-5 days or freeze for 3 months. I like to slice it before freezing so you can grab just what you need. The glaze can be made ahead too—just mix and refrigerate until ready to use.
Why You’ll Love This Recipe
- I’ll be real: ground beef isn’t getting cheaper, but this recipe makes a pound go further thanks to the breadcrumbs and veggies bulking it up. Leftovers? Even better—the flavors deepen overnight, so I intentionally make extra for sandwiches or crumbled over mac and cheese. Waste nothing, eat well.
- No-Fuss Mixing: Honestly, this might be the easiest meatloaf I’ve ever made—just dump the ground beef, breadcrumbs, eggs, and diced onion/pepper in a bowl, squish it together with your hands, and you’re done. No fancy techniques, no weird gadgets, just straightforward mixing that even my 10-year-old can handle (yes, I let him “help”).
- That Sweet-Savory Crust: Here’s what sold me—the caramelized edges from the onion and bell pepper mixed into the meat, plus the breadcrumbs giving it just enough crisp while keeping the inside juicy. It’s not some dry, sad meatloaf; it’s got that homestyle diner taste where every bite makes you reach for seconds.
- Feeds a Hungry Table: Between us, this is my go-to when I’ve got company or a weeknight with three different schedules to juggle. One loaf serves six generously, pairs with literally anything (mashed potatoes, roasted veggies, even just buttered bread), and reheats like a dream for lunches. No last-minute takeout runs required.
Step-by-Step Instructions for Paula Deen’s Classic Meatloaf
This is where the magic happens—simple steps that deliver that nostalgic, comforting flavor we all love.
Step 1: Prepare the Vegetable Base
Start by finely dicing the yellow onion and green bell pepper—you want small, even pieces that will disappear into the meatloaf. I like to use a sharp chef’s knife for this because it gives you better control than a food processor. The pieces should be about ¼-inch in size.
In a small skillet, sauté the diced onion, green bell pepper, and minced garlic cloves in a little oil over medium heat for 5-6 minutes until they’re softened and translucent. This step removes the raw bite and brings out their sweetness. Let the mixture cool completely before adding it to your meat mixture—hot vegetables can cook the eggs prematurely.
Step 2: Combine All Ingredients Thoroughly
In a large mixing bowl, add the 2 lb ground beef, 1.5 cups plain breadcrumbs, 2 whole large eggs, and all the remaining ingredients: the cooled vegetable mixture, 0.5 cup ketchup, 2 tbsp Worcestershire sauce, 1 tsp dried thyme, 1 tsp dried oregano, 1.5 tsp salt, 1 tsp black pepper, 2 tbsp brown sugar, 1 tbsp Dijon mustard, and 0.25 cup milk.
Here’s the secret: use your hands to mix everything together. I know it’s messy, but this is the only way to ensure all ingredients are evenly distributed without overworking the meat. You want the mixture to be uniform but not compacted—think of it like combining ingredients for meatballs. The texture should hold together when pressed but still feel light and airy.
Step 3: Shape and Prepare for Baking
Transfer the meat mixture to a standard 9×5-inch loaf pan or shape it into a free-form loaf on a rimmed baking sheet lined with parchment paper. If using a loaf pan, press the mixture gently into the pan—don’t pack it down too firmly, as this can make the meatloaf dense. For a free-form loaf, shape it into an even rectangle about 5 inches wide and 2 inches high.
Brush the top with additional ketchup—this creates that classic sweet, tangy glaze we all love. I like to use about 2 tablespoons for this step. The glaze should cover the top completely but not pool around the edges. This will caramelize beautifully in the oven and give you that signature meatloaf appearance.
Step 4: Bake to Perfection
Preheat your oven to 350°F and position the rack in the middle. Bake the meatloaf for 50-60 minutes if using a loaf pan, or 45-55 minutes for a free-form loaf. You’ll know it’s done when the internal temperature reaches 160°F on an instant-read thermometer inserted into the center, and the top is deep golden brown with slightly caramelized edges.
About halfway through baking, I like to brush on another thin layer of ketchup—this builds up that beautiful glaze. Watch for the moment when the meatloaf pulls away slightly from the sides of the pan and the top develops a slight crust. That’s when you know it’s perfectly cooked through while still remaining juicy inside.
Step 5: Rest and Serve
Remove the meatloaf from the oven and let it rest for 10-15 minutes before slicing. This resting period is crucial—it allows the juices to redistribute throughout the meat instead of running out onto your cutting board. I tent mine loosely with foil to keep it warm while it rests.
Slice the meatloaf into 1-inch thick pieces using a sharp serrated knife. The slices should hold their shape but be tender enough to cut with a fork. Serve it warm with extra ketchup on the side or with classic comfort food accompaniments like mashed potatoes and green beans. Each bite should deliver that perfect balance of savory meat, sweet glaze, and comforting texture that makes this dish so beloved.
Essential Equipment for paula deen meatloaf recipe aunt peggy
Mixing Bowls Matter
For this recipe, I swear by my stainless steel mixing bowl—the 12-quart size from Cuisinart gives me plenty of room to mix without making a mess. The wide base lets me get my hands in there to combine everything evenly. Avoid glass bowls here; they’re too heavy and don’t give you the same control when mixing by hand. 💡
Loaf Pan Selection
A standard 9×5-inch loaf pan works best—I use the USA Pan brand with the nonstick coating because it releases the meatloaf perfectly every time. If you prefer a free-form loaf, a rimmed baking sheet with parchment paper prevents sticking and makes cleanup easier. The edges should be at least 1-inch high to contain any drippings.
Knives for Prep
You’ll need a sharp 8-inch chef’s knife for dicing the onion and bell pepper—I’ve used my Wüsthof Classic for years. A good knife makes this step faster and safer. For mincing garlic, I keep a small paring knife handy. Dull knives crush rather than cut, which can make your vegetables release too much moisture into the meatloaf.
Thermometer is Key
Don’t guess when your meatloaf is done—use an instant-read thermometer. I rely on my ThermoWorks Thermapen because it gives accurate readings in 2-3 seconds. The internal temperature should reach 160°F in the center. This is the only way to guarantee perfect doneness without overcooking.
Basting Brush
A good silicone basting brush makes applying that ketchup glaze easy. I like the OXO Good Grips version because it’s heat-resistant and won’t shed bristles. The flexible head lets you get into corners of the loaf pan. Brush on the glaze gently to avoid disturbing the meatloaf’s shape before baking.
Cooling Rack
After baking, transfer your meatloaf to a wire cooling rack for those critical 10-15 minutes of resting. This prevents the bottom from getting soggy. I use a simple stainless steel rack that fits over my baking sheet—it elevates the meatloaf just enough to let air circulate underneath while keeping it warm. 🔥
Nutrition Facts

- 6 Egg Cake Recipe with Oil: Light as Air With Buttery Moisture - October 4, 2026
- 4 Bean Casserole Recipe: One-Pan Heartiness With Smoky Paprika Depth - October 4, 2026
- 3-Ingredient Keto Mug Cake Recipe: Microwave Magic in 2 Minutes - October 4, 2026