
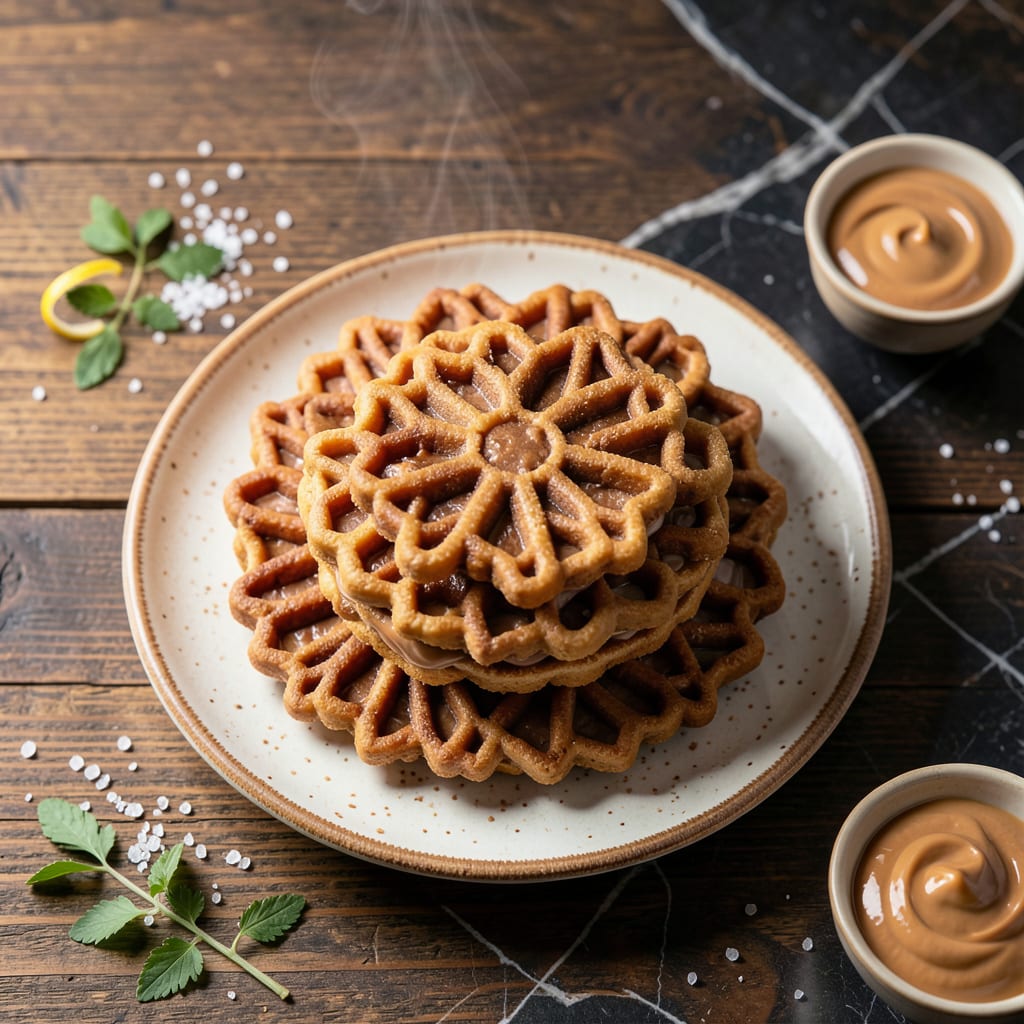
I’ve perfected the art of making crispy peanut butter pizzelle, transforming a classic Italian cookie with a rich, nutty twist. This recipe delivers delicate, lace-like cookies with deep, golden-brown edges and a satisfying snap.
The secret lies in the precise iron temperature and a batter that balances sweetness with peanut butter’s natural richness. Each bite offers a buttery, toasted flavor that’s impossible to resist.
Ingredients for Peanut Butter Pizzelle
Delicate lace cookies with a nutty twist require just these pantry staples and a few special touches.
| Ingredient | Amount | Notes |
|---|---|---|
| All-Purpose Flour 🌾 | 1 ¾ cups | Sifted for lighter texture |
| Granulated Sugar 🍚 | ¾ cup | Fine white granulated |
| Unsalted Butter 🧈 | ½ cup | Melted and cooled slightly |
| Smooth Peanut Butter 🥜 | ½ cup | Natural or commercial variety |
| Large Eggs 🥚 | 3 whole | Room temperature preferred |
| Pure Vanilla Extract 🌿 | 1 tsp | High-quality for best flavor |
| Baking Powder 🧂 | 1 tsp | Fresh for optimal rise |
| Salt 🧂 | ¼ tsp | Fine sea salt or kosher |
| Anise Seeds 🌿 | 1 tbsp | Traditional Italian flavor |
| Vegetable Oil 🫒 | 2 tbsp | For greasing the iron |
The peanut butter is non-negotiable here—Jif or Skippy work perfectly, but natural styles with oil separation can make the batter too loose. King Arthur Flour is my go-to for all-purpose, but any unbleached brand does the job. The anise seeds (found in the spice aisle at Whole Foods or any major grocery store) are traditional, but don’t stress if you can’t find them. The butter must be unsalted so you control the salt content precisely.
No anise? A pinch of anise extract (about 1/8 tsp) works, or swap for vanilla seeds from a pod. Brown sugar at half the amount can replace granulated for a deeper flavor, though the texture changes slightly. For a gluten-free version, a 1:1 baking flour like Bob’s Red Mill substitutes well. The eggs are key for structure—don’t try flax eggs here as they won’t give the right crispness.
Store cooled cookies in an airtight container at room temperature for up to 2 weeks. They’ll soften slightly over time but stay crisp if kept dry. The batter can be mixed a day ahead and refrigerated. Freeze cookies for up to 3 months in a single layer before bagging to prevent breakage.
Why You’ll Love This Recipe
- One Bowl Wonder: I just dump flour, sugar, butter, peanut butter, and eggs in a bowl—no fancy steps, no extra dishes.
- That PB Swirl: The peanut butter bakes into these crispy little waffles with pockets of nutty richness. Honestly, it’s like a cookie and a waffle had the best baby.
- Holiday MVP: I make batches for cookie swaps, pack them in tins for teachers, or just set out a plate when guests drop by.
- Freezer Friendly: They keep for weeks in an airtight container, so I can pull out a few whenever a sweet craving hits.
Step-by-Step Instructions for Peanut Butter Pizzelle
Master the technique for achieving perfectly crisp cookies with traditional Italian flair.
Step 1: Prepare the Batter Base
In a large mixing bowl, whisk together the 1.75 cups All-Purpose Flour, 1 tsp Baking Powder, and 0.25 tsp Salt until fully combined. This creates your dry foundation. I always sift the flour first to prevent any lumps in the final batter.
In a separate bowl, cream together the 0.75 cup Granulated Sugar with the 0.5 cup Unsalted Butter until light and fluffy. The mixture should noticeably pale in color. Add the 0.5 cup Smooth Peanut Butter and beat for another 1 minute until smooth and fully integrated.
Step 2: Incorporate Wet Ingredients
Add the 3 whole Large Eggs one at a time to the peanut butter mixture, beating well after each addition. This ensures proper emulsification. The batter should become silky and slightly thicker with each egg.
Stir in the 1 tsp Pure Vanilla Extract and 1 tbsp Anise Seeds. The anise will release its aromatic oils into the warm mixture, infusing the batter with its distinctive licorice note that defines authentic pizzelle.
Step 3: Combine and Rest the Batter
Gradually fold the dry ingredients into the wet mixture using a spatula. Mix just until the flour disappears—overworking develops gluten, which makes the cookies tough rather than delicate. The batter should be thick but still pourable.
Let the batter rest at room temperature for 30 minutes. This allows the flour to fully hydrate and the baking powder to begin activating, resulting in a more uniform texture during cooking.
Step 4: Cook in the Pizzelle Iron
Preheat your pizzelle iron according to manufacturer instructions. Lightly brush both plates with the 2 tbsp Vegetable Oil to prevent sticking. The iron is ready when a drop of water sizzles and evaporates immediately upon contact.
Spoon about 1 tablespoon of batter onto each pattern well—don’t overfill. Close the iron and cook for 30-45 seconds until the cookies are golden brown and crisp. The exact time depends on your iron’s temperature and the desired level of browning.
Step 5: Cool and Store for Maximum Crispness
Remove the pizzelle from the iron using a fork and transfer to a wire rack. Don’t stack them while warm—the trapped steam will make them soggy. Let cool completely, which takes about 10 minutes per batch.
Once cooled, the cookies should be crisp enough to snap cleanly when bent. Store in an airtight container at room temperature for up to 2 weeks, with parchment paper between layers to maintain their delicate texture.
Pro Tips For Making Peanut Butter Pizzelle
- Preheat the Iron: I learned this the hard way—always let your pizzelle iron heat for a full 5 minutes before adding batter. Uneven heating means half the cookies won’t cook through.
- Soften the Butter: Use room-temperature butter and peanut butter, about 65-70°F. Cold ingredients make the batter thick and hard to spread, and the cookies turn out dense.
- Skip Overfilling: A teaspoon of batter per iron is plenty—resist the urge to add more. Too much batter spills over, makes a mess, and leaves you with misshapen, undercooked edges.
- Cool on Rack: Transfer pizzelle to a wire rack right after baking, even if they seem firm. Stacking them while hot traps steam, turning crisp cookies into chewy ones.
Make-Ahead Tips for Leftovers
Batter Prep Ahead
You can mix the entire batter up to 24 hours in advance and refrigerate it in an airtight container. The cold rest time actually improves the texture by allowing the flour to fully hydrate.
Room Temperature Eggs
If prepping ahead, use room temperature eggs for the best emulsion. I pull my eggs from the fridge 2 hours before mixing. This ensures they incorporate smoothly into the peanut butter mixture.
Iron Preheating
Preheat your pizzelle iron while the batter rests. This saves 10-15 minutes when you’re ready to cook. A properly heated iron ensures even browning from the first cookie to the last. 🔥
Freezing Cooked Pizzelle
Once completely cooled, freeze cookies in a single layer on a baking sheet for 1 hour, then transfer to freezer bags. They’ll keep for up to 3 months without losing their crisp texture.
Thawing and Reviving
Thaw frozen pizzelle at room temperature for 30 minutes. If they’ve softened, crisp them up in a 300°F oven for 3-5 minutes. They’ll taste freshly made. ✨
Equipment Prep
Have your wire racks ready before cooking begins. I keep 3-4 racks handy for cooling multiple batches simultaneously. This prevents the steam buildup that can make cookies soggy.
Nutrition Facts
Frequently Asked Questions
Can I use crunchy peanut butter instead?
Smooth peanut butter works best for even texture, but crunchy can add a nice bite. Strain out excess oil first to maintain batter consistency. The peanut pieces may make the design less defined.
Why did my pizzelle turn out soft?
Overfilling the iron or not cooking long enough causes softness. Use exactly 1 tablespoon batter per cookie and cook until golden brown. Cool completely on a rack to crisp up.
Can I skip the anise seeds?
Yes! Omit them or replace with 1/2 tsp cinnamon or 1/4 tsp almond extract for a different flavor. The peanut butter taste will shine through without them.

- 6 Egg Cake Recipe with Oil: Light as Air With Buttery Moisture - October 4, 2026
- 4 Bean Casserole Recipe: One-Pan Heartiness With Smoky Paprika Depth - October 4, 2026
- 3-Ingredient Keto Mug Cake Recipe: Microwave Magic in 2 Minutes - October 4, 2026