
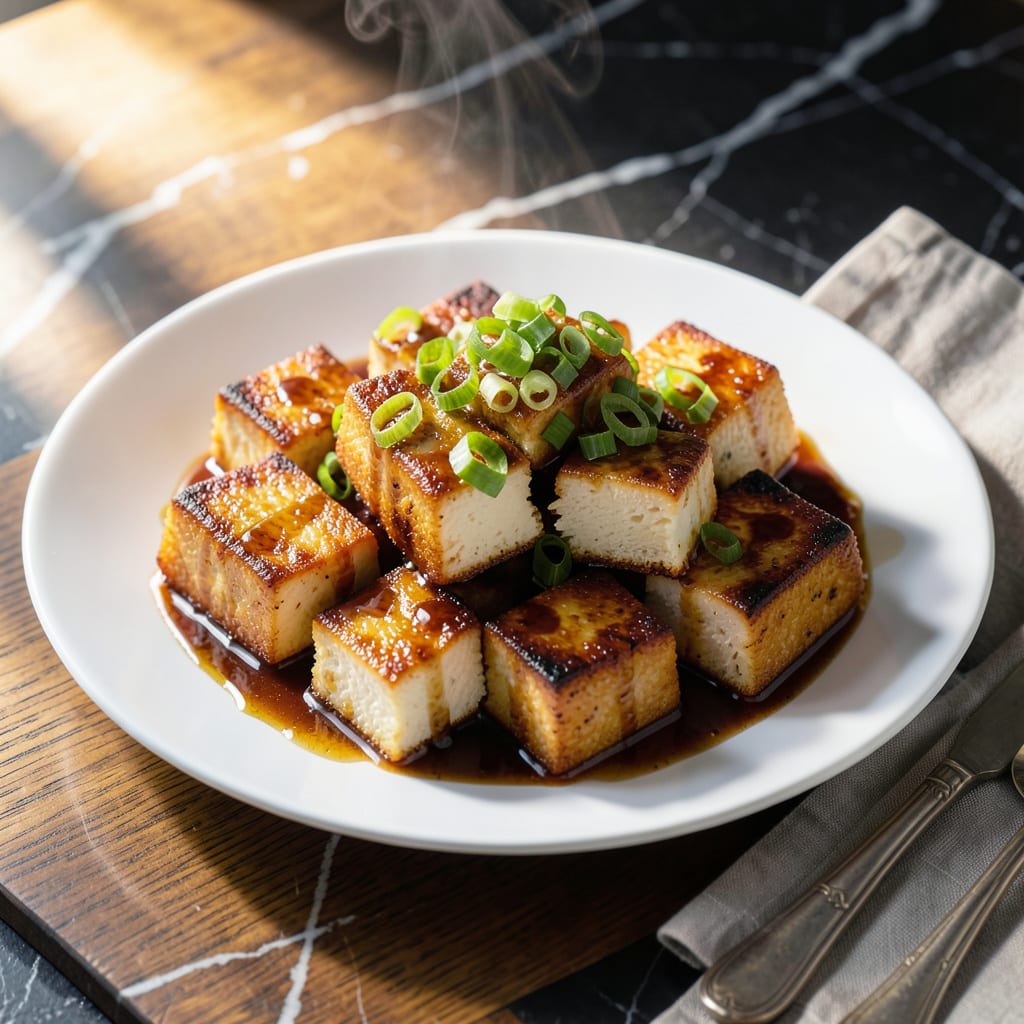
This recipe brings the bold, savory flavors of Pei Wei’s tofu dish to your kitchen. I’ve perfected the technique to match the restaurant’s signature taste and texture.
With crispy, golden tofu coated in a rich, umami-packed sauce, this version delivers the same satisfying experience. No takeout required—just simple ingredients and precise steps.
Ingredients for Pei Wei Tofu
Crispy tofu and bold umami sauce come together with everyday ingredients for restaurant-quality results.
| Ingredient | Amount | Notes |
|---|---|---|
| Extra-Firm Tofu 🧈 | 16 oz | Pressed and cubed |
| Cornstarch 🌾 | ¼ cup | For crispy coating |
| Vegetable Oil 🫒 | ½ cup | High smoke point for frying |
| Soy Sauce 🥢 | ⅓ cup | Low-sodium preferred |
| Rice Vinegar 🍶 | 2 tbsp | For tangy balance |
| Brown Sugar 🍚 | 2 tbsp | Packed for sweetness |
| Garlic Cloves 🧄 | 4 cloves | Minced for sauce |
| Fresh Ginger 🌿 | 1 tbsp | Grated or minced |
| Sriracha 🌶️ | 1 tbsp | Adjust for spice preference |
| Sesame Oil 🫒 | 1 tsp | Toasted for aroma |
| Green Onions 🧅 | 3 whole | Thinly sliced for garnish |
| Sesame Seeds 🌰 | 1 tsp | Toasted for garnish |
| Red Bell Pepper 🌶️ | 1 whole | Diced for texture |
[recipeingredientscaler]
The tofu quality is crucial here. Extra-firm from Nasoya or Wildwood holds up best to frying and won’t crumble. Press it for at least 30 minutes to remove excess water—this ensures maximum crispiness. For the cornstarch, Bob’s Red Mill is widely available and reliable. The soy sauce should be low-sodium to control the saltiness of the dish.
No cornstarch? Arrowroot powder works at a 1:1 ratio. Sriracha can be swapped with chili garlic sauce for a different heat profile. Fresh ginger is ideal, but ground ginger at half the amount works in a pinch. For a gluten-free version, tamari instead of soy sauce. The brown sugar can be replaced with coconut sugar if needed.
Leftover tofu keeps well in the fridge for 3-4 days but the texture is best fresh. Store sauce separately to prevent sogginess. The sauce can be frozen for up to 3 months—just thaw and reheat gently before tossing with freshly cooked tofu.
Why You’ll Love This Recipe
- 20-Minute Meal: I can press the tofu while the oil heats, then it’s just a quick fry and toss with soy sauce and rice vinegar.
- Crispy Outside, Creamy Inside: That cornstarch coating gives it the most satisfying crunch, with the tofu staying soft where it counts.
- Meal Prep Magic: Honestly, this tastes even better the next day—packs perfectly for lunch with rice or noodles.
- Pantry Staples Only: Between us, I always have these ingredients on hand, so it’s my go-to when I’m too tired to think.
Step-by-Step Instructions for Copycat Asian Tofu
This method delivers restaurant-quality results with crispy tofu and a perfectly balanced sauce.
Step 1: Press and Coat the Tofu
Begin by pressing the 16 oz Extra-Firm Tofu between paper towels for 15-20 minutes to remove excess moisture. This step is crucial for achieving that crispy exterior that makes this dish special.
Cut the pressed tofu into 1-inch cubes and toss them in the 0.25 cup Cornstarch until evenly coated. The cornstarch creates that signature crunch you expect from takeout-style tofu. Shake off any excess—you want a thin, even layer that won’t clump when fried.
Step 2: Fry the Tofu to Golden Perfection
Heat the 0.5 cup Vegetable Oil in a large skillet over medium-high heat until shimmering. Working in batches to avoid crowding, add the coated tofu cubes in a single layer. Cook for 3-4 minutes per side until deep golden brown and crispy.
Use a slotted spoon to transfer the fried tofu to a paper towel-lined plate. The tofu should be uniformly crispy with no soft spots. The oil temperature is key here—if it’s not hot enough, the tofu will absorb oil instead of crisping up.
Step 3: Create the Signature Sauce
In a clean pan, combine the 0.33 cup Soy Sauce, 2 tbsp Rice Vinegar, 2 tbsp Brown Sugar, minced 4 cloves Garlic Cloves, 1 tbsp Fresh Ginger, 1 tbsp Sriracha, and 1 tsp Sesame Oil. Simmer over medium heat for 2-3 minutes until slightly thickened.
The sauce should have a glossy sheen and coat the back of a spoon. The brown sugar will dissolve completely, and the garlic and ginger will become fragrant. Taste and adjust the balance if needed—more vinegar for tang or sugar for sweetness.
Step 4: Combine and Finish
Add the crispy tofu to the sauce along with the diced 1 whole Red Bell Pepper. Toss gently to coat every piece evenly. Cook for an additional 1-2 minutes until the tofu is heated through and the sauce clings perfectly to each cube.
The bell pepper should retain some crispness, adding texture contrast to the dish. Avoid over-stirring, which can break up the crispy tofu coating you worked so hard to achieve.
Step 5: Garnish and Serve
Transfer to a serving dish and sprinkle with the thinly sliced 3 whole Green Onions and 1 tsp Sesame Seeds. The green onions add a fresh, sharp contrast, while the sesame seeds provide a nutty finish.
Serve immediately while the tofu is still crispy. The sauce will have thickened slightly as it cools, creating that perfect sticky consistency that coats every piece of tofu and veggie. This dish tastes just like the restaurant version, with all the flavors balanced and complementary.
Pro Tips For Making Pei Wei Tofu
- Press the Tofu: Use a heavy pan or book to press the tofu for at least 20 minutes—this removes excess water so the cornstarch actually sticks and gives you that crispy exterior.
- Heat the Oil: Get the oil smoking hot (about 375°F) before adding the tofu. I learned this the hard way—lukewarm oil just makes greasy, soggy pieces instead of golden, crispy ones.
- Dust Evenly: Toss the tofu in cornstarch in a sealed bag and shake it hard. This coats every crevice evenly, which means no bare spots and maximum crunch.
- Skip the Overcrowding: Fry the tofu in batches if needed—crowding the pan steams the pieces instead of frying them, and you’ll lose that satisfying snap.
Troubleshooting This Dish
Tofu Not Crispy
If your tofu isn’t crispy, the most likely issue is excess moisture. Even after pressing, pat the cubes dry with paper towels before coating in cornstarch. Also, ensure your oil is at 350-375°F before adding the tofu.
Sauce Too Thin
For a thicker sauce, simmer it longer before adding the tofu—3-4 minutes should do the trick. Mix 1 tsp cornstarch with 1 tsp water and stir it into the sauce to create a glossy, restaurant-style consistency. 💡
Sauce Too Salty
If your sauce is overly salty, balance it with 1 tbsp brown sugar or a splash of rice vinegar. Using low-sodium soy sauce from the start helps prevent this issue entirely.
Tofu Sticks to Pan
Tofu sticking usually means the pan wasn’t hot enough or you tried to move it too soon. Wait until a golden crust forms before flipping. Use a nonstick skillet or a well-seasoned cast-iron pan for best results.
Sauce Overpowers Tofu
If the sauce is too strong, toss the tofu in it just before serving instead of letting it sit. This keeps the tofu crispy while still delivering bold flavor. Serve extra sauce on the side for dipping.
Oil Temperature Drops
Frying in batches prevents the oil temperature from dropping, which causes greasy tofu. If needed, let the oil heat back up between batches. A candy thermometer helps monitor the temperature precisely. 🔥
Nutrition Facts
Frequently Asked Questions
Can I bake the tofu instead of frying?
Yes! Toss cubes with 1 tbsp oil and bake at 400°F for 25-30 minutes, flipping halfway. It won’t be as crispy but still delicious.
How do I make this gluten-free?
Swap soy sauce for tamari and use cornstarch already in the recipe. Ensure all other ingredients are certified gluten-free.
Can I use silken tofu for this?
No. Silken tofu is too soft and will fall apart. Stick with extra-firm for the best texture.
What can I add for extra veggies?
Broccoli, snap peas, or carrots work well. Add them when cooking the sauce for 2-3 minutes to soften slightly.

- 6 Egg Cake Recipe with Oil: Light as Air With Buttery Moisture - October 4, 2026
- 4 Bean Casserole Recipe: One-Pan Heartiness With Smoky Paprika Depth - October 4, 2026
- 3-Ingredient Keto Mug Cake Recipe: Microwave Magic in 2 Minutes - October 4, 2026