
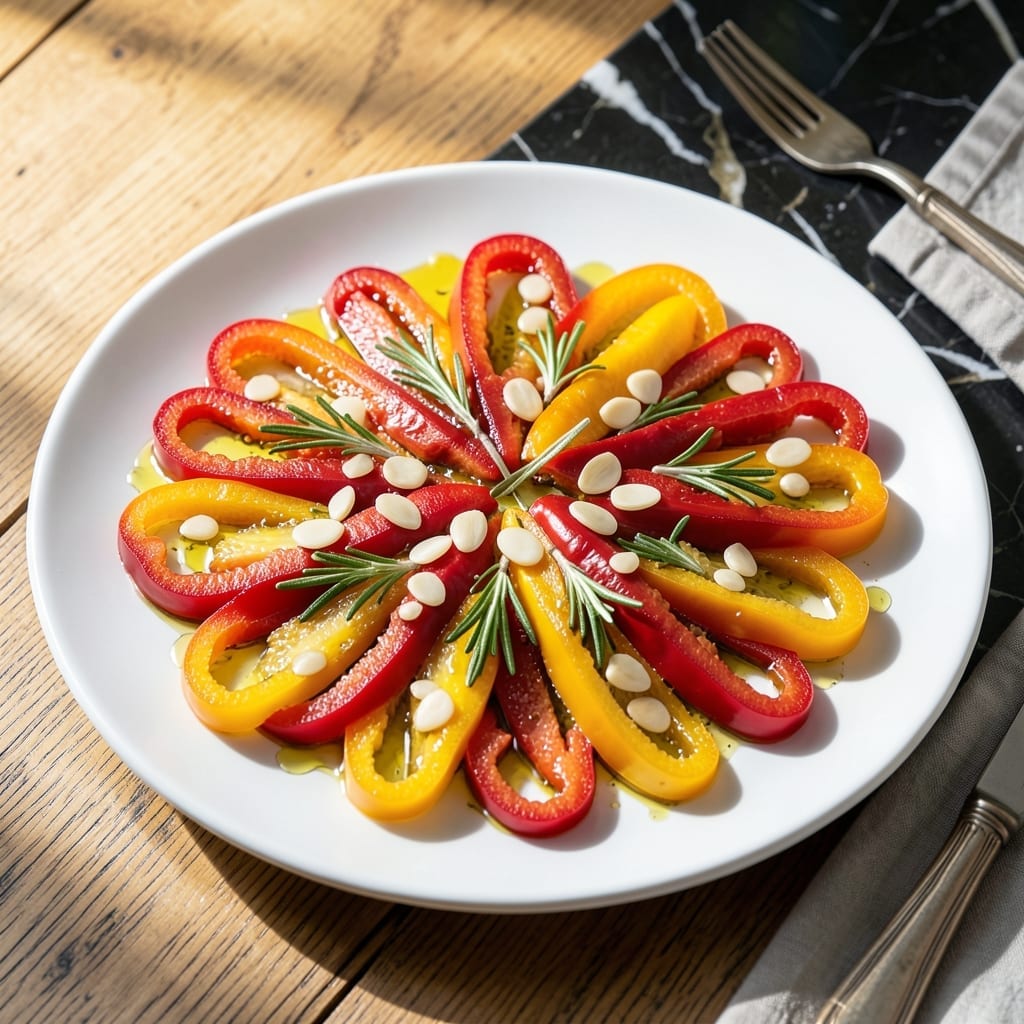
This vibrant Italian preserve captures the essence of summer peppers in every jar. A simple combination of fresh peppers, garlic, and herbs creates a versatile condiment that brightens any meal.
The process involves slow-cooking the peppers until tender, then preserving them in olive oil with aromatic seasonings. This method locks in flavor and extends shelf life, making it perfect for meal prep.
Use it as a topping for bruschetta, a side for grilled meats, or a flavorful addition to sandwiches. The oil itself becomes infused with the peppers’ essence, ideal for drizzling.
This preserve keeps well in the pantry, ready to add a touch of Mediterranean flair to your dishes whenever needed.
Ingredients for Peppers in Oil
Bright peppers, aromatic herbs, and garlic infuse this versatile Italian preserve with summer flavors.
| Ingredient | Amount | Notes |
|---|---|---|
| Red Bell Peppers 🌶️ | 6 whole | Cored, seeded, sliced into strips |
| Yellow Bell Peppers 🌶️ | 4 whole | Cored, seeded, sliced into strips |
| Garlic Cloves 🧄 | 8 cloves | Thinly sliced |
| Extra-Virgin Olive Oil 🫒 | 2 cups | For preserving and infusing |
| White Wine Vinegar 💧 | ¼ cup | Balances flavors |
| Fresh Rosemary 🌿 | 2 tbsps | Chopped, stems removed |
| Fresh Thyme 🌿 | 2 tbsps | Leaves stripped from stems |
| Red Pepper Flakes 🔥 | 1 tsp | Adjust to taste for heat |
| Sea Salt 🧂 | 1 tsp | Fine grain for even distribution |
The peppers are the star here. Farmers market peppers have superior sweetness and texture compared to grocery store varieties. Look for firm, glossy skins without blemishes. For the olive oil, California Olive Ranch or Colavita are reliable brands that won’t break the bank. The garlic should be fresh—avoid the pre-minced stuff in jars, as it lacks the right punch for preserving.
No yellow peppers? Orange or green bell peppers work just as well (though flavor will be slightly different). Fresh herbs can be swapped for dried at one-third the amount, but the texture won’t be the same. If you’re out of white wine vinegar, apple cider vinegar is a fine substitute. The red pepper flakes are optional—skip them if you prefer a milder preserve.
This preserve keeps beautifully. Store in a cool, dark pantry for up to 1 month, or refrigerate for 3 months. The oil will solidify in the fridge—just bring to room temperature before using. Always use clean, dry utensils to prevent spoilage.
Why You’ll Love This Recipe
- One Pan Wonder: I just roast the peppers, then toss them with oil, garlic, and vinegar—no complicated steps.
- Garlicky Punch: The slow-infused olive oil and vinegar turn those sweet peppers into something crave-worthy.
- Meal Prep Hero: I make a big batch on Sunday and use them in sandwiches, pasta, and antipasto all week.
- Pantry Savior: Between us, it’s a fridge staple that keeps well and costs less than store-bought giardiniera.
Step-by-Step Instructions for Peppers in Oil
This Italian preserving method delivers vibrant flavors with minimal effort and maximum reward.
Step 1: Prepare the Peppers and Aromatics
Core and seed the 6 whole Red Bell Peppers and 4 whole Yellow Bell Peppers, then slice them into uniform ½-inch strips. Consistency in cutting ensures even cooking and a professional appearance in the final dish.
Thinly slice the 8 cloves Garlic Cloves. Chop the 2 tbsps Fresh Rosemary and strip the leaves from the stems of the 2 tbsps Fresh Thyme. This prep work releases the essential oils, which will infuse beautifully into the 2 cups Extra-Virgin Olive Oil.
Step 2: Blanch the Peppers for Tenderness
Bring a large pot of salted water to a rolling boil. Add all the pepper strips and blanch for 2-3 minutes until they soften slightly but retain a slight crunch. You want them tender enough to absorb flavors but still hold their shape.
Drain the peppers immediately and spread them on a clean kitchen towel to cool and dry completely. Any residual moisture will dilute the preserving oil and shorten shelf life. Pat them dry thoroughly before proceeding.
Step 3: Layer Ingredients in Sterilized Jars
Divide the 1 tsp Red Pepper Flakes and 1 tsp Sea Salt evenly between your sterilized jars. Start layering with a portion of the blanched peppers, then sprinkle some of the sliced garlic, rosemary, and thyme over them.
Continue alternating layers until all ingredients are used, finishing with herbs on top. This distribution ensures every bite carries balanced flavor. Pack the peppers tightly but leave ½ inch of headspace at the top.
Step 4: Add Liquid and Seal
In a small saucepan, gently warm the 2 cups Extra-Virgin Olive Oil with the 0.25 cup White Wine Vinegar until just warm to the touch—do not boil. The warmth helps the oil absorb flavors more effectively.
Pour the warm oil-vinegar mixture over the peppers in each jar, ensuring all ingredients are completely submerged. This step preserves the peppers and infuses them with garlic and herb essence. Seal the jars tightly while still warm.
Step 5: Store and Wait for Flavor Development
Let the jars cool to room temperature, then refrigerate for at least 24 hours before using. This resting period allows the flavors to meld and intensify. The peppers will keep in the refrigerator for up to 2 weeks.
The oil will take on a beautiful golden hue and aromatic complexity. For best results, wait 48 hours before serving to allow the garlic and herbs to fully infuse the oil and peppers.
Pro Tips For Making Peppers In Oil
- Char the Peppers: Use high heat to blister the skins until they’re black in spots—this adds a smoky depth you won’t get from steaming or boiling. I learned this the hard way after making bland batches with under-charred peppers.
- Slice Evenly: Cut the peppers into uniform strips, about ¼-inch thick, so they cook at the same rate and absorb the oil and vinegar evenly. Sounds fussy, but it actually changes the outcome.
- Skip the Seeds: Remove all the seeds and white pith before cooking—they can make the oil bitter. After ruining a jar with a lazy prep job, I now double-check every piece.
- Warm the Oil: Heat the olive oil gently with the garlic for 30 seconds before adding the peppers—it infuses the oil with flavor and prevents the garlic from tasting raw. My grandmother swore by this, and she was right.
Make-Ahead Tips for This Recipe
Prep Ahead Strategy
I always prep the peppers and aromatics the night before. Slice the 6 Red Bell Peppers and 4 Yellow Bell Peppers, then store them in airtight containers in the fridge. This saves 20-30 minutes on cooking day. 💡
Jar Sterilization
Sterilize your jars while the peppers blanch. Boil them for 10 minutes, then keep warm in a 200°F oven until ready to fill. This prevents contamination and extends shelf life.
Oil Infusion Shortcut
For faster flavor development, warm the 2 cups Extra-Virgin Olive Oil with herbs and garlic for 5 minutes before pouring. This jumpstarts the infusion process, giving you rich flavor in 12 hours instead of 24 hours.
Batch Processing
Double the recipe and process in batches. The peppers keep beautifully, so I make 4-6 jars at once. This way, I always have some on hand for gifts or last-minute meals.
Storage Tips
Label jars with the date and store in a cool, dark pantry. For longer storage, refrigerate after opening. The oil may solidify in the fridge—just bring to room temperature before using. ❄️
Flavor Boost
If making ahead, add fresh herbs the day of serving for brighter flavor. The preserved peppers will still taste amazing, but fresh herbs add that extra pop of color and aroma.
Nutrition Facts
Frequently Asked Questions
What’s the best way to slice peppers for even cooking?
Cut into uniform ½-inch strips for consistent texture. This ensures they blanch evenly in 2-3 minutes and look professional in jars.
Can I use dried herbs instead of fresh?
Yes, but use ⅓ the amount since dried herbs are more concentrated. Fresh herbs give better texture, but dried work in a pinch.
How do I know if my jars are properly sealed?
Check the lid after cooling—it should be concave and not pop when pressed. If it pops, refrigerate immediately and use within 1 week.
What can I do with the leftover infused oil?
Drizzle over pasta, bread, or salads. The oil absorbs all the garlic and herb flavors, making it perfect for 2-3 weeks of use.

- 6 Egg Cake Recipe with Oil: Light as Air With Buttery Moisture - October 4, 2026
- 4 Bean Casserole Recipe: One-Pan Heartiness With Smoky Paprika Depth - October 4, 2026
- 3-Ingredient Keto Mug Cake Recipe: Microwave Magic in 2 Minutes - October 4, 2026